
User's Manual
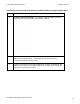
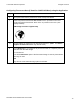

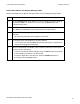
Table Of Contents
- DTC4500 User Guide
- Section 1: Specifications
- Section 2: Setup and Installation Procedures
- Section 3: Print Driver Installation
- Section 4: Printer Preferences Tab Functions
- |contextid=30 Using the Card tab
- Using the Toolbox Options
- |contextid=150 Using the Configuration Tab
- |contextid=151 Selecting the Calibrate Laminator tab
- Using the Event Monitoring Group Box
- |contextid=152 Selecting the Calibrate Ribbon tab
- |contextid=154 Selecting the Clean Printer tab
- |contextid=155 Selecting the Advanced Settings tab
- |contextid=40Using the Device Options tab
- |contextid=50Using the Image Color tab
- |contextid=51Using the Image Calibrate tab
- |contextid=70Using the Magnetic Encoding Tab
- |contextid=80Using the Lamination tab
- |contextid=90 Using the Overlay / Print Area tab
- |contextid=100Using the K Panel Resin tab
- |contextid=120Using the Printer Info tab
- Section 5: Selecting the Fluorescent Panel Ribbon Type
- Section 6: System Overview- Troubleshooting
- Section 7: Troubleshooting
- Section 8: Cleaning
- Section 9: Firmware Upgrades
- Section 10: HID Global Technical Support
- Appendix A

© 2010 HID Global Corporation All rights reserved
Configuring Fluorescent Data (F-Panel for YMCFKO Ribbon) using the Application
Step Procedure
10 Check Invert F-Panel Image to create a negative of the fluorescent image.
See below.
• This refers to the ability to cause light or white areas of the image to
fluoresce and dark colors to remain dark on the printed card when exposed
to a UV light.
• This was requested because the fluorescent dye color is bright when black
light is applied to it.
By default, the dark areas of the image will fluoresce on the card and the
lighter or white areas will have no dye applied. (Note: This may improve the
look of the person’s image if used for the Logo.)
DTC4500 Card Printer/Encoder User Guide
75