
User Manual


Chapter 2- Enterprise Installation
14
AIR ID Server Installation
Prior to installation please make sure you have read the Important
Note for NT Users.
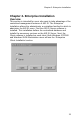
This section will give you a step by step overview of each of the
installation screens.
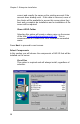
Place the AIR ID CD into the CDROM drive of the machine
designated as the AIR ID Server. Using the Microsoft Windows
Start button locate Run. Use the Browse feature to locate the
Setup.exe file on the AIR ID CD provided. Double-click this file and
select the OK button to load the installation program.
Opening Formalities
Answer Yes to the Welcome window to start the installation
process.
Be sure to read the Software License Agreement and verify your
agreement by pressing the Yes button.
Enter your name and company and press Next.
Application Destination Folder
Choose the location for the local copy of the AIR ID system by
accepting the default or by using the Browse button to change the
default. The default directory is:
C:\Program Files\RFIDeas_NT\AIR ID.
Note that this location will need to be provided during the client
installation if you elect not to share this directory.
After making the entries, select the Next button to continue to the
component screen.
Installation Type - Client or Server
The next screen allows the Client or Server selection. For Server
installation, select the Server option and press Next.