
User Manual


13 Software Setup
AIR ID
Software Setup
In this section you will:
1. Configure Windows to enable the AIR ID or other screen saver
as well as set any graphical preferences.
Under the Windows 9x operating system this setting is made
automatically.
NT NOTE: NT users may use other 3rd party screen savers
provided they use the Keyboard/Mouse activation mode. Screen
savers from other companies do not support the use of the Room
Proximity mode unless they are “AIR ID Aware” (these activation
modes are discussed later).
2. Set the Base Unit COM port, set the screensaver Wait time.
3. Add users to the system.
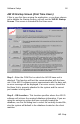
Enable the AIR ID screen saver in Windows NT/2K
To get started, follow these steps:
1. Since AIR ID automatically hides the Control Panel’s
screensaver tab, you will need to unlock this tab first. This is
done in the AIR ID application, under the Badges Tab, using
the Admin Tools button. Deselect the ‘Lock Screensaver
Tab’ checkbox.
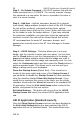
2. Click Start
3. Select Settings
4. Select Control Panel
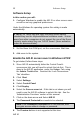
5. Click Display
6. Select the Screen saver tab. If this tab is not shown you will
need to use the AIR ID software to unlock this tab. See the
‘Administrative Functions’ section of this manual.
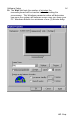
7. Click on the down arrow and Select AIR ID
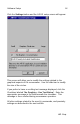
8. The Password Protected box needs to be selected.
Note: If the Password Protected box is not selected, user
can gain access without a badge or password.
9. The Preview buttons is not supported at this time.