
Manual
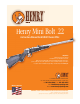


OPERATING INSTRUCTIONS
FOR YOUR HENRY MINI BOLT .22 RIFLE
7
AMMUNITION SELECTION
Henry RAC Firearms are designed to function with a variety of brands and types of factory-manufactured
ammunition in the appropriate caliber but not all ammunition produces the same result. Henry RAC
recommends that after you read and understand this manual, you go to the rang
e and fire different ammunition
which is appropriate to the caliber of your firearm. Once you find the ammunition which functions best, keep
using it. Especially when cutting-edge reliability and accuracy are vital to you. When sighting your rifle, shoot
a group to determine point of impact on the target. Then make increme
ntal adjustments to center the point of
impact on the target bullseye.
WARNING: DISCHARGING FIREARMS IN POORLY VENTILATED AREAS, CLEANING FIREARMS OR HANDLING
AMMUNITION MAY RESULT IN EXPOSURE TO LEAD, A SUBSTANCE KNOWN TO CAUSE BIRTH DEFECTS,
REPRODUCTIVE HARM AND OTHER SERIOUS PHYSICAL INJURY. HAVE ADEQUATE VENTILATION AT ALL TIMES.
WASH HANDS THOROUGHLY AFTER EXPOSURE.
1. OPEN THE ACTION
In order to open the action, you must push the safety forward into the OFF position, exposing the action, you
must push the safety forward into the OFF position, exposing the red dot. Next, lift the bolt handle upwards
until it cannot go any further (it will be aligned with the slot in the receiver) and pull the bolt rearward until it
stops.
2. LOAD THE RIFLE
Open the bolt as described above. Place a cartridge into the chamber. Close the action using the bolt handle,
the gun will not fire because you have not yet cocked the cocking knob. However, at this point you should put
the SAFETY “ON” by moving the safety rearward, covering the red dot.
3. SIGHT ADJUSTMENTS
FOR ELEVATION: Adjust the rear sight to shoot (higher or lower). Your rifle can be adjusted to shoot higher,
by turning the set screw nearest the rear of the sight (counter clockwise). In order to shoot lower, turn the set
screw (clockwise).
FOR WINDAGE: Your rifle can be adjusted to shoot either right or left by loosening the set screw nearest
the front of the rear sight. In order to shoot left, mov
e the sight to the right, and vice–versa. Make sure to re-
tighten the set screw after each function.
4. FIRING THE GUN
Point the rifle in a safe direction. Place the Safety "Off", exposing the red dot. Grasp the cocking knob very
firmly and pull the cocking knob fully rearward until the sear locks into the firing pin. You will feel and hear this
engagement. The cocking knob is not fully rearward and locked into position.
WARNING - THE GUN IS NOW
Made In America and Priced Right