
Manual


• Heatmaster/American Gas Log, Outdoor Burner/Hearth Kits •IM-116. Rev G . 01/2019
6
B. Install the Stainless Burner/Pan Assembly
The burner/pan assembly is shipped ready for right-hand
gas connection. See Section 3.B. for left-hand connection.
• Remove the existing cap or gas jet assembly from the
gas stub in your replace. Clean the threads using a wire
brush or steel wool. Apply Teon tape or joint compound
to the steel tting and attach the provided brass adapter
to the stub.
• Place the burner/pan assembly in the replace. The pan
should be centered both front to back and side to side.
• Bend the provided gas connector to facilitate its installation
between the burner and the gas stub.
• Attach one end of the gas connector to the brass elbow
or safety pilot tting. Attach the other end to the brass
adapter at the gas tube.
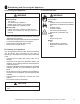
C. Install the Stainless Grate
• The grate should be centered over the burner pan, side
to side. If the grate sits toward the front of the burner pan,
the ames will be larger coming through the logs. If the
grate sits toward the back of the burner pan, the ember
bed will be more prominent. Refer to Figure 4.2.
Figure 4.2 Center Grate Over Burner Pan
D. Placement of Lava Rock
• Pour the lava rock into the burner pan. Lava rock should
follow the slope of pan, covering it and the burner tube
completely.
Note: Use caution so Lava rock does not get into the air
mixer on LP models.
• Allow the Lava rock to spill out the front of the pan and
over the sides onto the replace oor.
Important: Cover the pilot assembly to protect it before
installing the Lava rock.
• Inspect the pilot burner to ensure it is clear of any
Lava rock.
• The gas burns at the point of the least resistance. In
case of an uneven ame pattern it may be necessary to
adjust the materials in the pan (using an object such as a
screwdriver) to achieve the desired eect.
E. Install the Logs
Fire Risk
Explosion Risk
Personal Injury Risk
Failure to position the parts in accordance
with the diagrams provided with the log
packages or failure to use only parts
approved with this appliance may result in
property damage or personal injury.
WARNING
• Install the logs using the installation instructions included
with them.
• Light the burner as outlined in the operating section. Allow
the ame pattern to stabilize. If you are satised with the
ame pattern go to the next step. If you want more or less
ame around the front log, turn o the gas and move the
grate backward or forward.
• Once you are satised, turn on the gas and go on to the
next step.
• Arrange the top logs as shown in your log set up
instructions. Light the burner as outlined in the operating
instructions and allow the ame to stabilize.
• Spread additional lava rock around the outside of the
burner pan on the oor of the replace. If possible, cover
the gas connector with the cinders. DO NOT cover any
part of the pilot assembly.
F. Adjust the Pilot Flame
The pilot ame should be a soft blue color and should sur-
round the last 1/2 in. of the thermocouple tip. The pilot ad-
justment screw is located on pilot valve beside control knob.
Refer to Figure 4.3. If pilot ame must be adjusted, use a
standard slotted screwdriver to turn screw clockwise to re-
duce ame or counterclockwise to increase ame.
Pilot Adjustment Screw
Figure 4.3 Pilot Adjustment Screw
G. Inspect the Venting System
The replace venting system is designed and constructed to
develop a positive ow adequate to remove ue gases to the
outside atmosphere. See replace installation instructions.
Cleaning
Periodic examination and cleaning of the venting system
of the replace should be done before initial use and at
least annually by a qualied agency.