
Use and Care Manual


P A G E | 3
www.hayesfusion.com | HAYES FUSION
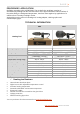
Socket Fusion Pipe Welder
(Before use, please read the manual carefully)
ABOUT THIS MANUAL
This manual is only a manufacturer´s guide. It does not take the place of proper training by
qualified instructors and does not exceed the experience of a professional. The information in
this manual is operational and cannot cover all the situations that may occur in the field such
as environment temperature, pipe material, thickness, selected welding standard, etc.
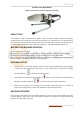
BEFORE THE WELDING PROCESS
A. Cut and chamfer the pipe.
B. Place the cold ring at the proper depth on the pipe as determined by the depth gauge.
C. Attach the coated heating adapters to the heating tool when the tool is cold.
D. Connect to a 110V grounded power source only and begin operating the welding machine.
Permit enough preheating to stabilize the temperature.
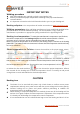
MACHINE SET UP
• Once the unit is connected to proper power source it will automatically turn on and begin
to heat to the last temperature that was set. If you need to turn on and off the heating
tool hold down the to activate the On/Off mode.
• Set the desired temperature by holding the button to activate the Set mode and then
using the “up/down” buttons you can choose the proper temperature.
• Allow a few seconds for the heating tool to show the temperature that it is currently at
and permit enough time to reach and stabilize the desired temperature.
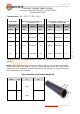
WELDING PROCESS
Put the pipes and fittings into the heating adapters, remove pipes and the fittings from the
heating adapters when they reach the proper heating time. Connect the pipes and fittings
together until the bead is formed.