
User Manual
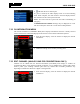
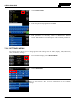

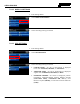
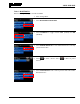
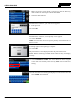


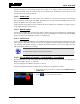
Table Of Contents
- 1. SAFETY SYMBOL CONVENTIONS
- 2. RF ENERGY EXPOSURE INFORMATION
- 3. OPERATION SAFETY RECOMMENDATIONS
- 4. OPERATING RULES AND REGULATIONS
- 5. INTRODUCTION
- 6. BASIC OPERATION
- 6.1 PROGRAMMING
- 6.2 XG-100M CONTROLS
- 6.3 DISPLAY
- 6.4 STATUS MESSAGES
- 6.5 ALERT TONES
- 6.6 BEFORE FIRST USE
- 6.7 POWER ON AND SET VOLUME
- 6.8 TURN ENCRYPTION ON OR OFF
- 6.9 USER INTERFACE PRIVILEGE LEVEL
- 6.10 SELECT CHANNEL USING MENUS
- 6.11 SELECT ZONE/SYSTEM USING MENUS
- 6.12 USE TALKAROUND TO BYPASS REPEATER (ANALOG AND P25 CONVENTIONAL)
- 6.13 INDIVIDUAL CALLS
- 6.14 SELECT A NEW TALKGROUP
- 6.15 SCAN OPERATION
- 6.16 VIEW GPS INFORMATION
- 6.17 EMERGENCY OPERATION
- 6.18 ENCRYPTION BAR
- 6.19 LIGHTS AND SIRENS
- 6.20 PUBLIC ADDRESS (PA)
- 6.21 SHORTCUT MENU
- 7. ADVANCED OPERATIONS
- 7.1 CREATE KEYS
- 7.2 LOAD KEYS
- 7.3 LOAD KEYGROUPS
- 7.4 ZEROIZE ALL FROM RADIO
- 7.5 ZEROIZE KEYS USING KVL 3000 PLUS
- 7.6 ZEROIZE KEYGROUPS USING KVL 3000 PLUS
- 7.7 ZEROIZE ALL FROM KVL 3000 PLUS
- 7.8 GLOBAL ENCRYPTION
- 7.9 SELECT KEYSET
- 7.10 OTAR CONFIGURATION
- 7.11 ACTIVATE/VIEW MISSION PLAN
- 7.12 CH INFORMATION MENU
- 7.13 EDIT CHANNEL (ANALOG AND P25 CONVENTIONAL ONLY)
- 7.14 SETTINGS MENU
- 7.15 SET UP SCAN
- 7.16 MESSAGE MENU
- 7.17 UTILITIES MENU
- 8. REFERENCE
- 9. GLOSSARY
- 10. BASIC TROUBLESHOOTING
- 11. TECHNICAL ASSISTANCE
- 12. WARRANTY

14221-1200-2010
49
actively receiving on a non-priority channel. For example, if the radio is actively receiving on C3 and
activity is detected on P2, the radio will drop C3 and switch to P2. Additionally, activity on P1 can also
preempt P2, but P2 cannot preempt P1.
7.15.2 ZONE SCAN
Zone scan is conventional only and consists of all channels in a zone that are selected as scan channels
when generating a mission plan with RPM. Depending on scan options selected in RPM, zone scan lists
may be modified to include or exclude channels.
Analog channels using different receive frequencies may be added in any combination of squelch type up
to the limits of the size of the scan list.
7.15.3 GROUP SCAN
Group scan is trunked only and allows the radio to monitor many groups simultaneously, permitting the
user to both monitor and receive calls from these groups. Depending on scan options selected in RPM,
group scan lists may be modified to include or exclude groups.
7.15.4 VOTE SCAN
If vote scan is enabled via RPM, the radio automatically selects the strongest signal ensuring that the best
audio quality is delivered to the user. If vote scan is enabled, the radio is always scanning. You cannot
stop scanning, start normal scanning, or monitor the channel. There is an icon in the upper status bar
indicating that the radio is vote scanning.
NOTE
If Talkaround is enabled, Vote Scan is turned off.
7.15.5 SET OR REMOVE PRIORITY 1 AND PRIORITY 2 CHANNELS
Priority channels are scanned more often than non-priority channels. Note that P1 can be configured via
RPM as “Keypad,” “Fixed,” or “Selected.”
P2 can be configured via RPM as “Keypad” or “Fixed.”
Zone scan configuration screens are shown below. Group scan configuration is similar.
1. Enter Set up Scan (see Section 7.15) and select GROUP LIST or
ZONE LIST.
2. Select next to the name of the scan list.