
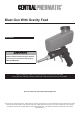
Product manual


Page 9For technical questions, please call 1-800-444-3353.SKU 95793
User-Maintenance Instructions
Procedures not specically explained
in this manual must be performed
only by a qualied technician.
TO PREVENT SERIOUS INJURY
FROM ACCIDENTAL OPERATION:
Detach the air supply and safely discharge any
residual air pressure in the tool before performing
any inspection, maintenance, or cleaning procedures.
TO PREVENT SERIOUS INJURY
FROM TOOL FAILURE:
Do not use damaged equipment.
If abnormal noise, vibration, or leaking air occurs,
have the problem corrected before further use.
Cleaning and Maintenance
Note: These procedures are in addition to the
regular checks and maintenance explained as part
of the regular operation of the air-operated tool.
1. BEFORE EACH USE, inspect the general condition
of the tool. Check for loose screws, misalignment
or binding of moving parts, clogged Nozzle,
damaged supply hose, cracked or broken parts,
and any other condition that may affect its safe
operation. Do not use damaged equipment.
2. AFTER USE, clean external surfaces of tool with a
clean, most cloth. If necessary, use a mild detergent.
WARNING! Do not use solvents or immerse in
liquids, as damage to Blast Gun may occur.
3. Store in a dry, secure area out of reach of children.
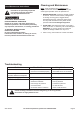
Troubleshooting
Problem Possible Causes Likely Solutions
Tool will not start. 1. Compressor not on.
2. Air line not connected properly.
1. Turn compressor on.
2. Check that air line is connected.
Excessive abrasive consumption.
Air pressure too low. Increase air pressure.
Excessive debris in abrasive.
1. Hopper empty.
2. Moisture in abrasive
3. Not enough air pressure.
4. Air hose kinked.
5. Excessive debris in abrasive.
1. Fill hopper.
2. Use dry abrasive.
3. Increase air pressure.
4. Un-kink air hose.
5.
Follow all safety precautions whenever diagnosing or servicing the tool.
Disconnect air supply before service.