
User's Manual


30_ I/O time setup
I/O time setup
TO SPECIFY THE ALARM OUTPUT FOR AN INPUT ERROR OF THE
DOOR CONTACT SENSOR
You can specify the output port and operation time if an error occurs from the Door Contact Sensor.
You must have specifi ed the operation time of the Door Contact Sensor. (Refer to “To specify the operation time of the
Door Contact Sensor” on page 25.)
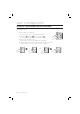
Present the Master Card to the device.
Press Button
and Button in sequence and press .
Refer to the output port table on page 28 and specify a desired output mode.
If you want the alarm relay alone to operate in normal and Secure modes
in case of an error from the Door contact Sensor, select the
< >
buttons and press
.
Enter the two-digit door relay output time and press
.
Enter the two-digit alarm relay output time and press
.
Enter the two-digit TTL relay output time and press
.
You can specify a two-digit time from 00 to 99 seconds.
By default, all output times are set to “00”.
Other output ports that are not specifi ed for the output mode will not be activated.
For instance, if you set the output mode to [5][2] and assign the operation time for each output device by following the
steps 4, 5, and 6 above, only the alarm relay will operate.
TO SPECIFY THE ALARM OPERATION TIME FOR AUX 1
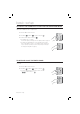
Present the Master Card to the device.
Press Button
and Button in sequence and press .
Refer to the output port table on page 28 and specify a desired output mode.
If you want the alarm relay alone to operate in normal and Secure modes in
case of an input through the auxiliary port, select the <
> buttons
and press
.
Enter the two-digit door relay output time and press
.
Enter the two-digit alarm relay output time and press
.
Enter the two-digit TTL relay output time and press
.
You can specify a two-digit time from 00 to 99 seconds.
By default, all output times are set to “00”.
Other output ports that are not specifi ed for the output mode will not be activated.
For instance, if you set the output mode to [5][2] and assign the operation time for each output device by following the
steps 4, 5, and 6 above, only the alarm relay will operate.
1.
2.
3.
•
4.
5.
6.
•
•
M
1.
2.
3.
•
4.
5.
6.
•
•
M
SSA-S2000V
tGj
SSA-S2000V
SSA-S2000V
tGj
SSA-S2000V