
Operation Manual


GB-6
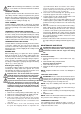
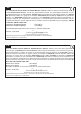
SPARK PLUG
1. Spark plug air gap : 0,6-0,7 mm (Fig. 29)
2. Tighten the spark plug with a torque of 12-15Nm. Put
the spark plug connector on the spark plug.
ATTENTION : Any maintenance works that are not
explicitly described in these Operating Instructions
must be carried out by an authorized workshop.
To ensure a consistent and proper operation use
ORIGINAL SPARE PARTS only.
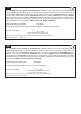
SHARPENING THE CORD CUTTER
1. Remove the cutter (E) from the protection cover (F)
(Fig. 30).
2. Put the cutter into a vice and x it rmly. Sharpen the
cutter using a at le. File with care and keep the
sharpening angle. Always le in one direction only.
STORAGE
1. Follow all aforementioned maintenance instructions.
2. Thoroughly clean the trimmer and grease the metal
parts.
3. Empty the fuel tank and screw the tank cap back on.
4. After the tank has been emptied, start the engine.
5. Let the engine idle until it stops to free the carburettor
from fuel.
6. Let the engine cool down (about 5 minutes).
7. Remove the spark plug using a spark plug wrench.
8. Fill a tea spoon of pure 2-stroke oil into the combustion
chamber. Pull the starter rope several times slowly to
distribute the oil inside the engine. Put the spark plug
back in.
9. Store the device in a cool, dry place where it is protected
from open ames and sources of heat as ow heaters,
oil-red boilers etc.
REOPERATION
1. Remove the spark plug.
2. Pull the starter rope quickly to its full extent to remove
any remaining oil from the combustion chamber.
3. Clean the spark plug and check the gap. Replace the
plug if required.
4. Prepare the device for operation.
5. Fill the tank with the proper fuel/oil mixture. See chapter
‘Fuels and lubricants’.
WASTE DISPOSAL AND ENVIRONMENTAL
PROTECTION
Never pour remainders of chain lubricant or 2-stroke fuel
mixture in the drain or sewerage system or soil, but dispose
of it in a proper, environmentally friendly way, e.g., at a
special collecting point or dump.
If your device should become useless somewhere in the
future or you do not need it any longer, do not dispose
of the device together with your domestic refuse, but
dispose of it in an environmentally friendly manner.
Thoroughly empty the oil/lubricant and fuel tanks and
dispose of the remainders at a special collecting point
or dump. Please also dispose of the device itself at an
according collecting/recycling point. By doing so, plastic
and metal parts can be separated and recycled. Informa-
tion concerning the disposal of materials and devices are
available from your local administration.
PROBLEM POSSIBLE CAUSE CORRECTION
Engine does not start or starts, Wrong starting process. Refer to the instructions in these
but does not run further. operating instructions.
Wrong setting of the carburettor. Have the carburettor settings adjusted by
an authorised customer service organisation.
Fouled spark plug. Clean/adjust or replace spark plug.
Clogged fuel lter. Replace the fuel lter.
Engine starts, but does not run at full Wrong choke lever position. Put the lever to position BETRIEB
power. (OPERATION).
Dirty/clogged spark grid. Replace the spark grid.
Dirty/clogged air lter. Remove, clean and reassemble lter.
Wrong setting of the carburettor. Have the carburettor settings adjusted by
an authorised customer service organisation.
Engine splutters. Wrong setting of the carburettor. Have the carburettor settings adjusted by
an authorised customer service organisation.
No power under load.
Engine does not run smoothly. Wrong setting of the spark plug. Clean/adjust or replace spark plug.
Excessive exhaust gases (smoke). Wrong setting of the carburettor. Have the carburettor settings adjusted by
an authorised customer service organisation.
Improper fuel mixture. Use the proper fuel mixture (ratio – 40:1).
CORRECTING FAILURES OF THE ENGINE