
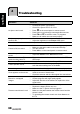
Specifications

22
English
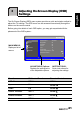
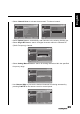
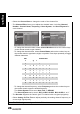
3.1 OSD Setting Menus
Follow the instructions indicated on the down side of the OSD Function Menu. Press
P
S/PTon the control panel or
/
arrow keys to scroll through the menus, VOL
+ on the control panel or the arrow key to select an item, or MENU to exit the OSD
menu.
The following menus can be set by different adjustment methods.
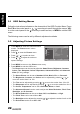
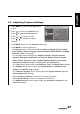
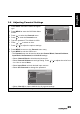
3.2 Adjusting Picture Settings
1 Press MENU to enter the OSD Main Menu
screen. The Picture menu is then
displayed.
2 Press to enter the Picture menu.
3 Press
/
to select an item.
4 Press
/
to adjust the scales or
options settings.
5 Press MENU to return to the Picture menu entry.
6 Press MENU to exit the OSD menu.
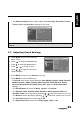
- The Picture menu can be used to adjust the Smart Picture, Brightness, Contrast,
Colour, Tint, Sharpness, Colour Temperature, Advanced Control, and Advanced
Video (PC only) settings.
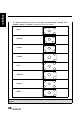
•The Smart Picture can be set to Standard, Vivid, Movie, Eco, or Personal.
•The Brightness, Contrast, and Colour can be adjusted by pressing
/
to
move the scales from 0 to 100.
•The Tint can be adjusted by pressing
/
to move the scales from -32 to 32.
•The
Sharpness
can be adjusted by pressing
/
to move the scales from 0 to 7.
•The Colour Temperature can be set to Standard, Warm, or Cool.
•The Advanced Control can be used to adjust the Noise Reduction, Flesh Tone,
Backlight, and X-Contrast.
•The Noise Reduction can be set to Auto, Off, Low, Medium, or High.
•The Flesh Tone can be set to On or Off.
• The
Backlight
can be adjusted by pressing / to adjust the scales from 0 to 100.
• The
X-Contrast
can be set to
On
or
Off
.
Picture
Sound
TV
Features
Parental
Smart Picture
Brightness
Contrast
Colour
Tint
Sharpness
Colour Temperature
Advanced Control
Standard
50
50
50
0
3
Cool
OK Menu
Enter Select Exit