
User Guide


7
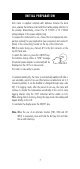
INITIAL PREPARATION
Each meter is supplied complete with batteries. Remove the back
cover, unwrap the batteries and install them while paying attention to
the polarity. Alternatively, connect the HI 710005 or HI 710006
voltage adapter to the power adapter plug.
To prepare the instrument for use, choose the most appropriate tem-
perature probe(s) for your application (see accessories) and connect it
(them) to the connector(s) located on the top of the instrument.
With the meter facing you, channel #1 is the first connector on the
top left hand side.
To switch the meter on, press the ON/OFF key.
The batteries charge status or "LINE" message
(if external power adapter is connected) will be
displayed on the LCD for a few seconds.
The meter is now ready to operate.
To maximize battery life, the meter is automatically switched off after a
user selectable period of non-use (this feature is enabled and set to 5
minutes by default; it can be disabled or changed through setup code
40). If in logging mode, after the period of non-use, the meter will
continue to monitor the temperature periodically at the end of every
logging interval. Only the "LOG" indication will be visible on LCD.
While storing data in memory, during the sleep mode, the reading will
appear briefly on the LCD.
To reactivate the display press the ON/OFF key.
Note: When the use of an alternate function (FNC, CFM and LOT
INFO) is requested, press and hold the ALT key first and then
the second listed key.
ON/OFF