
User Guide

7
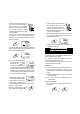
• Wait until the display stabilizes (about
10-15 minutes). The fluoride ion concen-
tration and the temperature will be
displayed on the upper and lower dis-
plays, respectively.
Note: It is recommended to mix the sample during the measurement,
using a magnetic stirrer set at around 100 rpm.
Note: If the temperature probe is not connected, the meter will
naturally not compensate for the temperature variance. In this
case, accurate fluoride measurements are only possible if the
temperature of the sample and the calibration solutions are
close (no more than ±3°C apart).
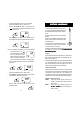
TEMPERATURE MEASUREMENT
The temperature can be measured independently from fluoride con-
centration.
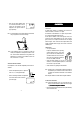
• Immerse the temperature probe to a depth of at
least 1 cm (½”) in the prepared sample.
• Wait for the reading to stabilize. The temperature
of the solution will be shown on the lower
part of the display.
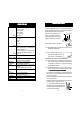
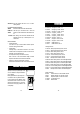
MAGNETIC STIRRER
HI 190M
POWER
SPEED
ON
OFF MAX
8
CALIBRATIONCALIBRATION
CALIBRATIONCALIBRATION
CALIBRATION
In order to obtain accurate measurements, frequent calibration is
recommended.
For better results, calibrate at a temperature close to that of the
solution to be tested (no more than ±3°C apart).
The instrument can be calibrated at 1 or 2 points. Two-point calibra-
tion is always recommended for better accuracy.
The first point of calibration is fixed at 100 ppm (HI 70703). The
second point can be selected between 10.0 (HI 70702) and 1000
ppm (HI 70701). If the sample to be tested has low ionic strength
(below 100 ppm), use HI 70702 for the second point. Likewise, with
sample concentrations above 100 ppm, use HI 70701 as the second
calibration point.
PREPARATION
• Use only clean beakers.
Prepare two calibration solutions by mixing
sufficient quantity of 50% HI 70703 (100
ppm) and 50% HI 7023 (TISAB) solution in
one beaker and then 50% of HI 70702 (10.0
ppm) or HI 70701 (1000 ppm) solution and
50% HI 7023 (TISAB) in the other.
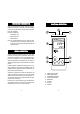
• Attach the fluoride electrode (#3 on page 4), the reference
electrode (#2) and the temperature probe (#1) to their respec-
tive connectors on top of the meter.
• Switch the meter on by pressing the ON/OFF button.
Note: For best results, it is recommended to prepare two beakers for
each calibration point: one beaker to rinse and the second one
to calibrate. This minimizes contamination of the calibration
solutions.
Note: Use plastic beakers to minimize electro-magnetic interference.
CALIBRATION PROCEDURE
Note: If the fluoride electrode is new, or it has not been used for a
few days, it must be soaked in a solution of HI 70702 (10 ppm
of F
--
--
-
) for at least 3 hours prior to calibration.) for at least 3 hours prior to calibration.
) for at least 3 hours prior to calibration.) for at least 3 hours prior to calibration.
) for at least 3 hours prior to calibration.
• Rinse the electrodes with deionized water and dry them attentively
with a non-abrasive cloth.