
User Guide


17
17
If the second probe is not connected during the
recording mode, the data from the second probe
will not be printed.
Data from the second channel can only be
added if the recording mode is exited and a new
log number is entered.
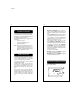
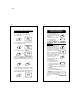
A blinking "CH" will appear on
the display next to the chan-
nel number not utilized and/or
recorded.
When the meter is in record-
ing mode "LOG" is displayed
on the bottom left corner of the
LCD with the temperature value
on the primary display.
If no keys are pressed, the meter goes to
standby mode to prolong battery life.
To reactivate the display
press the ON/OFF key
Notes:
• It is recommended to use the power sup-
ply (HI710005 or HI 710006) during record-
ing mode, especially when many printouts
are going to be taken.
• Before proceeding with recording, make
sure there is enough paper for your mea-
surements. When the paper is finished
the meter will not advise the operator and
the printouts could be lost.
• It is possible to insert a new paper roll
during recording session (see page 31).
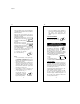
• If the PRINT key is
pressed while still in re-
cording mode, a printout
is produced without affect-
ing the running number.
CH
°C
LOG
CH
°C
LOG
ON/OFF
PRINT
Untitled-10
18
18
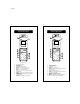
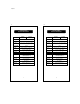
10-01-96
0001 *10.24
#1 20.0
#2 45.4
#3 -----
#4 -----
.
.
.
.
a
b
c
de
• Once in recording mode, the printing in-
terval cannot be changed. Exit the record-
ing mode first (pressing the
ON/OFF key) before setting the new in-
terval.
TO STOP RECORDING
In order to quit the recording
mode, press the ON/OFF key.
PRINTING / LOGGING
WITH HI955301 AND HI955302
To print the measured values
shown on the display, press
the PRINT key. This function
can be activated in normal
operation mode as well as
during logging and scanning data on display
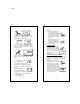
(see above). When in measurement mode, the
printout provides the following information:
a - Running sample number
b - Date
c - Time
d - Temperature value/s
e - Channel number (HI 955302 only)
LOGGING MODE
This function is suggested when remote mea-
surements have to be taken automatically
without the necessity of an operator and for a
long period of time. In this mode data will be
stored directly into memory.
Set the appropriate logging interval (see Op-
erational Guide section on page 9).
Press the ALT and the LOG keys simulta-
neously to enter the logging mode. The log
number and page number will appear for a
few seconds on the display to indicate the
correct operational mode.
PRINT
ON/OFF