
User Guide


25
25
Note: Before proceeding with printing, make
sure there is enough paper for the data
to be printed. When the paper is fin-
ished the meter will not advise the
operator and printouts could be lost. If
this happens, stop the
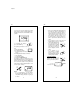
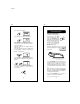
printer by pressing ALT
and PAPER simulta-
neously. Data will be
kept in memory.
Insert a new paper roll and repeat the
instruction above starting from the last
printed sample number (see chapter
"PRINTER MAINTENANCE" on page 31
for changing paper roll).
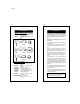
UP
PAPER
ALT
PRINT
Untitled-10
26
26
WORKING SAMPLE (HI 955301 and
HI955302 only)
The following is a step by step procedure of a
typical monitoring situation where we have
assumed that you have already inserted the
batteries and set the date and time correctly.
It is an example of a meter used to monitor
and store every 2 minutes. The meter will log
10 samples but print only 3, display the data
contained in sample number 1 and print
samples 5 through 10.
Example:
Step One - Setting the printing/logging inter-
val at 2 minutes:
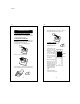
Press ALT and TIME keys twice. The time
will appear on the primary display with a
number representing the printing/logging in-
terval blinking.
Press either the UP or DOWN keys until a
blinking "2" appears.
Press ALT and TIME keys to exit. The dis-
play will now show the current time together
with the selected interval of 2 minutes.
Step Two - Entering the log mode:
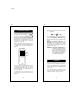
Press ALT and LOG keys. Initially, "L 01" will
appear on the primary display.
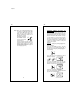
UP
TIME
ALT
TEMP
UP
DOWN
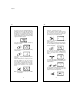
UP
TIME
ALT
TEMP
UP DOWN
TIME LOG
ALT
TEMP
INTV
TIME
INTV
TIME
LOG