Instruction Manual HI 83225 Grow Master for Nutrient Analyses MAN83225R1 04/05 w w w . h a n n a i n s t . c o m www.hannainst.
Dear Customer, Thank you for choosing a Hanna product. Please read this instruction manual carefully before using the meter. This manual will provide you with the necessary information for the correct use of the instrument. If you need additional technical information, do not hesitate to e-mail us at tech@hannainst.com. These instruments are in compliance with directives. TABLE OF CONTENTS NITRATE LR .............................. 33 NITRATE MR ............................. 35 NITRATE HR ..................
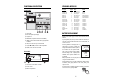
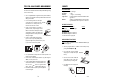
CE DECLARATION OF CONFORMITY PRELIMINARY EXAMINATION Remove the instrument from the packing material and examine it carefully to make sure that no damage has occurred during shipment. If there is any damage, notify your Dealer. Each HI 83225 Meter is supplied complete with: • Four Sample Cuvets and Caps • One Transport Cap • Two 9 V Battery • 12 VDC Transformer (HI 710005 or HI 710006) Note: Save all packing material until you are sure that the instrument functions correctly.
SPECIFICATIONS WARRANTY Tungsten lamp with narrow band interference filter Light Detector Silicon Photocell Environment 0 to 50°C (32 to 122°F); max 95% RH non-condensing Power Supply 2x 9 V batteries / 12 to 20 VDC through voltage adapter Auto-Shut off After 10' of non-use Dimensions 230 x 165 x 70 mm (9.0 x 6.5 x 2.8") Weight 640 g (22.6 oz.) For specifications related to each single parameter (e.g. range, accuracy, etc.), refer to the related measurement section.
ACCESSORIES REAGENT SETS HI 93706-01 HI 93706-03 HI 93715-01 HI 93715-03 HI 93728-01 HI 93728-03 HI 93750-01 HI 93750-03 HI 93751-01 HI 93751-03 HI 937520-01 HI 937520-03 HI 937521-01 HI 937521-03 100 Phosphorus tests 300 Phosphorus tests 100 Ammonia tests 300 Ammonia tests 100 Nitrate tests 300 Nitrate tests 100 Potassium tests 300 Potassium tests 100 Sulfate tests 300 Sulfate tests 50 Magnesium tests 150 Magnesium tests 50 Calcium tests 150 Calcium tests OTHER ACCESSORIES HI 721310 9V battery (10 pcs) H
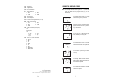
FUNCTIONAL DESCRIPTION STANDARD METHODS FRONT PANEL Description Ammonia, LR Ammonia, MR Ammonia, HR Nitrate, LR Nitrate, MR Nitrate, HR Phosphorus, LR Phosphorus, MR Phosphorus, HR Potassium, LR Potassium, MR Potassium, HR Calcium, Magnesium, HR Sulfate 1) 2) 3) 4) 5) Cuvet Holder Dual Level Liquid Crystal Display Programs List READ DIRECT, to perform measurement immediately TIMER, to perform measurements after a preprogrammed countdown 6) ZERO, to zero the meter prior to measurement 7) Program W and V
/PUP - Program Up /PDN - Program Down /PTM - Turn Test Mode On /Brx - Set the baud rate 1 - 300 2 - 600 3 - 1200 4 - 2400 /KBL - Lock Keyboard /KBU - Unlock Keyboard ?PR# - Send Current Program Number (1 to 12) ?BRQ - Send current baud rate 1 - 150 2 - 300 3 - 600 4 - 1200 5 - 2400 ?CNQ - Send Concentration (three bytes) conc decimal point unit m - ppm b - ppb t - ppt u - pcu h - pH ?ERR - send error / status information 0 - No error 1 - CAP 2 - HI 3 - ZERO 4 - LO 5 - IDLE 6 - ZERO DONE 7 - TIMED READ GUID
Light over range. The cuvet is not inserted correctly and an eccess ambient light is reaching the detector. If the cuvet is properly inserted, then contact your dealer or the nearest Hanna Customer Service Center. The lamp is not working properly. Contact your dealer or the nearest Hanna Customer Service Center. INTERFACE WITH PC To connect your meter to the PC use the optional HI 920010 (available from your Hanna Dealer).
b) on sample reading: • Wait for a few seconds and the display will show "-0.0-". Now the meter is zeroed and ready for measurement. There is too much light for the sample measurement. Please check if the right sample cuvet is inserted. • Remove the cuvet. The sample and zero cuvet are inverted. • Add the content of one packet of 93751 reagent • Replace the cap and shake gently for 1 minute. 1’ 12 9 3 6 • Reinsert the cuvet into the instrument.
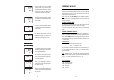
TIPS FOR AN ACCURATE MEASUREMENT The instructions listed below should be carefully followed during testing to ensure best accuracy. • Color or suspended matter in large amounts may cause interference, therefore, these should be removed by treatment with active carbon and by prior filtration. • For a correct filling of the cuvet: the liquid in the cuvet forms a convexity on the top; 10 mL the bottom of this convexity must be at the same level of the 10 mL mark.
• Wait for a few seconds and the display will show “-0.0-”. Now the meter is zeroed and ready for measurement. • Remove the cuvet and add the content of one packet of HI 93750B reagent. Replace the cap and mix gently for one minute by turning slowly the cuvet upside down. • Reinsert the cuvet into the instrument. • Press TIMER and the display will show the countdown prior to the measurement or, alternatively, wait for 2 minutes and press READ DIRECT. In both cases “SIP” will blink during measurement.
OPERATIONAL GUIDE POTASSIUM HIGH RANGE SPECIFICATIONS POWER CONNECTION Plug the 12VDC adapter (HI 710005 - 110VDC, or HI 710006 220VDC) into the DC socket. Plug the adapter into the outlet. Alternatively, remove the battery cover on the back of the meter; attach 2 fresh 9V batteries and replace the cover. Note: Insure the main line is surge protected. Note: Always turn the meter off before unplugging it to insure no data is lost.
• Press ZERO and “SIP” will appear on the display. • Wait for a few seconds and the display will show “-0.0-”. Now the meter is zeroed and ready for measurement. • Remove the cuvet and add the content of one packet of HI 93750B reagent. Replace the cap and mix gently for one minute by turning slowly the cuvet upside down. Note: in the following measurement sections, a generic "P– –" will be placed on the secondary LCD instead of the exact related message (e.g. "P1" for Ammonia LR).
INTRODUCTION POTASSIUM MEDIUM RANGE THE ROLE OF NUTRIENTS IN THE GROWTH AND PRODUCTION OF PLANTS SPECIFICATIONS The three primary macro elements needed by the plants are nitrogen (N), phosphorus (P) and potassium (K), while calcium (Ca), magnesium (Mg) and Sulfer (S) are so called secondary macro elements. In hydroponics, plants need a balanced nutritive solution, composed of both primary and secondary elements.
• Press ZERO and “SIP” will appear on the display. PHOSPHORUS Phosphorus (P) has an important role in many fundamental biochemical and physiological processes. Plants take up phosphorus in the form of phosphate ion (PO43-). PRESENT IN DNA and RNA, ATP, ADP • Wait for a few seconds and the display will show “-0.0-”. Now the meter is zeroed and ready for measurement.
EXCESS EFFECTS • reduced absorption of calcium and magnesium • increase of water consumption • increase of the substrate salinity CALCIUM Calcium (Ca) forms a structural part of the plant cell walls. It helps to build up resistance against fungus and bacteriological attack. PRESENT IN tissue of cell walls ACTION • it gives rigidity or stiffness to plant stems • it stimulates roots growth • neutralizes organic acids like oxalic and succinic acid • regulates the absorption of potassium, magnesium etc.
• Wait for a few seconds and the display will show "-0.0-". Now the meter is zeroed and ready for measurement. • Remove the cuvet. • Add 10 drops of HI 93706A Molybdate reagent. SULPHUR Sulphur (S) is a constituent of plant proteins and hormones. Plants take up sulphur in the form of sulphate ions (SO42-).
WATER AND NUTRIENT MANAGEMENT IRRIGATION WATER (LOW RANGE) In agricultural areas it is quite common to find altered values in the chemical composition of irrigation waters. The problem concerns mostly the high nitrate concentration, usually determined by excessive fertilization or irrational liquid manure spreading. The analysis of irrigation waters allows us to find out which are the substances present in major or minor quantity and to organize an advantageous fertilization plan.
SAMPLE PREPARATION • Wait for a few seconds and the display will show "-0.0-". Now the meter is zeroed and ready for measurement. • Remove the cuvet. • Add 10 drops of HI 93706A Molybdate reagent. LIST OF MATERIAL x 10 • Add the content of one packet of HI 93706B Phosphorus Reagent B (Amino Acid) to the cuvet. Replace the cap and shake gently until dissolution is complete. • Reinsert the cuvet into the instrument.
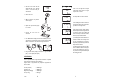
PHOSPHORUS MEDIUM RANGE • Mix well using the spoon and then wait for 5 minutes. SPECIFICATIONS filter disc • Unscrew the filter assembly, put a filter disc inside and close it again. Range Resolution Accuracy Light Source Method • Connect the filter assembly to the 60 mL syringe by the screw rim. 0.0 to 50.0 mg/L 0.5 mg/L ±2.
• Remove the cap and fill the Demineralizer Bottle with tap water. • Wait for a few seconds and the display will show "-0.0-". Now the meter is zeroed and ready for measurement. • Remove the cuvet. • Add 10 drops of HI 93706A Molybdate reagent. • Replace the cap and shake gently for at least 2 minutes. x 10 • Add the content of one packet of HI 93706B Phosphorus Reagent B (Amino Acid) to the cuvet. Replace the cap and shake gently until dissolution is complete. • Reinsert the cuvet into the instrument.
sample with the syringe, push the plunger completely into the syringe and insert the tip into the sample. Pull the plunger out until the lower edge of the seal is on the 5 mL mark of the syringe. PHOSPHORUS LOW RANGE SPECIFICATIONS Range Resolution Accuracy Light Source Method probable level of liquid taken up by syringe • Remove the cap and fill the Demineralizer Bottle with tap water. • Replace the cap and shake gently for at least 2 minutes.
• Remove the cuvet and add the content of one packet of HI 93728 reagent. • Replace the cap and immediately shake vigorously for exactly 10 seconds by moving the cuvet up and down. Continue to mix by inverting the cuvet gently and slowly for 50 seconds, while taking care not to induce air bubbles. A deposit remains, but this does not affect the measurement. Time and way of shaking could sensitively affect the measurement. • Reinsert the cuvet into the instrument, taking care not to shake it.
NITRATE HIGH RANGE • Wait for a few seconds and the display will show “-0.0-”. Now the meter is zeroed and ready for measurement. SPECIFICATIONS • Remove the cuvet. • Add 4 drops of the First reagent. Replace the cap and mix the solution by inverting the cuvet a couple of times. • Add 4 drops of the Second reagent. Replace the cap and mix the solution by inverting the cuvet a couple of times.
• Remove the cuvet and add the content of one packet of HI 93728 reagent. • Replace the cap and immediately shake vigorously for exactly 10 seconds by moving the cuvet up and down. Continue to mix by inverting the cuvet gently and slowly for 50 seconds, while taking care not to induce air bubbles. A deposit remains, but this does not affect the measurement. Time and way of shaking could sensitively affect the measurement. • Reinsert the cuvet into the instrument, taking care not to shake it.
NITRATE MEDIUM RANGE • Wait for a few seconds and the display will show “-0.0-”. Now the meter is zeroed and ready for measurement. SPECIFICATIONS • Remove the cuvet. • Add 4 drops of the First reagent. Replace the cap and mix the solution by inverting the cuvet a couple of times. • Add 4 drops of the Second reagent. Replace the cap and mix the solution by inverting the cuvet a couple of times. x4 Range Resolution Accuracy Light Source Method 0 to 150 mg/L 2.
• Remove the cuvet and add the content of one packet of HI 93728 reagent. • Replace the cap and immediately shake vigorously for exactly 10 seconds by moving the cuvet up and down. Continue to mix by inverting the cuvet gently and slowly for 50 seconds, while taking care not to induce air bubbles. A deposit remains, but this does not affect the measurement. Time and way of shaking could sensitively affect the measurement. • Reinsert the cuvet into the instrument, taking care not to shake it.
NITRATE LOW RANGE • Wait for a few seconds and the display will show “-0.0-”. Now the meter is zeroed and ready for measurement. SPECIFICATIONS • Remove the cuvet. • Add 4 drops of the First reagent. Replace the cap and mix the solution by inverting the cuvet a couple of times. • Add 4 drops of the Second reagent. Replace the cap and mix the solution by inverting the cuvet a couple of times. x4 Range Resolution Accuracy Light Source Method 0.0 to 30.0 mg/L 0.5 mg/L ±1.
CALCIUM • Press ZERO and "SIP" will blink on the display. SPECIFICATIONS Range Resolution Accuracy Light Source • Wait for a few seconds and the display will show "-0.0-". Now the meter is zeroed and ready for measurement. Method • Remove the cuvet. • Using the other 1 mL syringe, add to the cuvet exactly 0.5 mL of sample. Note Note: Do not mix up the two syringes! 0.
MAGNESIUM • Replace the cap and invert several times to mix. • Place the cuvet into the holder and ensure that the notch on the cap is positioned securely into the groove. • Press ZERO and "SIP" will blink on the display. • Wait for a few seconds and the display will show "-0.0-". Now the meter is zeroed and ready for measurement.