
User Guide

9
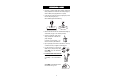
• Each meter is supplied complete with a 9V battery. Slide off the
battery compartment cover on the back of the meter (see page 22).
Install the battery while paying attention to its polarity.
• Connect the probe to the meter securely by aligning the pins with
the socket and pushing the plug in.
With HI 933000, tighten the threaded ring.
• Make sure that the meter has been calibrated before taking any
measurements (see page 11 for calibration procedure).
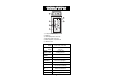
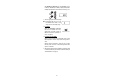
• Immerse the conductivity probe into the
sample, with the holes on the shaft com-
pletely submerged.
If possible, use plastic beakers or con-
tainers to minimize any EMC interference.
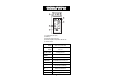
• Tap the probe lightly on the bottom of the beaker to remove any
air bubbles which may be trapped inside the PVC sleeve.
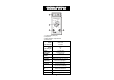
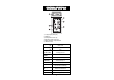
• Turn the instrument on by pressing the
ON/OFF key or by setting the rotary switch
(for HI 8033 only) to the desired mea-
surement range.
•
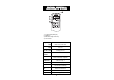
For HI 8033, HI 8633 and HI 8734 only:
Take the temperature of the solution with
a ChecktempC or an accurate thermom-
eter.
With HI 8033 set the temperature knob to
the measured value e.g. 20°C.
ON
OFF
µS
0-199,9
µS
0-1999
µS
0-19,990
salinity
0-19,990
ppm
CaCO
3
OFF
ON
OFF
OPERATIONAL GUIDEOPERATIONAL GUIDE
OPERATIONAL GUIDEOPERATIONAL GUIDE
OPERATIONAL GUIDE
°
C
TEMPERATURE