
User Guide


14
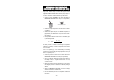
PROCEDURE FOR HI 8733
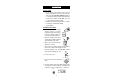
• Pour sufficient quantity of a conductivity
calibration solution (e.g. HI 7030/
HI 8030) into a beaker to cover the holes
on the probe. If possible, use plastic bea-
kers to minimize any EMC interference.
• Immerse the conductivity probe in the
solution, making sure that holes are com-
pletely submerged.
• Wait for a couple of minutes for thermal
equilibrium to be reached.
• Tap the probe on the bottom, then shake it while rotating to
make sure no air bubbles remain trapped in the sleeve.
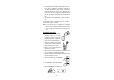
• Switch the instrument on by pressing
ON/OFF.
• Set the temperature coefficient knob to
2% to compensate for the temperature
effect of average solutions (to determine
exact value for a particular solution, see
page 20).
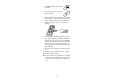
• Select 19.99 mS/cm range by pressing
the appropriate range key.
• Adjust the calibration trimmer (see page 6, #5) on the side of
the instrument with the calibration screwdriver until the display
shows "12.88 mS" i.e. the conductivity reading @ 25°C.
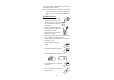
• All subsequent measurements will be compensated to 25°C (77°F).
If you prefer to standardize the temperature compensation to
20°C (68°F) rather than 25°C (77°F), adjust the trimmer to read
"11.67 mS" (see the conductivity vs. temperature chart on page
18). All subsequent measurements will be compensated to 20°C.
• The calibration is now complete and the instrument is ready for
use.
HI 7030
ON
OFF
2.5
2
1.51
0.5
0
TEMPERATURE COEFFICIENT
19.99
mS
m
S
mS