
User Guide


16
1
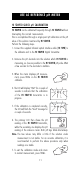
The meter automatically checks for entered time/date accuracy as follows:
0≤hh≤23; 0≤mm≤59; 01≤dd≤28/29/30/31; 1≤MM≤12; 1998≤YYYY≤2097.
2
To change the password, the correct code must be entered first. If the password
has been forgotten, the password protected features are no longer accessible;
in this case contact your nearest Hanna Service Center.
Some of the setup parameters are explained below.
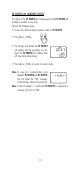
Code 00 - Setting the identification (ID) code
When using several identical meters it may be useful to uniquely
identify them by assigning an ID code to each meter.
• Select code 00.
• Enter a 4-digit value using the arrow keys.
• Press CFM to confirm the value.
Code 20 - Auto-off
The auto-off time-out is factory set at 5 minutes.
• Select code 20 to disable/enable this feature.
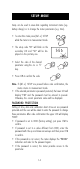
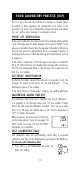
Code 22 - Battery level test
• Select code 22.
• If the meter is connected to an external power adapter, the LCD
displays "LINE" otherwise it shows "bAtt" on the primary display, and
the remaining battery charge percentage on
the secondary one (100 means fully charged
battery and 0 indicates the minimum volt-
age that allows the meter to operate).
Note: The battery level test is also performed any time the meter is
turned on.
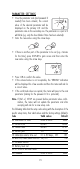
Code 90 - HI 504910 terminal
• Select code 90.
• Press CFM to confirm the value.
• HI 504920 enters a "terminal mode" during which it works as
keyboard and LCD for HI 504910, allowing complete calibration,
configuration and error check of HI 504910 (see the HI 504910
instruction manual for details).
Note: The "LOG" tag blinks while in HI 504910 terminal mode.
• Press (ALT+) TXCAL to exit this mode and skip into measurement
mode. Put HI 504910 in normal measurement mode before
exiting.
Note: The LCD shows the "rSEr" message when a connection between
HI 504920 and HI 504910 can not be established. In this
case, check interface cable and connections.