
User Guide


7
7
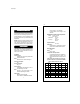
The mini-stirrers (HI 30XN series) cater up to
2.5 litres. For some fluids like oil and clay, the
viscosity changes during the stirring process
and it is necessary to adjust the power to
maintain a constant speed during the stirring.
Hanna Auto-Speed stirrers (HI 31X series) are
designed with automatic feedback control to
maintain constant speed when the torque load
changes and are therefore ideal for stirring with
non-Newtonian fluids where the viscosity
changes during stirring. It is also ideal for
mixing applications where one solution is added
to another which changes the capacity and
thereby the torque load on the stirrer. The Auto-
Speed stirrers maintain a constant stirring speed
during the mixing up to the full capacity of 5
litres. They can also be used with Newtonian
fluids up to a capacity of 5 litres.
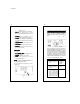
Stirring Procedure:Stirring Procedure:
Stirring Procedure:Stirring Procedure:
Stirring Procedure:
1. Make sure that the SPEED knob (B) and
the ON/OFF switch (L) are in the OFF
positions.
2. Place a beaker or glass container on top of
the stirrer and place the stirring bar at the
centre of the beaker base.
3. Pour the reagent to be titrated into the
beaker. Allow sufficient space for the titrant
to be added without spillage.
4. Connect power cable and switch on the
power supply. Then switch the stirrer on
which the ON/OFF switch. Attach the pH
electrode and temperature probe on the
electrode holder (optional accessory) and
adjust the holder so that pH electrode is at
the centre of the beaker. Set the OFF/ºC/pH
to pH to display pH measurement. You
should read the pH of the reagent compen-
sated for the sample temperature.
istrstirR2.p65
8
8
5. Adjust the SPEED knob slowly until the
required stirring speed is achieved and allow
sufficient time to attain uniform rotational
flow.
6. Add the titrant through a burette and observe
the changes in pH value of the sample as
the titrant is being added. Switch the OFF/
ºC/pH to ºC to display the temperature of
the mixed sample if required.
7. When the titrant is completed, turn the
SPEED knob to off. If no further stirring is
required switch off the stirrer and disconnect
the power supply.
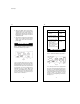
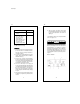
FRONT PANELFRONT PANEL
FRONT PANELFRONT PANEL
FRONT PANEL
See Figures 2 to 7 on the following pages.
A.
PowerPower
PowerPower
Power indication LED lights up when there
is power supply
B.
SPEEDSPEED
SPEEDSPEED
SPEED knob for rpm setting with ON/OFF
and continuously variable up to the maxi-
mum.
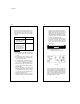
C.
HIGH/LOW HIGH/LOW
HIGH/LOW HIGH/LOW
HIGH/LOW switch for selecting low speed
range or high speed range. See Tables 1 and
2 for speed range of each model.
D.
rpmrpm
rpmrpm
rpm LCD displays the rpm setting by the
SPEED knob.
E.
REVERSE PERIOD REVERSE PERIOD
REVERSE PERIOD REVERSE PERIOD
REVERSE PERIOD knob with ON/OFF
and continuously variable selection of inver-
sion cycle time in minutes, from 0.5 to 3
minutes.
F.
TIME TIME
TIME TIME
TIME knob for setting the stirring time from
5 min. to 2 hours.
G.
START/RESET START/RESET
START/RESET START/RESET
START/RESET for starting and resetting
the timer control.
H.
OFF/ºC/pHOFF/ºC/pH
OFF/ºC/pHOFF/ºC/pH
OFF/ºC/pH knob
OFF:Switches display off
ºC : Switches display to temperature