
User Guide


13
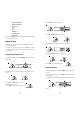
The meter is equipped with a stability indicator and the user will be guided
step by step with symbols on the display during the D.O. calibration. This will
make the calibration a simple and error-free procedure.
The zero calibration of the HI 2400 is very stable, therefore this procedure
needs only to be performed whenever the probe or the membrane is
replaced.
However, because the slope calibration is more critical, it is recommended
to perform this procedure every week.
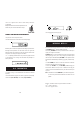
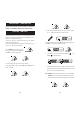
INITIAL PREPARATION
• Pour small quantities of HI 7040 Zero Oxygen
solution into a beaker. If possible, use a plastic
beaker to minimize any EMC interferences.
• Make sure the probe is ready for measurements
(see initial preparation at page 9), i.e. the mem-
brane is filled with electrolyte and the probe is
connected to the meter.
• Switch the meter on by pressing the ON/OFF switch.
• For an accurate calibration, it is recommended to
wait for at least 15 minutes to ensure precise condi-
tioning of the probe.
• Remove the protective cap from the D.O. probe.
• Set the appropriate altitude factor (see page 19).
Make sure the salinity factor is set to zero (see page
18).
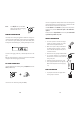
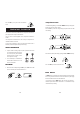
ZERO CALIBRATION
• Dip the probe into HI 7040 zero oxygen solution
and stir gently for 2-3 minutes.
HI 7040
HI 7040
28
Note : If the ON/OFF switch is pressed while
logging, the meter will stop the logging
first and then will turn off.
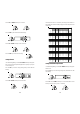
MEMORY ORGANIZATION
The memory used for storing the logged data is divided into 16 pages. The
capacity of each page is 500 samples. It starts to log from page 16 downwards
until 1 and then 16 again, overwriting the previous data. However, when
this happens the LCD will show page “0”, indicating overwriting has occurred.
Each time a new logging period starts, it automatically starts from a new
page.
When the samples collected for a single lot are more than the limit (8000
samples) the meter will stop logging automatically.
TO CLEAR LOGGED DATA
The entire logged data can be cleared by pressing the ON/OFF switch and the
LOG key simultaneously.
The choice has to be confirmed by pressing the CFM key.