
User Manual

13
Required Parts
• Stabilizer
• Elevator (right and left)
• Elevator joiner wire
• Control horn w/backplate
• 2mm x 12mm screw (3)
Required Tools and Adhesives
• Thin CA • Drill
• Drill bit: 1/16" (1.5mm) • Straight edge
• 6-minute epoxy • Masking tape
• Sandpaper • Paper towel
• Rubbing alcohol • Mixing stick
• T-pins • Phillips screwdriver
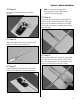
Step 1
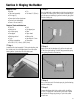
Locate the elevator joiner wire. Use sandpaper to roughen
the wire. Use a paper towel and rubbing alcohol to clean
the wire to remove any dirt or debris.
Step 2
Test fit the joiner wire into one of the elevator halves.
The wire must rest parallel or behind the hinge line
of the elevator. Make any adjustments to the elevator
to correct any offset.
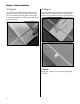
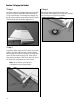
Step 3
Mix up a small amount of 6-minute epoxy. Apply epoxy to
the hole and groove of the elevator. Also apply epoxy to
the joiner wire where it will contact the elevator half. Slide
the joiner wire into position and use masking tape to hold
it in position until the epoxy cures.
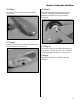
Step 4
Test fit the remaining elevator to the joiner wire.
There are two items to check: Make sure both elevators
rest flat on the work surface, and that the leading edge
of both elevators are parallel. Make adjustments to the
elevator and/or joiner wire to properly align the two
elevator halves.
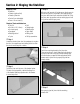
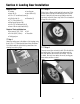
Step 5
Use epoxy to glue the joiner into the remaining
elevator half.
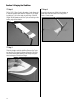
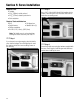
Section 2: Hinging the Stabilizer