
Visor Handheld User Guide
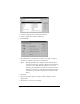
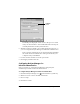
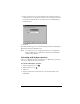
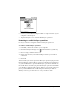
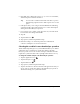
Table Of Contents
- Visor™ Handheld User Guide
- Windows Edition
- Contents
- About This Guide
- Introduction to Your Visor Handheld
- Getting to know your Visor handheld
- Installing the batteries
- Tapping and typing
- Customizing your handheld
- Entering Data in Your Visor Handheld
- Using Graffiti writing to enter data
- Using the onscreen keyboard
- Using your computer keyboard
- Importing data
- Using an external keyboard
- Managing Your Applications
- Overview of Basic Applications
- Common Tasks
- Application Specific Tasks
- Date Book
- Date Book Plus
- Address
- To Do List
- Memo Pad
- Calculator
- CityTime
- Expense
- Communicating Using Your Handheld
- Managing desktop E-Mail away from your desk
- In Mail, you can do the following:
- Setting up Mail on the desktop
- Synchronizing Mail with your E-Mail application
- Opening the Mail application on your handheld
- Viewing e-mail items
- Creating e-mail items
- Looking up an address
- Adding details to e-mail items
- Storing e-mail to be sent later
- Editing unsent e-mail
- Draft e-mail
- Filing e-mail
- Deleting e-mail
- Removing e-mail from the Deleted folder
- Purging deleted e-mail
- Message list options
- HotSync options
- Creating special filters
- Truncating e-mail items
- Mail menus
- Beaming information
- Managing desktop E-Mail away from your desk
- Advanced HotSync® Operations
- Selecting HotSync setup options
- Customizing HotSync application settings
- IR HotSync operations
- Conducting a HotSync operation via modem
- Conducting a HotSync operation via a network
- Using File Link
- Creating a user profile
- Setting Preferences for Your Handheld
- In the Preferences screens, you can do the following:
- Viewing preferences
- Buttons preferences
- Connection preferences
- Digitizer preferences
- Formats preferences
- General preferences
- Network preferences and TCP/IP software
- Selecting a service
- Entering a user name
- Entering a password
- Selecting a connection
- Adding telephone settings
- Connecting to your service
- Creating additional service templates
- Adding detailed information to a service template
- Creating a login script
- Deleting a service template
- Network preferences menu commands
- TCP/IP troubleshooting
- Owner preferences
- ShortCuts preferences
- Maintaining Your Handheld
- Troubleshooting Tips
- Creating a Custom Expense Report
- Non-ASCII Characters for Login Scripts
- Warranty and Other Product Information
- Index

Chapter 8 Page 183
IR HotSync operations
Your handheld is equipped with an infrared (IR) port that supports
the IrCOMM implementation of the standards for infrared
communication established by the Infrared Data Association (IrDA).
This means that you can beam data to any other device that supports
the IrCOMM implementation of the IrDA standards. Most
importantly, you can use the IR port to perform HotSync operations.
When you use the IR port on your handheld to perform HotSync
operations, you don’t need your cradle. You simply enable infrared
communication on your computer and your handheld and then
perform an IR HotSync operation. So there’s no need to carry your
cradle when you’re on the road with an infrared-enabled laptop.
Preparing your computer for infrared communication
To perform an IR HotSync operation, the computer you want to
synchronize with must have an enabled infrared port or be connected
to an infrared device that supports the IrCOMM implementation of
the IrDA standards.
Desktop computers are likely to require an infrared device attached to
a physical COM port. Laptops are likely to have a built-in IR port.
Your computer must also have an installed infrared driver.
Does your computer supports infrared communication?
If your computer uses Microsoft Windows 98 or Windows 2000,
infrared communication is built into the operating system. Some
versions of Windows 95 also have built-in infrared communication. If
you are using another type of computer, check the documentation that
came with your computer to see if it supports infrared
communication.
To check the ports used for infrared communication:
1. In the Windows taskbar click Start, choose Settings, and then
choose Control Panel.
2. Double-click the Infrared icon.
Note: If you do not see the Infrared icon, you need to install an
infrared driver.
3. Click the Options tab.
4. Select Enable infrared communication.