
Instructions / Assembly

I
N
S
T
A
L
L
A
T
I
O
N
G
U
I
D
E
2
.
© 2019 Halco Lighting Technologies, LLC. All rights reserved. Halco is a registered trademark of Halco Lighting Technologies. All sizes and specications are subject to change.
Halco Lighting Technologies | 2940 Pacic Drive | Norcross, GA 30071 | Toll Free 800.677.3334 | Phone 770.242.3612 | Fax 800.880.0822 | halcolighting.com | Atlanta | Chicago | Cleveland | Houston | Los Angeles | Phoenix
Warranty Information:
This product is warranted for ve years from the date of purchase.
If this product does not perform to the specications supplied on this package, send an email or write to the address below for product return and
replacement. This replacement is the sole remedy available. Liability for incidental or consequential damage is expressly excluded.
Visit www.halcolighting.com for full warranty details and compatibility information.
OFF
STEP 2STEP 1
STEP 4STEP 3
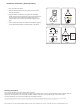
WEEE-reference of dlisposal
In accordance with European
defauits used electrical and
electronics devices may no more
be given to the unsorted
waste.The symbol of the waste bin
on wheels rerers to the necessity
of separate collection.Pease
help with environmental protection
and see to it that this device is
given to the for this purpose
1. Turn off power to the fixture
2. Remove existing HID lamp from the fixture and screw Halco
lamp into the soc
ket
3. Open the fixtures junction box and bypass the HID ballast,
igniter (if there) and the capacitor (if there) by disconnecting the
line neutral wires and socket black and white wires in the
locations with "Cross" marks in the schematic diagram on the
right.
4. Close the fixture's junction box. Clean the area before applying
the re-lamp warming label to a visible location on the fixture
Installation instruction ( Post top fixture)
IDO LIGHTING
•
#178,Qiaojiao Middle Road,Tangxia Town,DG 523710 ,China
•
www.ido-led.com
•
001@idopower.com
20180630IDO VERSION