
Installation Manual


INSTALLATION
PAGE 25
ENGLISH SECTION D
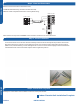
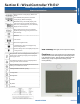
Procedure for Selecting the LocationRequired Tools for Installation
• Drill
• Wire Snipper
• Hole Saw 2 3/4”
• Vacuum pump
• Soap-and-water solution or gas leakage
detector
• Torque wrench
• 17mm, 22mm, 26mm
• Tubing cutter
• Flaring tool
• Razor knife
• Measuring tape
• Level
• Micron gauge
• Nitrogen
• Mini-Split AD-87 Adapter (1/4” to 5/16”)
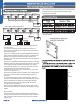
• A - Non-adhesive Tape
• B - Adhesive Tape
• C - Saddle (L.S.) with screws
• D - Electrical wiring
• E - Drain hose (Included)
• F - Insulation
• G - Piping hole cover (Included)
Note:
1) R-410A refrigerant is a safe, nontoxic
and nonammable refrigerant. However,
if there is a concern about a dangerous
level of refrigerant concentration in the
case of refrigerant leakage, add extra
ventilation.
• Place above the ceiling or in sot area
where you have enough space to position
the unit.
• Place where the drainage pipe can be
properly positioned.
• Place where the inlet and outlet air of the
indoor unit will not be blocked.
• Do not install the unit in a place with
heavy oil or moisture (e.g. - kitchens and
workshops)
• Do not install in a location with
destructive gas (such as sulfuric acid gas)
or pungent gas (thinner and gasoline) are
used or stored.
• Choose a place solid enough to bear the
weight and vibration of the unit and where
the operation noise will not be amplied.
• Install where there are no expensive
items like a television or piano below the
indoor unit.
• Leave enough space for maintenance.
• Install at least 3 ft. away from televisions
and radios to avoid interference.
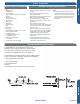
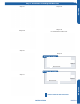
Threaded Rod Mounting Information
The High ESP Duct unit should be mounted to the
building structure using threaded rods. The threaded
rods should have washers and nuts to allow the height
and level of the High ESP Duct unit to be adjusted.
The threaded rods and attachment brackets are eld supplied
items. The materials required for mounting to the brackets
on the High ESP Duct unit include:
4- 3/8” Threaded Rods
4- Mounting Brackets
Washers
Nuts (Double nut the assembly as shown in step 2.3)
Step 1 - Preparation