
Assembly Instructions


Assembly Instructions
13
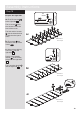
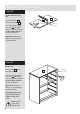
Step 23
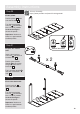
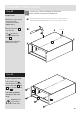
Step 24
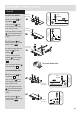
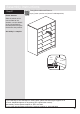
Finished
front edge
CL
CL
CL
CL
CL
CL
Fit the right side
Push the right side
down onto the assembly.
Turn the 3 large locking
cam nuts clockwise
to the “2 o’clock” position
as far as they will go to
secure the panels.
Important: Make sure
there is no gap between
the fitted panels.
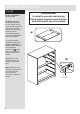
Carefully stand the
unit up for the next
step.
2
B
Warning: The
unit is heavy.
Lift with care.
2
CL
CL
CL
CL
CL
CL
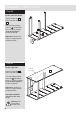
Fit the other back rail
Push the back rail
down onto the left side
. .
Turn the large locking
cam nut clockwise to
the “2 o’clock” position
as far as it will go to
secure the panels.
Important: Make sure
there is no gap between
the fitted panels.
7
1
B
1
7