
Assembly Instructions

Assembly Instructions
16
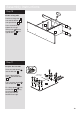
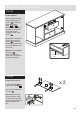
Step 31
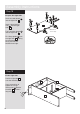
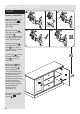
Step 32
H
H
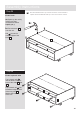
Fit the plinths
Position the 3 plinths
onto the assembly
ensuring that the bottom
edge of the plinths are
flush with the bottom
edge of the sides, as
shown.
Secure the 2 side plinths
. through the left end
. . and right end
using 4 screws
10
1 2
H
10
H
H
10
10
1
2
6
H
H
11
9
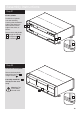
Secure the front plinth
Secure the front plinth
through the long rail
using 2 screws .
Carefully stand the
unit up for the next
step.
11
9
H
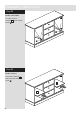
Warning: The
unit is heavy.
Lift with care.