
User's Manual

5
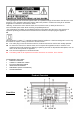
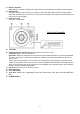
1. “POWER ON/OFF” Switch to turn the unit
on or off.
2. “PHONO” Press to play a vinyl record.
3. “AUX”, “BT” & AUX IN Jack Press
“AUX/BT” to listen to an external source
connected to the AUX IN jack or Bluetooth.
4. “AM/FM” Press to listen to the radio. Press
again to switch between AM and FM mode.
5. “CD” Press to play a CD.
6. “TAPE” Press to play a cassette.
7. REMOTE SENSOR. When using the
remote control, point it towards this sensor.
8. RADIO TUNER DISPLAY
9. “TRACK INCREMENT” During recording,
press to separate tracks.
10. “RECORD” Press to enter record pause
mode.
11. LCD DISPLAY
12. “TUNED ST” INDICATOR. Illuminates
when a station is correctly tuned in.
13. STEREO SPEAKERS
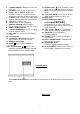
14. STOP Press to stop playback or
recording.
15/16. PLAY/PAUSE Press to start
playback, recording, finalizing or erasing.
During playback, press again to pause.
17. OPEN/CLOSE In CD, PHONO or AUX
mode, use to open and close the disc tray.
(Note: This button will not work in AM/FM
mode.)
18. “VOLUME” KNOB Turn to adjust volume.
(Note: volume ranges from 00 to 32.)
19. DISC TRAY
20. NEXT/PREVIOUS TRACK
& FF/REWIND
In CD Mode, press once to skip to the
next/previous track. Press and hold to fast
forward/rewind.
21. “REC LEVEL” KNOB In record pause
mode, turn to adjust the recording level.
22. “FINALIZE” Press to finalize a
CD-R/CD-RW disc.
23. “ERASE” Press to erase or unfinalize a
CD-RW disc.
24. RADIO TUNER KNOB In AM/FM mode,
turn to tune in a station.
25. EARPHONE JACK
Accepts headphone/earphone plugs.
26. AUTO /MANUAL Press to select mode of
track number assignment for recording.
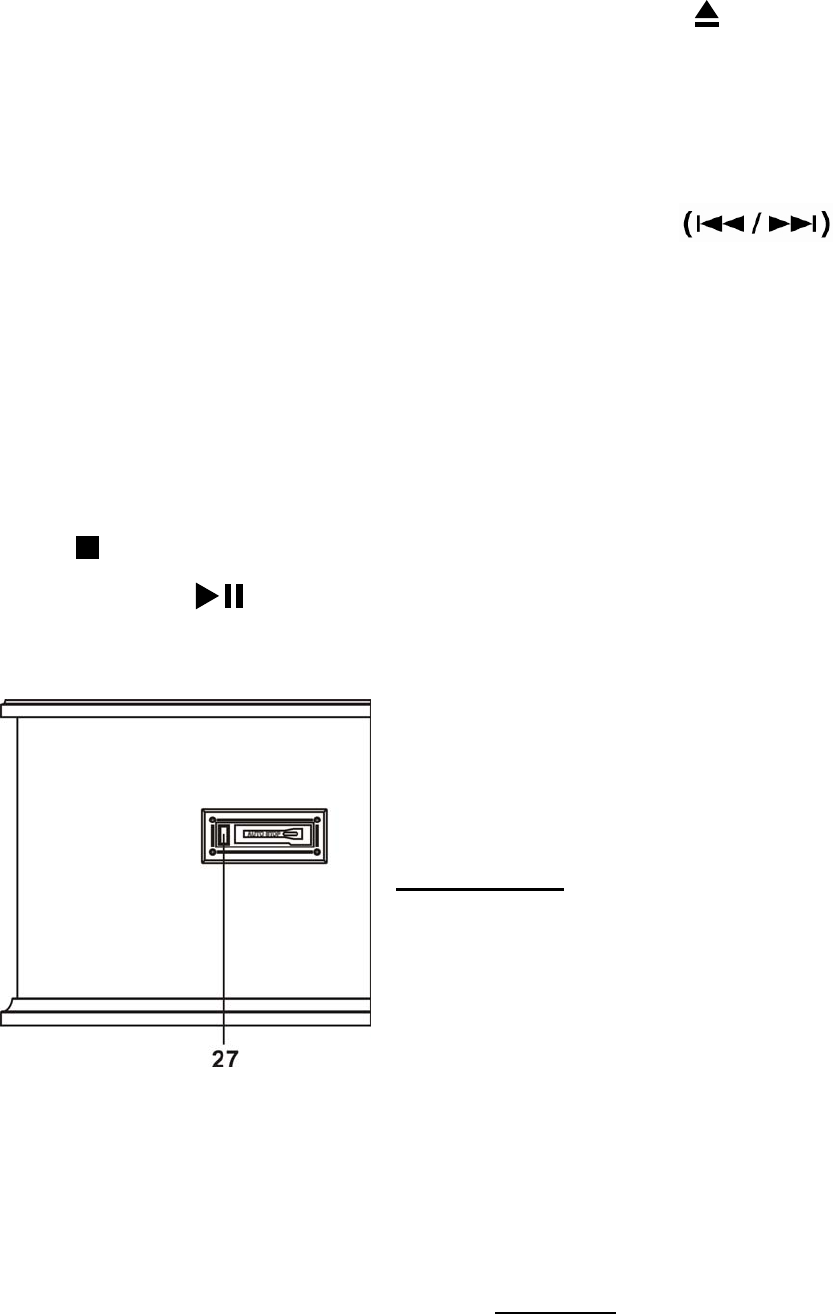
Left side View
27. CASSETTE FF&EJECT Press halfway to fast forward, press all the way to end and eject the
tape.
Rear View