
User Guide


9
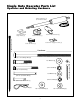
Single Gate Operator Parts List (continued)
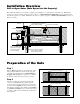
Control Box and Electrical Components
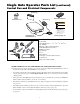
Tools Needed
• Power Drill
• Open End Wrenches —
3
/8",
7
/16",
1
/2", and
9
/16"
•
3
/8" Drill Bit
• Hacksaw or Heavy Duty Bolt Cutters
• Small (Flat Bladed) Screwdriver
• Phillips Screwdriver
• Tape Measure
• Level
• Wire Strippers
• C-Clamps — small, medium, and large
• Center Punch
• Extra person will be helpful
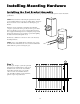
Transformer (1)
Battery (1)
Control Box w/
Control Board (1)
Warning Signs (2)
GTO Transmitter(1)
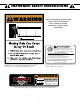
1. KEEP CLEAR! Gate may move at any time.
2. Do not allow children to operate gate or
play in gate area.
3. This gate is for vehicles only.
Pedestrians
must use a separate entrance.
Moving Gate Can Cause
Injury Or Death
WARNING
!
Receiver (1)
O
N
/O
F
F
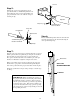
OTHER MATERIALS YOU MAY NEED BEFORE YOU START THE INSTALLATION:
Depending on the type of gate and fence post, you may need some additional materials/hardware. Some of
these items can be found in the GTO/PRO Accessory Catalog.
• Low voltage wire may be needed. Length depends upon the distance between the transformer power supply
and the control box. See page 19, Powering the System and the Accessory Catalog for wire and solar
charging panels.
• If the gate is more than 1000' away from an AC power source you will need to use at least one GTO Solar
Panel to trickle charge the battery. See the Accessory Catalog.
• The diameter of the fence post should be at least 8" (round) or 6" (square) in order to mount the post bracket
(see page 12).
• Depending upon the diameter of the fence post, you may need longer carriage bolts than those provided.
Bolts should be at least 1" longer than the diameter of the fence post (see page 12).
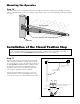
• A horizontal or vertical cross member or mounting plate may be needed to mount the operator to the gate.
See page 11.