
Operation Manual


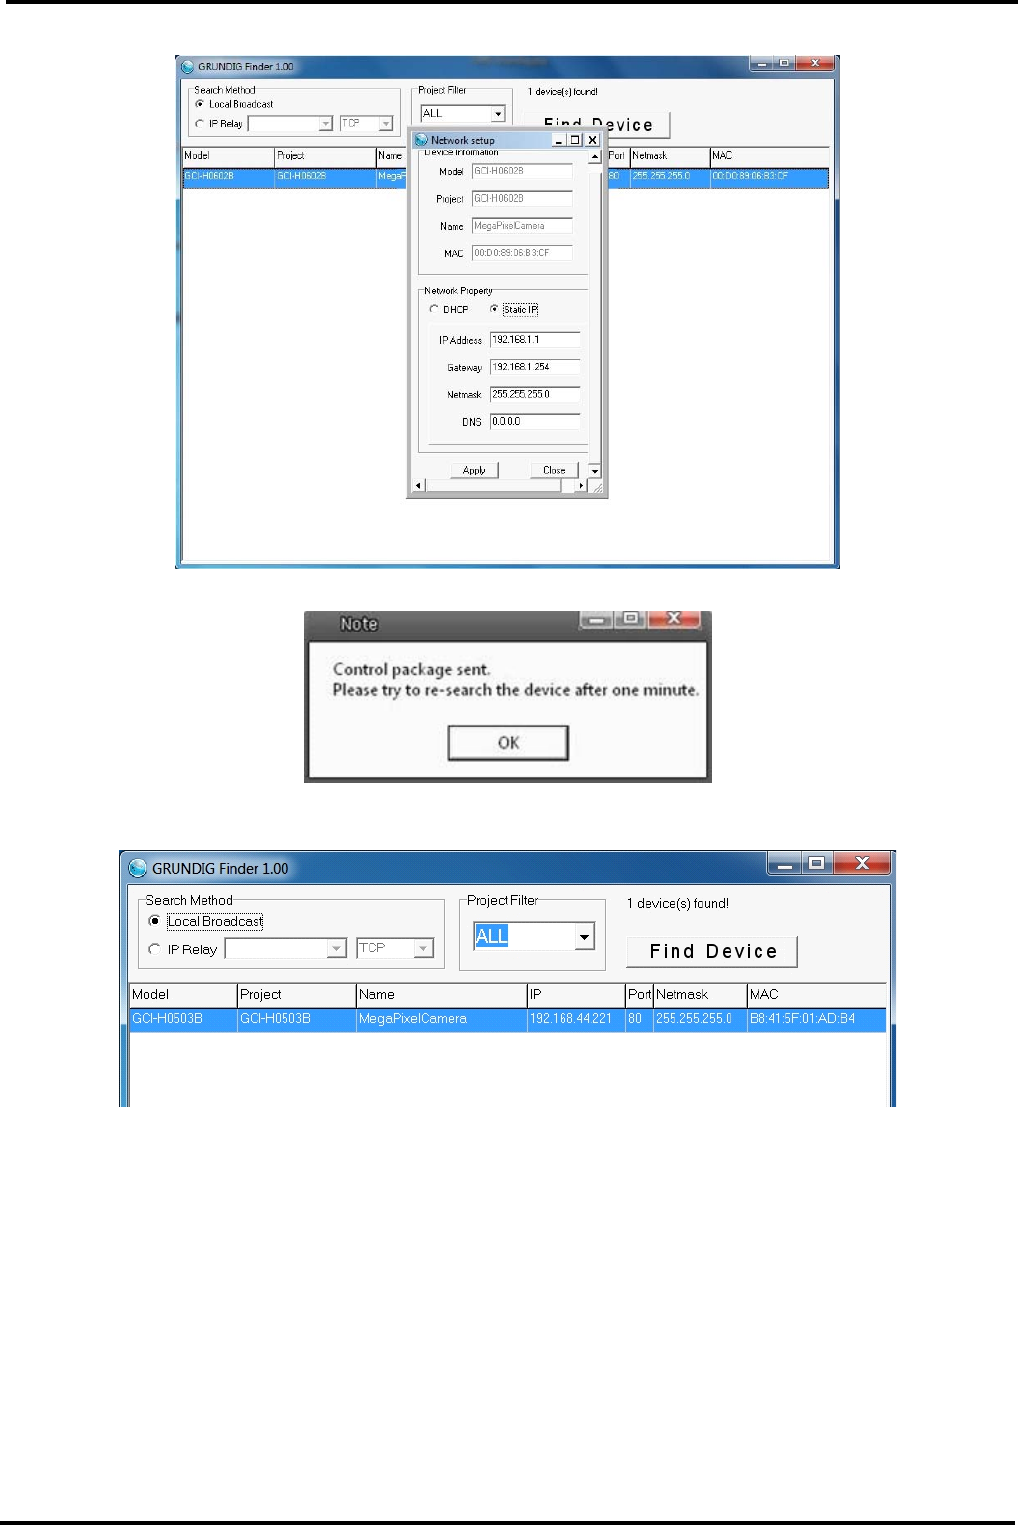
Step 2: The “Network Setup” page will come out. Select “DHCP,” and press the “Apply” button down the page.
Step 3: Click “OK” on the Note of setting change. Wait for one minute to re-search the IP Camera.
Step 4: Click the “Find Device” button to search all the devices. Then select the IP Camera with the correct MAC
address. Double-click on the IP Camera, and the login window will come out.
Step 5: Enter User name and Password to access the IP Camera.
Installing the DC Viewer Software Online :
For initial access to the IP Camera, a client program, DC Viewer, will be automatically installed to your PC when
connected to the IP Camera.
If the Web browser doesn’t allow the DC Viewer installation, please check the Internet security settings or
ActiveX controls and plug-ins settings (see 14. Internet Security Settings) to continue the process.
10
English