WiFi PDA DT4100 Quick Start Guide
Copyright ................................................................................................. 2 Disclaimer................................................................................................ 2 Regulatory Information........................................................................... 2 Contents Contents Safety Information................................................................................... 4 Getting Started.....................................................
Copyright Copyright Copyright© 2015 Group Sense Mobile-Tech Limited. All rights reserved. No part of this document may be reproduced, distributed, translated, or stored in any form without the prior written permission of Group Sense Mobile-Tech Limited. All brands and product names mentioned herein may be trademarks or registered trademarks of their respective owners. Product specifications are subject to change without prior notice. Disclaimer The contents of this document are provided as is.
R&TTE Directive (1999/5/EC) • EMC Directive (2004/108/EC) • Low Voltage Directive (2006/95/EC) The assessment of compliance of the device was performed according to the following European standards: • EMC: EN 301 489-1 V1.9.2, EN 301 489-3 V1.4.1, EN 301 489-17 V2.2.1 • Health: EN 62311:2008, EN 62209-2:2008, EN 62479:2010 • Safety: EN 60950-1:2006 + A11:2009 + A1:2010 + A12:2011 • Radio: EN 300 328 V1.7.1, EN 300 330-1 V1.7.1, EN 300 330-2 V1.5.
Safety Information 4 Safety Information Please read the following information carefully before using the device for the first time, and keep this Quick Start Guide in a safe place for future reference. ■■ Always treat the device with care and keep it in a clean and dustfree environment. ■■ Do not expose the device to extremely hot, cold or humid environment. The operation temperature is from –10°C to 50°C. ■■ Do not use the device in wet or rainy conditions.
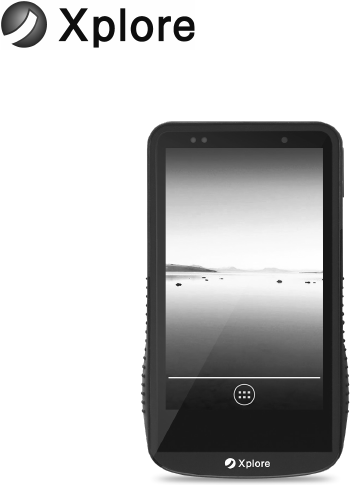
Device Overview 5 6 7 13 10 1 2 8 11 14 Getting Started Getting Started 15 3 16 4 9 12 17 No. Item Description 1 MicroSD card cover Open the cover to access the MicroSD card slot 2 Left side key Configurable shortcut key. Default as Menu key 3 Power key Press and hold to turn the device on or off. If the device is on, press to suspend.
Getting Started 8 Touch screen LCD with capacitive touch screen 9 NFC reader Scanning area for NFC tags 10 USB cover Open the cover to access the USB connector 11 Right side key Configurable shortcut key.
Installing the Battery 1. 2. 3. Align the battery metal contacts with the contact pins inside the battery compartment. Press the battery down until the battery lock clicks into place. Align the battery cover with the battery compartment; and push the battery cover down until it is locked. 1 2 Getting Started Installing and Removing the Battery 3 Removing the Battery Note: Always power off the device before removing the battery. 1. 2. 3. 4.
Getting Started Battery Charging Charging the Device 1. 2. 3. Connect the AC/DC adaptor to the DC jack of the cradle. Plug the AC/DC adaptor into a suitable power socket. The cradle power LED will turn green when power is supplied to the cradle. Insert the device to the cradle slot. The device LED will flash amber while charging, then it will turn green when fully charged. Note: Alternately, use the approved travel adaptor to charge the device via the USB connector. Charging the Spare Battery 1. 2.
DT4000 cradles can be cascaded in series to charge devices and batteries simultaneously with one AC/DC adaptor. Each adaptor supports maximum 3 cascaded cradles. Important: Do not cascade over 3 cradles in series. 1. Disconnect AC/DC adaptor, and turn over 2 cradles. 2. Connect the DC Power Cable of one cradle to the DC power connector of the other cradle. 3. Apply the metal plate accessory to the recess area as illustrated, and fasten the metal plate screws with a coin or screwdriver. 4.
Getting Started LED Status Description Device LED LED colour Description Red Battery very low Flashing red Battery low Flashing amber Charging Green Fully charged Flashing blue quickly Wi-Fi searching Flashing blue slowly Wi-Fi connected Off Wi-Fi disconnected Aqua blue Powering on Flashing green Battery door is open Cradle Power LED LED colour Description Green Cradle is powered on Off Cradle is powered off Cradle Battery LED 10 LED colour Description Red Spare battery is ch
Powering on the Device Press and hold the Power key for 3 seconds until the LED indicates aqua blue. Note: The device can only power on when the battery cover is closed. Powering off the Device Getting Started Powering the Device On and Off Press and hold the Power key for 3 seconds, and follow the screen instructions to power off the device. Suspending the Device If the device is on, press the Power key once or close the flip cover to suspend the device (i.e.
Using the Device Using the Device Viewing System Information 1. 2. Select Application drawer > Settings > About device. Scroll to view model number, Android version, build number, etc. 3. Select Status to view serial number, battery status, IP info., etc. Using Wi-Fi Connecting to a Wi-Fi Network 1. Select Application drawer > Settings > Wi-Fi. 2. Slide the Wi-Fi On/Off switch to the ON position. 3. Click Wi-Fi, and select a network. 4. Input the network key when prompted. 5.
Click Bluetooth, and select a device under AVAILABLE DEVICES. Click SEARCH FOR DEVICES if it does not appear in the list. 4. Input PIN, and then click OK to pair. 5. Once paired, the device is displayed under PAIRED DEVICES. Using NFC 1. Select Application drawer > Settings > More. 2. Select the NFC checkbox to turn on NFC. Using the Device 3. Note: The reading range is approx. 2mm from the NFC scanning area. Adjusting Date & Time To set up the date and time manually: 1.
Using the Device 2. 3. Select UHD Player. Browse to a picture, and then click SET WALLPAPER. Adjusting Screen timeout & Screen dim timeout 1. Select Application drawer > Settings > Display 2. Adjust the timeout period for the following options: Sleep: Adjust the idle period before the device enters sleep mode. Sleep in charging: Adjust the idle period before the device enters sleep mode while charging. Screen dim timeout: Adjust the screen dim period before the screen turns off.
Select Smart charging > Smart charging settings. 3. Drag the slide bar to adjust the charging trigger level, and then click OK. Changing Language 1. Select Application drawer > Settings > Language & input > Language. 2. Select a language. Using the Device 2. Performing System Backup To perform system backup: 1. Select Application drawer > System Backup. 2. Select the Backup button. 3. Backup path is the backup image name. Edit the path if needed. 4.
Using the Device 2. Select the Restore button. 3. Select the backup image location from Backup location. 4. Select the backup image file from the Restore content menu. 5. Click Start, and then click OK when prompted. 6. The device reboots automatically upon completing the restore. Note: • The backup image folder must be placed in the backup folder. • When backing up only the data, the image should be restored on the same firmware version.
Copyright© 2015 Group Sense Mobile-Tech Limited. All rights reserved. http://www.gsml.com.
Due to the used enclosure material, the product shall only be connected to a USB Interface of version 2.0 or higher. The connection to so called power USB is prohibited. The adapter shall be installed near the equipment and shall be easily accessible. CAUTION RISK OF EXPLOSION IF BATTERY IS REPLACED BY AN INCORRECT TYPE. DISPOSE OF USED BATTERIES ACCORDING TO THE INSTRUCTIONS FCC statements: This device complies with part 15 of the FCC rules.