
Sander User Manual

7.
does not
does
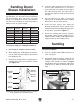
Figure 11.
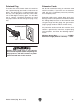
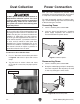
The switch can be disabled by removing the key,
as shown below. Disabling the switch in this man-
ner can prevent unauthorized operation of the
machine, which is important if it is not kept inside
an access-restricted building or in a location
where children may be present.
IMPORTANT: Disabling the switch only
restricts its function. It is not a substitute
for disconnecting machine from power when
adjusting or servicing.
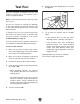
Test Run
Note: You do not need to install a drum to perform
the test run.
TroubleshootingPage 22
To test run the machine:
1.
2.
3.
4.
ON
5. OFF
6.
Figure 11