
Operation Manual


29
GB
3. Screw down the screw (23) in
the auxiliary handle (5).
Mounting the trimming unit:
4.
Slip the cutting disc (12) onto the
axle. There is only one mounting
position. Screw the cutting disc
(12) to the axle. Mind the left-
hand thread. Please ensure that
the screws are properly tightened.
Place the cutting insert (13) on
the pin (23) on the cutting disk
(12) and pull out the insert until it
snaps in.
Spare cutting inserts are kept in
the box (4) on the auxiliary handle
(5).
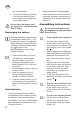
To insert the battery:
5. To insert the battery (16), place it
on the guide track (20) and push
it into the appliance. It will audi-
bly snap in.
Operation
operate the appliance without
-
ate the appliance, wear suitable
clothing, eye and ear protection.
not block the On/Off switch or
the switch lock. They must reli-
ably turn off the motor when you
release the switch. Do not oper-
ate the appliance if one of the
switches is damaged.
Please observe local regulations
concerning noise protection.
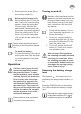
Turning on and off
Maintain a rm stand and hold the
appliance well with both hands and
at some distance away from your
body. Before turning on the appli-
ance, check that it will not touch
any objects.
1. Check that the battery (16) is in
(see “Assembly instructions - In-
serting the battery”).
2. To turn on, use your thumb to
actuate the switch lock (3), then
press the On/Off switch (2). Re-
lease the switch lock.
3. To turn off, release the On/Off
switch (2). There is no continu-
ous operation mode.
After turning off the appliance,
the trimming assembly will keep
the trimming assembly to come
to a standstill. Neither touch nor
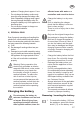
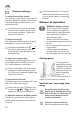
Checking the battery charge
level
The battery’s ( 18) charge level is in-
dicated by the charge state indicator (
16).
Press the PRESS button on the battery.
The LEDs indicate the battery’s charge
level.
Recharge the battery when the last
charge state indicator LED (
18)
changes from green to orange/red.