User Guide
User Guide Welcome to GreatCall! The all-new Jitterbug Touch 2 – An AndroidTM smartphone with the simplicity of Jitterbug. This User Guide features all the information you need to get the most out of your phone, so please read this before you get started. For more information on the Jitterbug Touch 2, go to www.greatcall.com.
User Guide 2
Contents Chapter 1: Jitterbug Touch 2 Introduction .......................... 7 1.1 Battery .......................................................................10 Charging the Battery .................................................................... 10 1.2 Jitterbug Touch 2 Overview .............................................11 1.3 Using the On-Screen Keyboard .......................................12 1.4 Using the Lock Screen ....................................................14 1.
2.5 Camera ...........................................................................24 Accessing the Camera ................................................................. 24 Taking a Photo ............................................................................. 25 Viewing a Photo from the Camera App ....................................... 25 Recording a Video........................................................................ 26 2.6 Photo Album.................................................
Chapter 5: Setting Up and Using Email and Gmail ........... 47 5.1 Introduction ....................................................................48 5.2 Setting up your Google Gmail Account ...........................49 Creating an Gmail Account from your Computer................49 Linking Your Google Account to Your Jitterbug Touch 2......50 5.3 Email...............................................................................51 Chapter 6: All Apps Button...............................................
User Guide 6
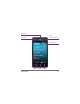
Chapter 1: Jitterbug Touch 2 Introduction This chapter explains how to start using your Jitterbug Touch 2. • • • • Device Battery Jitterbug Touch 2 Overview Using the Lock Screen Main Screen Overview For additional support, visit us online at www.greatcall.com.
Earpiece LED Indicator Light Front-Facing Camera Volume Key Back Home Menu User Guide 8
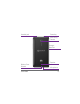
Headset Jack Power Key Rear-Facing Camera Charger/ Data Port Speaker Battery Cover Release User Guide Microphone 9
1.1 Battery Your Jitterbug Touch 2 comes with the battery pre-installed and pre-charged so you can get started right away. Charging the Battery 1. With the symbol on the charger facing up and your phone’s touch screen facing down, insert the small end of the charger into the microUSB port on the phone. 2. Insert the large end of the charger cord into the port on the wall adapter. 3. Plug the adapter into a standard outlet.
1.2 Jitterbug Touch 2 Overview Get familiar with the three main keys, as you will use them to navigate your phone. Home key – no matter what you’re doing, this will 1. take you back to the Main screen on your phone. 2. Menu key – this gives you a menu of options for every section of the phone. For example, this button will allow you to add and delete contacts while in your contacts list. Back key – this will take you back to the previous 3. screen.
1.3 Using the On-Screen Keyboard When typing an email or text, simply tap the screen in the message entry area. This is the white area shown in the image to the right. 1. The blue cursor will appear when tapping a text field on the screen and can be used to navigate your typed text. You can select a specific place in the text by simply tapping the place or by touching & dragging the cursor to the desired location. 2. The Shift key changes the text from lower case to upper case. Touch and hold for caps lock.
1 2 3 4 To change the orientation of your keyboard to horizontal (shown above), simply rotate your phone and hold it horizontally. The on-screen keyboard will shift automatically.
1.4 Using the Lock Screen Your phone is equipped with a lock screen that appears when your phone is not in use, to prevent accidental dialing. 3 1. The Unlock Function 2 – To unlock the screen, press and hold the lock icon and drag it toward the top of the screen. 1 2. The Events Window – The Events Window shows your missed messages and calls. – To access these events, you will need to unlock the screen. 3. 5Star – This button gives you access to immediate help with 5Star Urgent ResponseTM.
– In order to use 5Star Urgent Response, you will need to visit www.mygreatcall.com to set up your account and a Personal Profile. If you do not set up a 5Star account, this button will take you to a screen where you can access 9-1-1 quickly in an emergency situation. For more information on 5Star Urgent Response, see page 29. After several minutes of non-use, your phone will go into “sleep” mode to save battery power. To wake your phone, press the power button once.
1.5 The Main Screen Overview As soon as you unlock your phone, you will see the Main screen. From this screen you can use every function of your Jitterbug Touch 2. The Main screen features only two tabs – “Home” and “People.” It was designed to be simple, so you can easily access the apps and people that are most important to you, without having to dig through icons and features you may never use. The following two chapters show in detail how to use these two tabs.
Chapter 2: The Main Screen – Home Tab This chapter explains the Home Tab.
2.1 Home Tab Overview Your Jitterbug Touch 2 Home tab lists features that will be most useful to you. 1. Phone 2. Text Messages 3. Camera 4. Photo Album 5. 5Star 6. Urgent Care 7. Email 8. Internet 9. Maps 10. Clock To learn more about the “All Apps” button see page 53.
2.2 Phone Making Your First Call Making phone calls is easy on your Jitterbug Touch 2. Make sure you are in an area where a signal can be received. Look for the signal strength icon in the upper right of the screen. The more bars, the stronger the signal. Dialing a Number 1. Tap “Phone” on the Home tab. 2. Using the dialpad, enter the phone number. 3. Tap the “Call” button to dial the number. 4. To end the call, tap the symbol. Redialing a Number 1. Tap “Phone” on the Home tab. 2.
Answering a Call 1. When receiving an incoming call, three icons appear on your screen as shown in the image to the right. 2. To answer a call, touch and hold the center phone icon and drag it toward the green phone symbol on the right side of the screen. Ignoring a Call 1. To ignore a call and send the caller straight to your voicemail, touch and hold the center phone icon and drag it toward the red phone symbol on the left side of the screen. You can also press the Volume key to silence the ringer.
2.3 Setting up Voicemail Before your Jitterbug Touch 2 can receive a voicemail message, you need to record a personal greeting and set a password. Once you have set up your voicemail, all unanswered calls to your phone are automatically transferred even if your phone is in use or turned off. 1. From the Home tab, tap the “Voicemail” button next to “Phone.” 2. Listen to and follow the prompts to create a password and record a greeting. At the dialpad, you can also touch and hold “1” to access voicemail.
2.4 Text Messages Sending a Text Message The Jitterbug Touch 2 was designed to send text messages easily to your friends and family who have cell phones capable of receiving them. Composing and Sending a Text Message 1. Tap “Text Messages” on the Home tab. 2. Tap the new message symbol on the lower left to create a new text message. 3a. If sending a message to a saved contact, begin typing the name. A list of contacts will appear - tap to select a contact.
Sending a Photo or Video Message 1. While in “Text Messages,” tap the new message symbol in the lower left corner. 2. Once you have entered the desired contact or phone number in the “To” field, tap the attachment symbol , in the upper right corner of your screen. 3. To attach an existing photo from your phone’s Photo Album, tap “Pictures.” To attach an existing video, tap “Videos.” 4. To take a new photo to attach to your message, tap “Capture Picture.
2.5 Camera Accessing the Camera 1. Tap “Camera” on the Home tab and your phone will turn into a digital camera. Adjust the settings Select one of the four options below by tapping the symbol at the top of the screen. 1. Settings – Tap this button to adjust things like photo size and quality. 2. White balance – Tap this to adjust the white balance of your camera to either incandescent, daylight, flourescent, or cloudy. You can also set it to “Auto.” 3.
Taking a Photo Rear-Facing Camera 1. Tap “Camera” on the Home tab. 2. The phone screen will display the view of the camera and represents the image that will be captured for the picture. 3. Tap the circular white button in the center of the bottom of the screen. You will hear a shutter, indicating the photo was taken. Front-Facing Camera 1. Tap “Camera” on the Home tab. 2. Tap the lens rotation symbol to switch the lens between front facing and rear facing. 3.
2. The last picture taken will appear on screen. 3. Touch and hold the screen and slide it to the left or right to view another photo. 4. Hit the back button to return to the camera app. Recording a Video 1. Tap “Camera” on the Home tab. 2. Use the slider control on the bottom right corner of the screen to switch from camera to video mode. 3. Tap the circular red button in the center of the bottom of the screen to begin recording. Tap it again to stop recording.
2.6 Photo Album The Photo Album is where you can see all the pictures you have on your phone. Your phone will automatically sort pictures into “Albums,” so you can see where the picture originated – such as “Camera” or “Downloads.” Viewing a Picture in your Photo Album 1. Tap “Photo Album” on the Home tab. 2. At the albums list, tap the album you wish to view. 3. You will see thumbnails of the photos in the album. Tap the thumbnail to enlarge it. 4.
Sending a Photo 1. Enlarge the photos you wish to send by tapping the thumbnail view. 2. Tap the share symbol in the upper right corner of the screen. 3. Select a sharing option from the list, which will include numerous options based on the accounts you have set up (e.g. Gmail, Facebook and more). 4. To send the picture in a text message, tap the messaging symbol .
2.7 5Star Urgent Response GreatCall’s 5Star Urgent Response comes pre-loaded on your Jitterbug Touch 2, however, you will need to have a 5Star subscription to access this service. This app transforms your cell phone into a personal safety device. In any unsafe or uncertain situation, 5Star gives you immediate access to NAED Certified Response Agents who will identify you and your location, evaluate your situation and get you the help you need.
If you do not have access to 5Star through a GreatCall Service Plan you can add the service separately to your monthly plan by creating and logging into your www.mygreatcall.com account. Simply click “Phones” under the “Create an Account” section. You will be able to add 5Star Urgent Response, as well as a number of other innovative services from GreatCall.
2.8 Urgent Care Urgent Care comes pre-loaded on your Jitterbug Touch 2. If you have a GreatCall Service Plan, you will have free, unlimited access to a registered nurse or board-certified doctor, no appointment necessary. This app also gives you access to a robust medical dictionary and symptom checker tool. To access Urgent Care, simply tap the app and enter your name and state.
2.9 Internet Since the Jitterbug Touch 2 has a large color screen, browsing the Web is easy. 1. From the Home tab or the “All Apps” button, scroll down until you see “Internet.” Tap to select. 2. You will be brought to the www.google.com home page. 3. To type in a specific website address, tap the text field at the top of the screen and enter a URL.
2.10 Customizing your Home Tab You can customize your Home tab by selecting your favorite apps that you use most often. 1. From the Home tab, press the Menu key . 2. Tap “Add Favorites” and you will brought to a list of all the apps on your phone. 3. To select an app, just tap the square box to the right and a green checkmark will appear. 4. Tap “OK” when finished and the selected Apps will now appear on the Home tab. 5.
User Guide 34
Chapter 3: The Main Screen – People Tab This chapter explains the People Tab.
3.1 People Tab Overview The People tab was designed to give you easy access to the contacts that are most important to you. Creating a list of Favorites will make dialing friends or family a snap. Tapping the People tab shows you a list of your favorite contacts. To learn how to create a Favorite, see page 38. Tap the “All People” button to see all of your contacts.
3.2 Creating a Contact 1. From the People tab, press the menu key . 2. Tap “Add New” to add a new contact to your contacts list. 3. At the new contact screen, tap “Name” to enter a first and last name. 4. Tap “Next” at the bottom right to enter a phone number. 5. If applicable, enter additional phone numbers, email addresses and other contact details. 6. Tap “Done” in the upper left corner to save. 7. Your contact will now be saved in the “All People” list.
3.3 Creating a Favorite While you may have dozens of people in your contact list, the Jitterbug Touch 2 has made it easy to quickly access your most important contacts from the People tab. 1. From the People tab, tap “All People.” . 2. Press the Menu key 3. Tap “Add to Favorites.” 4. You will see a list of all your contacts. 5. Tap the check box next to a name, and a green checkmark will appear. Tap “OK.” 6. The selected contacts will now appear on your People tab.
3.4 Deleting a Contact 1. From the People tab, tap the “All People” button. 2. Tap the contact you wish to delete. 3. Once you’re on the contact screen, press the Menu key . 4. Tap “Delete.” Tap “OK” to confirm deletion. 5. This contact will no longer appear in your contact list or on your People tab.
3.5 Calling a Contact Calling a Favorite from the People Tab 1. From the People tab, tap the contact you wish to call. 2. Tap “Call.” Calling a Contact from the Contact List 1. From the People tab, tap the “All People” button. 2. Tap the contact you wish to call. 3. Tap “Call.” If a contact has multiple numbers, a selection will appear. Choose the appropriate number.
Chapter 4: GreatCall Button This chapter explains additional features on your Jitterbug Touch 2 available when you tap the GreatCall .
4.1 GreatCall Button – Introduction In both the Home and People tabs, you’ll see the GreatCall at the bottom right corner of your screen. button Tap this button to see the following options: 1. “Usage” – View how many minutes, text messages, data megabytes you’ve used, how many you have left, and when your next bill date is. 2. “Featured Apps” – Several featured apps recommended by GreatCall. 3. “Help” – Help and information about your Jitterbug Touch 2. 4.
4.2 Usage The usage feature will allow you to easily keep track of your usage right from your Jitterbug Touch 2. In addition to minute and text usage, your phone will track your data usage, or “megabyte” usage. Data is what your phone uses to access the Internet, download an app, or send an email. See the next page for examples of data usage. There may be a slight delay in displaying your exact usage. Usage is based on the estimated minutes, text messages and data that you use per billing cycle.
How much data is enough? Data 10 MB 50 MB 100 MB 250 MB 500 MB User Guide What you can do with it Send 50 emails, and send 7 emails with attachments, and View 20 web pages, and Post 2 photos on social media sites, and Watch 1 minute of streaming video Send 250 emails, and send 35 emails with attachments, and View 100 web pages, and Post 12 photos on social media sites, and Watch 5 minutes of streaming video Send 500 emails, and send 70 emails with attachments, and View 200 web pages, and Post 25 photo
4.3 Help With the Jitterbug Touch 2, you can easily find help whenever you need it. We have included an entire on-screen guide for easy reference. 1. Tap the GreatCall button. 2. Tap “Help.” 3. You will see a list of various help topics. Tap one to select. While in a help topic, you can scroll up or down to read all the content or use the left or right arrows to see the next topic. Your Jitterbug Touch 2 also features “Shake for HelpTM.
User Guide 46
Chapter 5: Setting Up and Using Email and Gmail This chapter explains how to set up and use email on your Jitterbug Touch 2.
5.1 Introduction The Jitterbug Touch 2 offers two ways to use Email: Standard Email and Gmail (Google Email). If you don’t have a Gmail account, we highly recommend setting one up to get the most out of your phone.
5.2 Setting up your Google Gmail Account To get the most out of your Jitterbug Touch 2 we strongly recommend linking your device to a Google email account. This will allow you to download apps from the Google Play Store, access your email and add contacts to your phone via your computer. If you do not already have a Google account, follow the steps below to get started: Creating an Gmail Account from your Computer The easiest way to create a Gmail account is right from your computer. 1.
Linking Your Google Account to Your Jitterbug Touch 2 1. From the Home tab, tap the “All Apps” button. 2. Tap “Gmail.” 3. At the “Add a Google account” screen, tap “Existing.” 4. At the “Sign in” screen, enter your Google username and password. 5. Tap “Save.
5.3 Email You can use your Jitterbug Touch 2 to view, compose and manage Email messages. It’s easy to synch most standard Email accounts – like Yahoo, AOL or Hotmail – in just a few steps. 1. From the Home Tab, tap the “All Apps” button. 2. Tap “Email.” 3. Select which type of email address you have. 4. Enter an email address and password in the entry boxes. 5. Tap “Next.” 6. Follow the instructions on the screen.
User Guide 52
Chapter 6: All Apps Button This chapter explains the All Apps button on your Jitterbug Touch 2.
6.1 All Apps Overview Your Jitterbug Touch 2 comes with some of the primary apps pre-programmed into your Home tab as “Favorites.” There are, however, many other apps you can access by tapping the “All Apps” button in the lower left corner of the Home tab. Some of the apps require you to have a Gmail or GreatCall account, while others work immediately. If there are certain apps you will be using more often, you can add them to your “Favorites” on the Home tab for quicker access.
6.2 Google Play Store After linking your Gmail account to your phone, you can access the Google Play Store and download games, movies, music and any other apps that interest you. There are over 600,000 apps to choose from. 1. From the Home tab, tap the “All Apps” button. 2. Tap “Play Store.” 3. You will be brought to the Google Play Store where you can easily search and download apps.
Downloading a free app Once you see a free app you wish to download: 1. Simply tap “Install” and then “Accept & Download.” 2. Once downloaded, your new app will appear in your “All Apps” list. Purchasing an app Once you see an app you wish to purchase and download: 1. Tap the price of the app. 2. Tap “Accept & Buy.” 3. Tap “OK.” 4. Once downloaded, your new app will now appear in your “All Apps” list, and Google will charge the credit card you use for your Google account.
Chapter 7: Settings and Options This chapter explains how you can customize the way your phone looks and performs.
7.1 Options We’ve made it easy to adjust some of the most commonly used phone settings. 1. From the Home tab, press the menu key . 2. Tap “Options.” 3. You can adjust Color Theme, Lock Screen Photo, Bluetooth, Airplane Mode, Wi-fi and Sounds. 4. Simply tap the option you wish to adjust.
7.2 Settings There are multiple additional settings you can adjust with your Jitterbug Touch 2, so that it best suits your needs, including: • • • • Call Settings Display Security Date & Time To adjust your settings 1. From the Home tab, tap the “All Apps” button. 2. Tap “Settings.” 3. You will see a list of settings. Tap the setting you wish to adjust. 4. Follow the prompts to adjust the setting.
7.3 Setting the Screen Lock You can protect your Jitterbug Touch 2 from unauthorized use by setting a password or other type of lock on your Home screen. 1. From the Home tab, tap the “All Apps” button. 2. Tap “Settings.” 3. Tap “Security.” 4. Tap “Screen Lock.” 5. Choose whichever security method you prefer. For example, to use a PIN code: - Tap “PIN.” - Enter a numeric pin code of at least 4 digits. - Tap “Continue.” 6. Enter your code again and tap “OK.
Chapter 8: Commercial Mobile Alert System (CMAS) This chapter explains CMAS on your Jitterbug Touch 2.
8.1 About CMAS The Commercial Mobile Alert System (CMAS) is a new national public safety system that allows people who own a CMAS-enabled mobile device to receive geographicallytargeted messages. These broadcast messages will alert customers of imminent threats to their safety within their immediate area. Receiving a CMAS alert message on your Jitterbug Touch 2 – Although alerts from CMAS are not text messages, the alerts will look similar to text messages.
8.2 Types of Alerts There are three types of alerts through CMAS: 1. Alerts issued by the President 2. Alerts involving imminent threats to life or property issued by the National Weather Service or other authorized emergency management agency. 3. Amber Alerts – missing child alert Alert messages are provided by approved emergency agencies and delivered via the Federal Emergency Management Agency (FEMA).
The Fine Print Warnings and Precautions This section contains important information pertaining to the operating instructions of your device. It also contains information about how to use the device safely. Read this information carefully before using your device. Electronic Device Power off your device if using the device is prohibited. Do not use the device when using the device causes danger or interference with electronic devices.
• Concentrate on driving. Your first responsibility is to drive safely. • Do not talk on the device while driving. Use hands-free accessories. • When you have to make or answer a call, park the vehicle at the road side before using your device. • RF signals may affect electronic systems of motor vehicles. For more information, consult the vehicle manufacturer. • In a motor vehicle, do not place the device over the air bag or in the air bag deployment area.
dangerous, as it may present a choking hazard. Ensure that small children are kept away from the device and accessories. Accessories Choose only batteries, chargers, and accessories approved for use with this model by the device manufacturer. The use of any other type of battery, charger, or accessory may invalidate any warranty for the device, may be in violation of local rules or laws, and may be dangerous.
• Promptly dispose of used batteries in accordance with local regulations. • The device should only be connected to products that bear the USBIF logo or have completed the USB-IF compliance program. • Only use the battery with a charging system that has been qualified with the system per this standard, IEEE-Std-1725. Use of an unqualified battery or charger may present a risk of fire, explosion, leakage, or other hazard.
• If the device screen is broken by colliding with hard objects, do not touch or try to remove the broken part. In this case, stop using the device immediately, and then contact an authorized service center in time. Emergency Call You can use your device for emergency calls in the service area. The connection, however, cannot be guaranteed in all conditions. You should not rely solely on the device for essential communications.
connected. --Consult the dealer or an experienced radio/TV technician for help. This device complies with Part 15 of the FCC Rules. Operation is subject to the following two conditions: (1) this device may not cause harmful interference, and (2) this device must accept any interference received, including interference that may cause undesired operation. Caution Chan ges or modifications made to this device not expressly approved by Huawei Technologies Co., Ltd.
ogies that it uses. However, there may be some newer wireless technologies used in this phone that have not been tested yet for use with hearing aids. It is important to try the different features of this phone thoroughly and in different locations, using your hearing aid or cochlear implant, to determine if you hear any interfering noise. Consult your service provider or the manufacturer of this phone for information on hearing aid compatibility.
Copyright © Huawei Technologies Co., Ltd. 2013. All rights reserved. No part of this manual may be reproduced or transmitted in any form or by any means without prior written consent of Huawei Technologies Co., Ltd. and its affiliates (“Huawei”). The product described in this manual may include copyrighted software of Huawei and possible licensors.
any form, including but not to limited texts, images, videos, or software etc. Customers shall bear the risk for any and all effects, including incompatibility between the software and this product, which result from installing software or uploading or downloading the third-party works. This product is based on the open-source Android™ platform. Huawei has made necessary changes to the platform.
GreatCall, Inc. Headquarters: 10935 Vista Sorrento Parkway Suite 200 San Diego, CA 92130 Tel: 1–858–720–7500 Customer Service Center: P.O. Box 4428 Carlsbad, CA 92018 Tel: 1–800–733–6632 Internet Address: www.greatcall.com Copyright ©2013 GreatCall, Inc. Jitterbug and GreatCall are registered trademarks of GreatCall, Inc.
Disclaimer Of Warranties; Exclusion Of Liability ALL CONTENTS OF THIS MANUAL ARE PROVIDED “AS IS”. EXCEPT AS REQUIRED BY APPLICABLE LAWS, NO WARRANTIES OF ANY KIND, EITHER EXPRESS OR IMPLIED, INCLUDING BUT NOT LIMITED TO, THE IMPLIED WARRANTIES OF MERCHANTABILITY AND FITNESS FOR A PARTICULAR PURPOSE, ARE MADE IN RELATION TO THE ACCURACY, RELIABILITY OR CONTENTS OF THIS MANUAL.
Your Customer Agreement 1. Welcome To The GreatCall® Family. Please read this agreement regarding your phone and service. When you accept this agreement, you’re bound by its conditions.
3.1 30-Day Return Policy If for any reason, within 30 days from date of purchase, you are not completely satisfied with your device, we will refund the activation fee, the first month’s service charge and the cost of the device, plus applicable taxes if you: • Have used less than 30 minutes of talk time; and • Return the device in “like new” condition, as determined by GreatCall, in the original box with all components and materials.
You will receive a final bill that will detail all the charges and credits on your account. If you wish to cancel your service before the end of a given month, you’ll be responsible for any account charges and overages through the date of your final bill. If you have purchased any Add-On Minutes, they are not refundable and these minutes will expire after your final bill. Although cancellations are effective immediately, we don’t bill for partial months; therefore, you’ll be charged for the entire month. 4.
Except as prohibited by law, we may also, at our discretion, require you to pay regulatory and administrative fees to recover our costs of complying with regulatory mandates and Universal Service fees or similarly imposed charges. Any customer who is eligible for an exemption from any tax or fee must provide us with a verifiable, valid and properly executed tax-exempt certificate.
YOUR SERVICE UNTIL PAID IN FULL. WE RESERVE THE RIGHT TO CHARGE A REASONABLE RECONNECTION FEE. IF YOUR ACCOUNT REMAINS UNPAID, WE WILL CANCEL SERVICE FOR NONPAYMENT. We reserve the right to require recurring credit card billing for certain products or services. We also reserve the right to require an advance deposit (or an increased deposit) from you based on your payment history and changes in your plan and/or the frequency of use of our services.
You may be able to transfer or “port” your phone number from us to another carrier or service provider. We cannot guarantee that this transfer will be successful. If you request that another service provider transfer or “port” your phone number, we will treat this request in the same manner as a request to cancel your GreatCall service. When the transfer is complete you will be responsible for all the terms of cancellation described in Section 3 of this agreement.
THIS AGREEMENT OR FOR ANY OTHER GOOD CAUSE, INCLUDING, BUT NOT LIMITED TO: a. b. Two or more late payments in a 12-month period. Incurring charges greater than your required deposit or billing limit (even if we haven’t yet billed the charges) if you are unwilling to increase your deposit with us. c. Incurring charges materially in excess of your monthly access charge (even if we haven’t yet billed the charges). d. Harassing our employees or agents. e. Lying to us. f. Interfering with our operations. g.
12. Disclaimer Of Warranties WE MAKE NO REPRESENTATIONS OR WARRANTIES, EXPRESS OR IMPLIED, INCLUDING, TO THE EXTENT PERMITTED BY APPLICABLE LAW, ANY IMPLIED WARRANTY OF MERCHANTABILITY OR FITNESS FOR A PARTICULAR PURPOSE CONCERNING YOUR SERVICE OR YOUR PHONE. WE CAN’T PROMISE UNINTERRUPTED OR ERROR-FREE SERVICE AND DON’T AUTHORIZE ANYONE TO MAKE ANY WARRANTIES ON OUR BEHALF. THIS DOESN’T DEPRIVE YOU OF ANY WARRANTY RIGHTS YOU MAY HAVE AGAINST ANYONE ELSE. 13.
CONCERNING THE AGREEMENT, OR THE PROVISION OF SERVICES OR PRODUCTS TO YOU, INCLUDING ANY BILLING DISPUTES (CLAIM), SHALL BE SUBMITTED TO FINAL, BINDING ARBITRATION BEFORE THE AMERICAN ARBITRATION ASSOCIATION (“AAA”). THIS AGREEMENT TO ARBITRATE ALSO REQUIRES YOU TO ARBITRATE CLAIMS AGAINST OTHER PARTIES RELATING TO SERVICES OR PRODUCTS PROVIDED OR BILLED TO YOU, INCLUDING SUPPLIERS OF SERVICES AND PRODUCTS AND OUR RETAIL DEALERS, IF YOU ALSO ASSERT CLAIMS AGAINST US IN THE SAME PROCEEDING.
RELIEF BUT ONLY APPLYING TO YOU AND US AND NOT TO ANY OTHER CUSTOMER OR THIRD PARTY. AS A LIMITED EXCEPTION TO THE AGREEMENT TO ARBITRATE, YOU AND WE AGREE THAT: (A) YOU MAY MAKE CLAIMS TO SMALL CLAIMS COURT, IF YOUR CLAIMS QUALIFY FOR HEARING BY SUCH COURT; AND (B) IF YOU FAIL TO TIMELY PAY AMOUNTS DUE, WE MAY ASSIGN YOUR ACCOUNT FOR COLLECTION, AND THE COLLECTION AGENCY MAY PURSUE IN COURT CLAIMS LIMITED STRICTLY TO THE COLLECTION OF THE PAST DUE DEBT AND ANY INTEREST OR COST OF COLLECTION AGREEMENT.
CONTRACT AND CAN BE CANCELLED AT ANY TIME. MONTHLY SERVICE FEES DO NOT INCLUDE GOVERNMENT TAXES OR ASSESSMENT SURCHARGES. PRICES AND FEES ARE SUBJECT TO CHANGE. OUR COVERAGE MAP ESTIMATES WHERE YOUR DEVICE WILL WORK. A NUMBER OF FACTORS AFFECT THE SPECIFIC COVERAGE YOU WILL GET. YOU WILL NOT BE ABLE TO MAKE 9-1-1 CALLS WHEN CELLULAR SERVICE IS NOT AVAILABLE. GREATCALL IS NOT A HEALTH CARE PROVIDER AND DOES NOT PROVIDE HEALTH CARE SERVICES.
to which it refers form the entire agreement between us on their subjects. You can’t rely on any other documents or statements on those subjects by any sales or service representatives, and you have no other rights with respect to service or this agreement, except as specifically provided by law. This agreement isn’t for the benefit of any third party except our parents, affiliates, subsidiaries, agents and predecessors/successors in interest.
www.greatcall.