
U-Can-Do 3D .60 ARF Manual
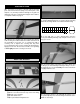

❏❏9. Attach the clevis with pushrod to the outer hole of the
control horn. Hold the aileron straight with the wing and mark
the pushrod where it crosses the servo arm. Bend the pushrod
90 degrees away from the wing on the mark you made.
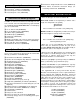
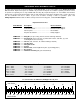
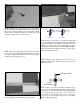
❏❏10. Attach the pushrod to the control horn as shown
in the sketch. Cut off the excess pushrod. Be certain to leave
1/16" [1.6mm] of wire protruding from the Faslink as shown
in the sketch.
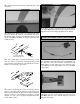
❏ 11. Repeat steps 2-10 for the other left side of the wing.
❏ 12. Slide a silicone retainer over the two servo wires so
they won’t fall back into the wing.
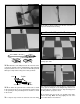
❏ 1. Mount the wing to the fuse with the two 1/4-20 x 2"
[51mm] nylon bolts.
❏ 2.Trim the two bolt holes in the belly pan. Using 6-minute
epoxy, glue the belly pan to the wing, being careful to not
glue the belly pan or wing to the fuse. Tape the belly pan to
the wing until the epoxy has cured.
❏ 3. Remove the two 1/4-20 x 2" [51mm] nylon bolts.
Remove the wing. Note: The wing might press out of the
fuse a little hard the first few times.
Mount the Wing to the Fuselage
1/16"
Faslink
Servo Arm Pushrod Wire
10