
User's Manual Part 1


Firmware Version 1.0.0.1 UCM6200 Series IP PBX User Manual Page 68 of 320
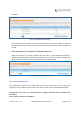
Import phonebook from your computer to LDAP server
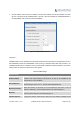
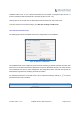
Click on “Import Phonebook” and a dialog will prompt as shown in the figure below.
Figure 41: Import Phonebook
The file to be imported must be a CSV file with UTF-8 encoding. Users can open the CSV file with
Notepad and save it with UTF-8 encoding.
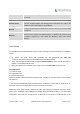
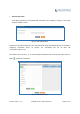
Here is how a sample file looks like. Please note “Account Number” and “Phonebook DN” fields are
required. Users could export a phonebook file from the UCM6200 LDAP phonebook section first and
use it as a sample to start with.
Figure 42: Phonebook CSV File Format
The Phonebook DN field is the same “Phonebook Prefix” entry as when the user clicks on “Add” to
create a new phonebook. Therefore, if the user enters “phonebook” in “Phonebook DN” field in the
CSV file, the actual phonebook DN “ou=phonebook,dc=pbx,dc=com” will be automatically created by
the UCM6200 once the CSV file is imported.
In the CSV file, users can specify different phonebook DN fields for different contacts. If the phonebook
DN already exists on the UCM6200 LDAP Phonebook, the contacts in the CSV file will be added into
the existing phonebook. If the phonebook DN doesn’t exist on the UCM6200 LDAP Phonebook, a new
phonebook with this phonebook DN will be created.
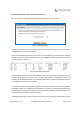
The sample phonebook CSV file in above picture will result in the following LDAP phonebook in the