
User's Guide


P a g e | 22
HT81x User Guide
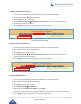
“Device not registered”
This prompt will be played immediately after off hook If
the device is not register and the option “Outgoing Call
without Registration” is in NO
Five success tips when using the voice prompt
“*” shifts down to the next menu option and “#” returns to the main menu
“9” functions as the ENTER key in many cases to confirm or toggle an option.
All entered digit sequences have known lengths - 2 digits for menu option and 12 digits for IP
address. For IP address, add 0 before the digits if the digits are less than 3 (i.e. - 192.168.0.26
should be key in like 192168000026. No decimal is needed).
Key entry cannot be deleted but the phone may prompt error once it is detected.
Note: Please make sure to reboot the device after changing network settings (IP Address, Gateway,
Subnet…) to apply the new configuration.
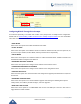
Configuration via Web Browser
The HT81X embedded Web server responds to HTTP GET/POST requests. Embedded HTML pages
allow a user to configure the HT81X through a web browser such as Google Chrome, Mozilla Firefox and
Microsoft’s IE.
Microsoft Internet Explorer: version 10 or higher.
Google Chrome: version 58.0.3 or higher.
Mozilla Firefox: version 53.0.2 or higher.
Safari: version 5.1.4 or higher.
Opera: version 44.0.2 or higher.
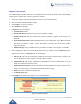
Accessing the Web UI
- Via WAN port
For the initial setup, the Web access is by default enabled when the device is using private IP and disabled
when using public IP, and you cannot access the Web UI of your HT81X until it’s enabled, the following
steps will show you how to enable it via IVR.
1. Power your HT81X using PSU with the right specifications.
2. Connect your analog phone to phone ports (FXS) of yourHT81X.
3. Press *** (press the star key three times) to access the IVR menu and wait until you hear “Enter
the menu option “.
4. Press 12, the IVR menu will announce that the web access is disabled, press 9 to enable it.
5. Reboot your HT81X to apply the new settings.
Please refer to steps below if your HT81X is connected via WAN port: