
User's Manual
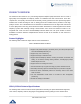
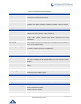
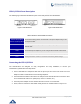
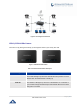
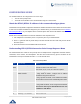
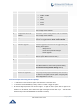
Table Of Contents

P a g e | 19
HT812/HT814 User Guide
Key entry cannot be deleted but the phone may prompt error once it is detected.
Configuration via Web Browser
The HT812/HT814 embedded Web server responds to HTTP GET/POST requests. Embedded HTML
pages allow a user to configure the HT812/HT814 through a web browser such as Google Chrome, Mozilla
Firefox and Microsoft’s IE.
Accessing the Web UI
1. Connect the computer to the same network as your HT812/HT814.
2. Make sure that your HT812/HT814 are booted up.
3. You may check your HT812/HT814 IP address using the IVR on the connected phone.
Please see Obtain the HT812/HT814 IP address via the connected analogue phone
4. Open Web browser on your computer.
5. Enter the HT812/HT814’s IP address in the address bar of the browser.
6. Enter the administrator’s password to access the Web Configuration Menu.
Note: The computer must be connected to the same sub-network as the HT812/HT814. This can be
easily done by connecting the computer to the same hub or switch as the HT812/HT814.
Web UI Access Level Management
There are two default passwords for the login page:
User Level
Password
Web Pages Allowed
End User Level
123
Only Status and Basic Settings
Administrator Level
admin
All pages
The password is case sensitive with maximum length of 25 characters. When changing any settings, always
submit them by pressing Update or Apply button on the bottom of the page. After submitting the changes
in all the Web GUI pages, reboot the HT812/HT814 to have the changes take effect if necessary; most of
the options under the Advanced Settings and FXS Port (x) pages require reboot
Saving the Configuration Changes
After users makes changes to the configuration, pressing Update button will save but not apply the changes
until Apply button is clicked. Users can instead directly press Apply button. We recommend rebooting or
powering cycle the phone after applying all the changes.