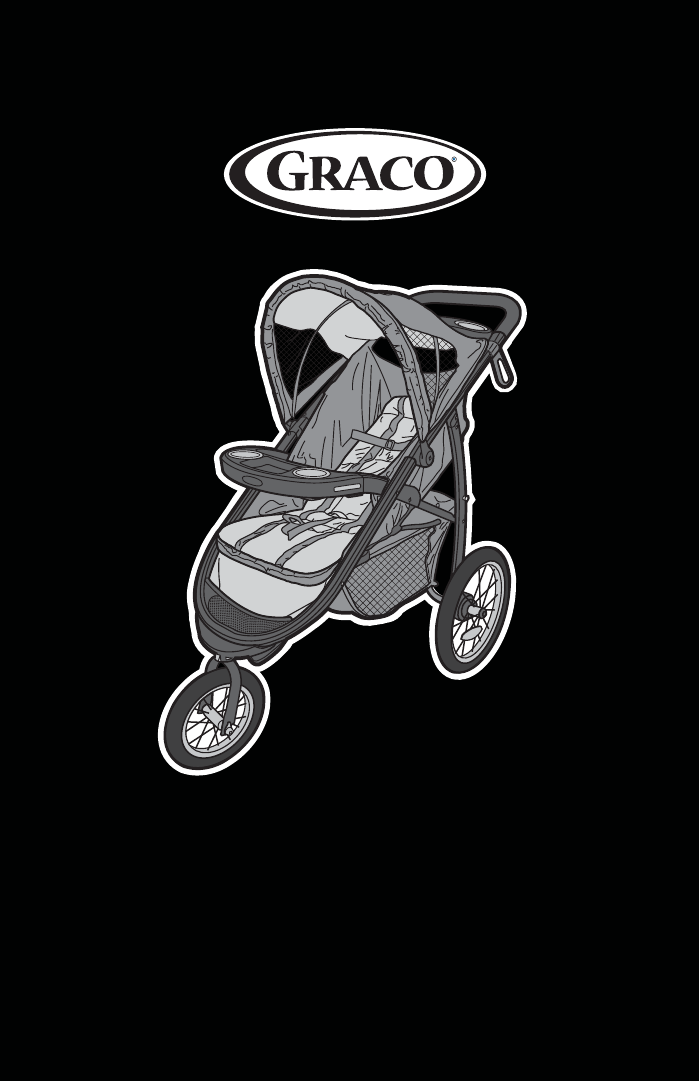
Fast Action Fold Jogger Click Connect TM TM Owner’S -ANUAL s -ANUAL DEL PROPIETARIO www.gracobaby.
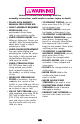
Failure to follow these warnings and the assembly instructions could result in serious injury or death. s TO PREVENT TIPPING, do not place more than 3 lbs (1.4 kg) on the parent’s tray. s TO AVOID BURNS, never put hot liquids in the parent’s tray. s TO PREVENT A HAZARDOUS, UNSTABLE CONDITION, never place purses, shopping bags, parcels or accessory items (other than approved Graco stroller bags) on the handle. Never place anything on the canopy.
USING GRACO® INFANT CAR SEAT WITH STROLLER: IF YOU ARE JOGGING WITH THIS STROLLER: s DO NOT INFLATE above the maximum recommended inflation pressure that is written on the side of the tire. Over inflation may cause wheel and/ or tire to blowout and could result in serious injury. s DO NOT use stroller for jogging while carrier is in stroller. s BE AWARE of the increased speed and greater possibility of losing control of the stroller. s ALWAYS USE and snugly adjust the seat belt provided.
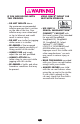
No observar estas advertencias y las instrucciones de armado podría resultar en lesiones serias o la muerte. s POR FAVOR, GUARDE EL MANUAL DEL PROPIETARIO PARA USO FUTURO. s REQUIERE QUE LO ARME UN ADULTO. s NUNCA DEJE al niño sin supervisión. Mantenga al niño siempre a la vista cuando esté en el cochecito. s EVITE SERIAS LESIONES de caídas o resbalos. Use siempre el cinturón de seguridad. Después de ajustar las hebillas, ajuste las correas para obtener un calce apretado alrededor de su niño.
s NUNCA PONGA a un niño en el cochecito con la cabeza hacia el frente del cochecito. s NUNCA DEJE QUE SU PRODUCTO SE USE como un juguete. s DEJE DE USAR EL COCHECITO en caso de que esté dañado o roto. s ESTE PRODUCTO NO DEBE usarse con patines o patines en línea. s SI USTED SALE A CORRER CON ESTE COCHECITO: s NO INFLE los neumáticos con más de la presión máxima recomendada que se indica en el costado del mismo.
0ARTS LIST s ,ISTA DE PIEZAS Check that you have all the parts for this model BEFORE assembling your product. If any parts are missing, call Customer Service. Verifique que tiene todas las piezas de este modelo ANTES de armar su producto. Si falta alguna pieza, llame a Servicio al Cliente. No tools required. No requiere herramientas.
4O /PEN 3TROLLER s #ØMO ABRIR EL COCHECITO Before assembly be sure to place stroller on top of a piece of cardboard or other protective cover to prevent damage to floor surface. Antes de armarlo, tenga la seguridad de poner el cochecito arriba de un pedazo de cartón u otro tipo de protección para prevenir el daño a la superficie del piso. 1 Storage latch Traba de almacenamiento 2 Pull up on handle as shown. Tire hacia arriba de la manija como se indica.
CHECK that the stroller is completely latched open every time you open the stroller and before continuing with the rest of the assembly steps. 3 VERIFIQUE que el cochecito esté completamente abierto y trabado cada vez que lo abre y antes de continuar los pasos de ensamblaje restantes.
Canopy s Capota WARNING Choking Hazard: Remove and immediately discard foam on the canopy wire. 1 ADVERTENCIA Peligro de estrangulamiento: Saque y deseche inmediatamente la espuma de goma del alambre de la capota. Insert canopy wire into the canopy mounts on each side of the stroller as shown. Ponga el alambre de la capota en los montajes de la capota en cada costado del cochecito como se indica. 2 SNAP! ¡CLIC! 3 To adjust. Para ajustarlo.
&RONT 7HEEL s 2UEDA DELANTERA CHECK the tire pressure before using the stroller. DO NOT INFLATE above the maximum recommended inflation pressure that is written on the side of the tire. Over-inflation may cause wheel and/or tire to blowout and could result in serious injury. VERIFIQUE la presión del neumático antes de usar el cochecito. NO INFLE los neumáticos por encima de la presión máxima recomendada que se indica en el costado del mismo.
3 For easy transport or storage remove front wheel by pushing button as shown. Para facilitar el transporte o almacenamiento, saque la rueda delantera empujando el botón como se indica.
2EAR 7HEELS s 2UEDAS TRASERAS WARNING Choking Hazard: Remove and immediately discard protective end cap from each wheel. DO NOT remove rear wheels unless replacing them. Child could fall on exposed rear axle and be injured. ADVERTENCIA Peligro de estrangulamiento: Saque y deseche inmediatamente la tapa de protección de cada rueda. NO saque las ruedas traseras a menos que sea para cambiarlas. El niño podría caerse sobre el eje trasero expuesto y sufrir una lesión.
s Parking Stand Kickstand s 0IE DE APOYO SNAP! ¡CLIC! Snap kickstand onto basket as shown. Trabe el pie de apoyo en la canasta como se indica. Basket Assembly s Ensamblaje de la canasta SNAP! ¡CLIC! Fasten basket to tube with snaps as shown. Sujete la canasta al tubo con las trabas como se indica.
Removing Rear Wheel s #ØMO SACAR LA RUEDA TRASERA To remove wheel, push button and pull wheel off. Repeat with the other wheel. Para sacar la rueda, empuje el botón y saque la rueda. Repita el procedimiento en la otra rueda. Attaching and Removing Arm Rests s #ØMO SUJETAR Y SACAR LOS APOYABRAZOS To remove, push button on the underside of armrest and pull armrest off. Para sacarlo, empuje el botón de abajo del apoyabrazos y tire del mismo. To attach, push on until it snaps into place.
#HILD S 4RAY s "ANDEJA PARA NI×OS WARNING Always secure your child with the seat belt. The tray is not a restraint device. DO NOT lift the stroller by the child’s tray. Use care when snapping the tray on the stroller with a child in the stroller. ADVERTENCIA Asegure siempre a su niño con el cinturón de seguridad. La bandeja no es un dispositivo de seguridad. NO levante el cochecito agarrándolo de la bandeja para el niño. Use cuidado cuando traba la bandeja en el cochecito si hay un niño en el cochecito.
Parent’s Tray s "ANDEJA PARA PADRES Parent tray needs to snap over the top of the canopy wire. La bandeja para padres necesita estar trabada arriba del alambre de la capota. 1 2 CHECK that canopy wire is attached. VERIFIQUE que el alambre de la capota está connectado SNAP! ¡CLIC! Parent Tray with MP3 Holder s "ANDEJA PARA PADRES CON SOPORTE PARA -0 Hook Gancho To attach your MP3 player (not included), slide the hook on the tray and insert your MP3 player in either direction as shown.
0OINT (ARNESS s !RNÏS DE PUNTOS 1 2 3 4 Use slide adjuster at shoulder and waist for tighter adjustment. To change shoulder harness slots, see page 19. Use el ajustador deslizable del hombro y la cintura para ajustarlo más apretadamente. Para cambiar las ranuras del arnés del hombro, consulte la página 19.
0OINT "UCKLE s (EBILLA DE PUNTOS To convert to 3-pt harness. Para convertirlo a un arnés de 3 puntos. 1 2 3 4 Use slide adjuster at waist for tighter adjustment. Use el ajustador deslizable de la cintura para ajustarlo más apretadamente.
To Change Shoulder Harness Slots s #ØMO CAMBIAR LAS RANURAS DEL ARNÏS DEL hombro Shoulder harness anchor—larger child Anclaje del arnés del hombro - niño más grande Shoulder harness anchor—smaller child Anclaje del arnés del hombro - niño pequeño Slide adjuster Ajustador deslizable Use the shoulder harness anchors in the slots that are closest to child’s shoulder height. Use slide adjuster for further adjustment.
"RAKES s &RENOS WARNING CHECK that ADVERTENCIA VERIFIQUE brakes are on by trying to push que los frenos estén activados stroller. tratando de empujar el cochecito. 2 1 3WIVEL 7HEELS s 2UEDAS GIRATORIAS Front swivel wheels lock for use Las ruedas giratorias delanteras on uneven surfaces such as grass, se traban para el uso en stones or gravel. superficies desparejas tales como césped, piedras o grava.
4O 2ECLINE 3EAT s #ØMO RECLINAR EL ASIENTO WARNING When making adjustments to the stroller seat, make sure child’s head, arms, and legs are clear of moving seat parts and stroller frame. Fabric caught in the latches may prevent them from locking. When returning seat to upright position, do not allow fabric to be pinched in the latch.
To Fold Stroller s #ØMO PLEGAR EL COCHECITO WARNING ADVERTENCIA NO deje que el niño juegue con la manija de plegarlo. DO NOT allow child to play with the fold handle. FOLD strap is located under this pocket. La correa de PLIEGUE está ubicada debajo de este bolsillo. 1 2 Pull strap up. Tire la correa hacia arriba. 3 Storage latch will engage and stroller will rest on the parking stand. La traba de almacenamiento se activará y el cochecito descansará en el soporte de estacionamiento.
To Attach Graco® Infant Car Seat s #ØMO INSTALAR EL ASIENTO DE AUTOMØVIL PARA BEBÏ 'RACO® For models that do not come with an infant car seat one may be purchased separately. WARNING Use only a Graco® SnugRide® Click Connect™ car seat with this travel system. (Not intended for use with SnugRide® , SnugRide® 30, SnugRide® 32, SnugRide® 35, Infant SafeSeat™, AUTOBABY, LOGICO S, JUNIORBABY and ASSURA infant car seats.
1 Recline the seat and open flaps inside seating area to expose Click Connect™ mounts. Recline el respaldo y abra las aletas en el interior del lugar para sentarse para ver los soportes Click Connect™. 2 Insert carseat into stroller and push down on car seat until the latches snap into the Click Connect™ mounts. Ponga el asiento para automóvil en el cochecito y empuje el asiento para automóvil hacia abajo hasta que se trabe en los soportes Click Connect™.
4 To remove car seat: squeeze release handle at back of car seat, and lift car seat out of the stroller. Para sacar el asiento DE AUTOMØVIL apriete la manija de liberación de atrás del asiento de automóvil y levante el asiento de automóvil fuera del cochecito.
4O 5SE 4ETHER s #ØMO USAR LA CORREA The tether strap is intended to maintain control of the stroller in the case of a fall while running. DO NOT allow tether strap to lie over top of the handle. DO NOT hang items on the tether strap. La correa de sujeción tiene la intención de mantener el control del cochecito en caso de sufrir una caída mientras está corriendo. NO deje que la correa de sujeción pase por arriba de la manija. NO cuelgue artículos de la correa de sujeción.
Care and Maintenance s DO NOT MACHINE WASH SEAT. It should only be wiped with a mild soap, taking care not to soak the material. NO BLEACH. s TO CLEAN STROLLER FRAME, use only household soap and warm water. NO BLEACH or detergent. s FROM TIME TO TIME CHECK YOUR STROLLER for loose screws, worn parts, torn material or stitching. Replace or repair the parts as needed. Use only Graco replacement parts. s EXCESSIVE EXPOSURE TO SUN OR HEAT could cause fading or warping of parts.
2EPLACEMENT 0ARTS s 7ARRANTY )NFORMATION 53! 0IEZAS DE REPUESTO s )NFORMACIØN SOBRE LA GARANTÓA %% 55 In To purchase parts or accessories or for warranty information in the United States, please contact us at the following: 0ARA COMPRAR PIEZAS O accesorios o para obtener INFORMACIØN SOBRE LA GARANTÓA en los Estados Unidos, por favor comuníquese con nosotros en: www.gracobaby.com or/o 1-800-345-4109 Product Registration (USA) Registro del producto (EE.UU.