
Installation Guide

3A3172B
EN
Kit Instructions
ProXChange
™
Repair Kit
Pressure Relief Procedure
1. Turn ON/OFF switch to OFF position.
2. Unplug sprayer.
3. Engage trigger lock. Always engage the trigger lock
when sprayer is stopped to prevent the gun from
being triggered accidentally.
4. Turn pressure control knob to lowest setting.
5. Put drain tube into a waste pail. Turn prime/spray
knob down or flip prime/spray lever away from
sprayer to the PRIME position to relieve pressure.
6. Hold the gun firmly to a pail. Point gun into pail. Dis-
engage the trigger lock and trigger the gun to
relieve pressure.
7. Engage the trigger lock.
Disassembly
Always perform Pressure Relief Procedure before
starting any pump repairs.
1. On sprayers with a hopper the hopper must be
removed before pump can be removed. Remove
airless hose, if necessary remove suction tube.
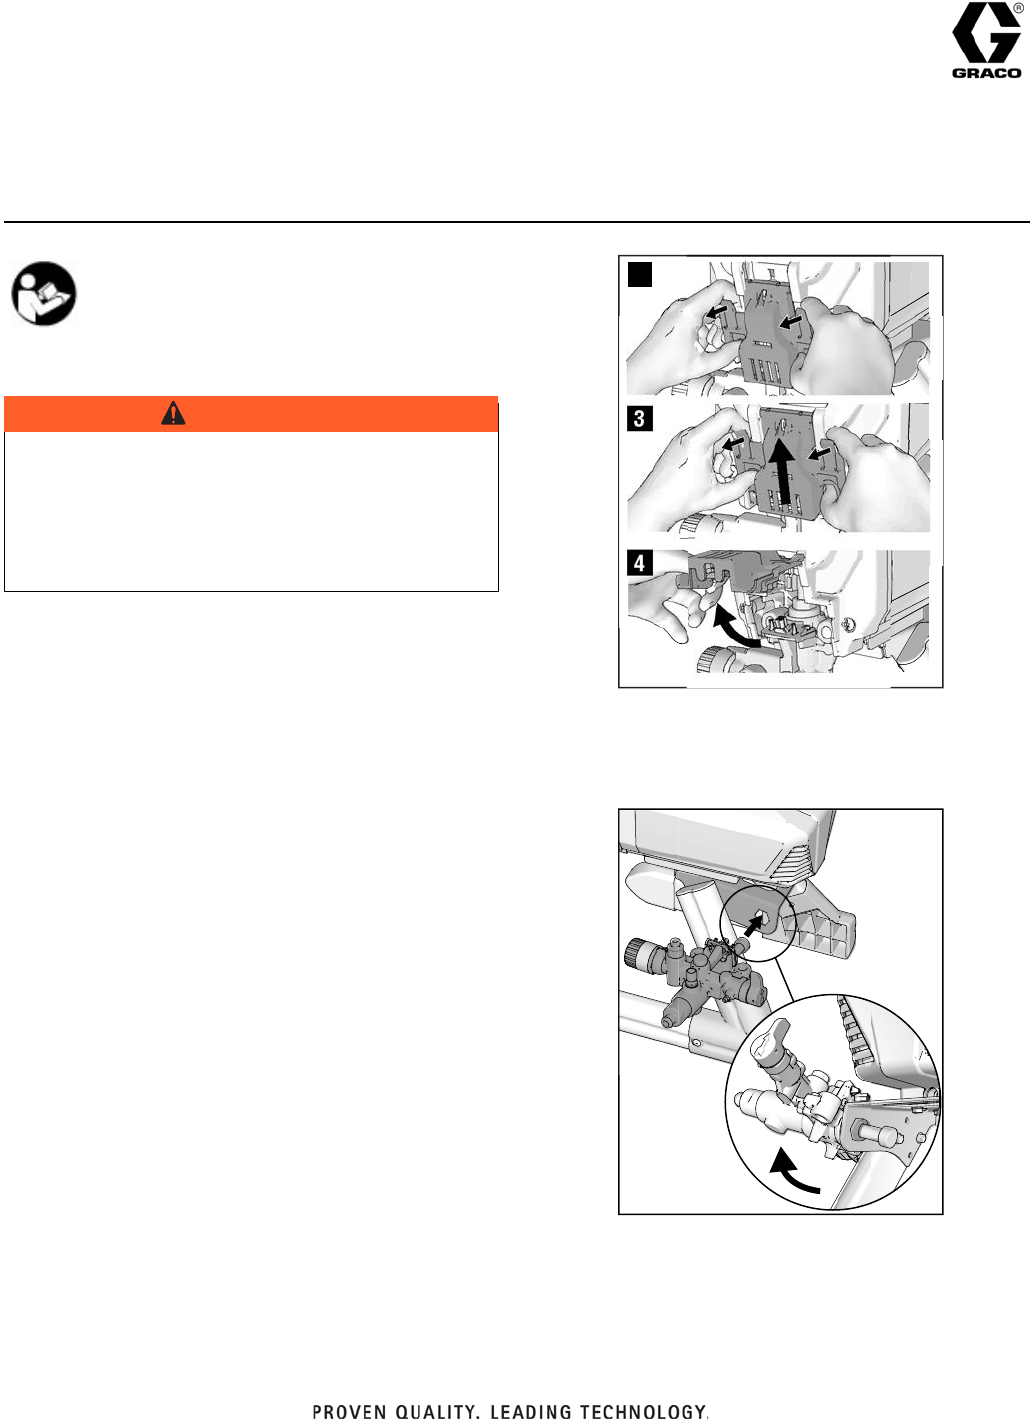
2. Pull tabs on sides of the easy access door towards
you.
3. Slide door away from the inlet end of the pump.
4. Now lift the easy access door so that it swivels out
of the way.
5. Insert hex end of pump into hex tool in the sprayer
frame and turn counter-clockwise to loosen assem-
bly. Location of the hex varies depending on the
sprayer.
6. Slide pump assembly off the mounting pins.
7. Remove entire packing assembly from pump hous-
ing including the packing spring.
IMPORTANT SAFETY INSTRUCTIONS
For detailed sprayer information and warnings, see
the Owners Manual included with your sprayer.
SKIN INJECTION HAZARD: This equipment stays
pressurized until pressure is manually relieved. To help
prevent serious injury from pressurized fluid, such as
skin injection, splashed fluid and moving parts, follow
the Pressure Relief Procedure whenever sprayer is
stopped and before sprayer is cleaned or checked, and
before equipment is serviced.
2
4
ti27463a
3
ti26931a
WARNING