
Radio User Manual
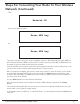
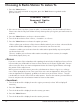

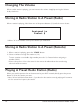
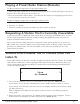
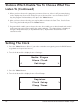


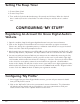
Table Of Contents
- User Guide
- Factory Reset (Menu Item)
- Clock Set
- Table of Contents
- Parts & Controls
- Internet Radio Quick Start
- What You Need Before You Can Use Your Internet Radio and Network Streamer
- Radio Controls
- Remote Control
- Connecting the Radio to Your Wireless Network
- Choosing a Radio Station
- Choosing a Pandora Radio Station
- Playing Music From Your iPod
- Changing the Volume
- Storing Radio Station Presets
- Playing a Preset Radio Station
- Requesting a Station That is Currently Unavailable
- Stations Which Enable You to Choose What You Listen to
- Setting the Clock
- Setting the Alarm
- Setting the Sleep Timer
- Configuring 'My Stuff'
- Media Player Quick Start
- Set Up Your Windows PC to Allow the Radio to Access Your Audio Files Via Windows Shares
- Locate the Shared Audio Files Using the Radio
- Listening to a Single Shared Track
- Listening to a Complete Shared Album
- Arranging (Queuing Up) Tracks For Playback Later
- Arranging (Queuing Up) Albums For Playback Later
- Controlling Playback
- Browsing the List of Tracks Currently Arranged (Queued Up) for Playback
- Removing Tracks From the List (Queue)
- Playing Tracks in Random Order
- Playing Tracks in the List (Queue) Repeatedly
- Set Up a Windows PC to Allow the Radio to Access Your Audio Files Via a UPnP Server
- Locating and Playing Media Files Using the Radio and UPnP
- Browsing the List of Tracks Currently Arranged (Queued Up) for Playback
- Arranging (Queuing Up) UPnP Tracks for Playback Later
- Arranging (Queuing Up) Albums for Playback Later
- Controlling Playback
- Removing Tracks From the List (Queue)
- Playing Tracks in Random Order
- Playing Tracks in the List (Queue) Repeatedly
- Set Up Your Windows PC to Allow the Radio to Access Your Audio Files Via Windows Shares
- Settings Menu
- Set Up Media Sharing in Windows MediaPlayer 11
- Play Music On The Internet Radio
- Troubleshooting
- Specs
- Warranty

12 Grace Internet and Network Media Player
Choosing A Radio Station To Listen To
1. Press the ‘Select’ button.
(Note: if you make a mistake at any point, press the ‘Back’ button to go back to the
previous screen.)
Internet Radio
Personal Radio
My Stuff
2. If the screen does not show < Internet radio > as shown above, turn the knob until it does.
Please note that the ‘My Stuff’ folder will only show up after you register your radio onto our
web site.
3. Press the ‘Select’ button, to choose <Internet radio>.
4. Turn the knob to choose from <Sirius>, <Location> or <Genre>.
5. Press the ‘Select’ button to choose the option you want.
<Sirius> allows you to choose a Sirius Internet Radio station if you are have a Internet Radio
enabled Sirius Radio subscription. Please see www.sirius.com for more info.
<Location> enables you to choose from the radio stations provided by any country which
you choose from a list.
<Genre> enables you to choose radio stations according to their content, for example
Classic Rock, Sport, News, etc.
1. Turn the knob until the display shows the region you want (or select ‘All’ to display all
countries),
2. Press the ‘Select’ button.
3. Turn the knob until the display shows the country you want.
4. Press the ‘Select’ button.
5. Turn the knob until the display shows the station you want.
If you are an active Sirius subscriber with a package that includes the ability to listen to Sirius
internet radio you will be able to listen to those stations on the Grace Digital radio. You can
either enter your Sirius user name and password onto the Grace Digital website or through
this portion of the radio’s menu.
When you are in the Sirius menu, press the select button to choose <log in> or <change
user>. When prompted you can enter your Sirius user name and password. After your user
name and password is accepted, go back to the main menu and select <Sirius>. You will
now be able to view the Sirius internet radio stations. Scroll to the stations you would like to
listen to and press the select button inward to listen to that station.
<Location>
<Sirius>