Google Search Appliance Enabling Windows Integrated Authentication Google Search Appliance software version 6.
Google, Inc. 1600 Amphitheatre Parkway Mountain View, CA 94043 www.google.com February 2011 © Copyright 2012 Google, Inc. All rights reserved. Google and the Google logo are registered trademarks or service marks of Google, Inc. All other trademarks are the property of their respective owners. Use of any Google solution is governed by the license agreement included in your original contract.
Contents Enabling Windows Integrated Authentication ...............................................................
Completing the Configuration Process 21 Configuring the SAML Bridge to Communicate with the Google Search Appliance 22 Checking Time Synchronization 22 Ensuring Connectivity Between the Google Search Appliance and SAML Bridge 23 Performing a Test Search 23 Troubleshooting 23 You Are Prompted When Testing Impersonation 23 Only Some Accounts Can Be Impersonated 24 Authorization Testing Results in Indeterminate Status 24 Authorization Error 25 More Troubleshooting Steps 25 Google Search Appliance: Enabling Wi
Enabling Windows Integrated Authentication Google SAML Bridge for Windows enables you to integrate Google Search Appliance into a Windows domain environment, providing a better search experience for your users. By default, a Google Search Appliance user who searches for and views secure content must enter credentials at an authentication stage and a results authorization stage.
For More Information For background information on the technology described in this document, refer to these sources: • The topic “The SAML Authentication Service Provider Interface (SPI)” in the document Managing Search for Controlled-Access Content, and the online help topics on the pages cited in that topic. • The Authentication/Authorization for Enterprise SPI Guide.
Authorize Content with the SAML Bridge The following process describes the role of the SAML Bridge in the lifecycle of a search query when the SAML Bridge is used for authorization: 1. A user creates a search query that includes secure content. 2. The search appliance authenticates the user and passes the verified identity to the authorization process. 3. The search appliance determines the search results for the user.
• IIS content servers. • IIS 6 on Windows Server 2003 • IIS 5 and 6 with Network Load Balancing (NLB) • IIS 7 on Windows Server 2008 To verify the version of IIS, do this: From the Start menu, point to Administrative Tools, then click Internet Information Services (IIS) Manager. In IIS Manager, choose Help > About. • • File share content servers. • Windows file share • Server Cluster File Share, using Microsoft Cluster Service SharePoint content servers.
To verify whether Kerberos is being used, you can use tools such as Windows Network Monitor or tcp trace or a browser extension that shows HTTP headers. You can view the headers that result from any communication with the content server. The content server should send the following header when Kerberos is in use. WWW-Authenticate: Negotiate For example, in the following header, look for the Negotiate header in the server responses. GET /ac/login.aspx HTTP/1.
3. In the right pane, select the server that hosts the SAML Bridge, right click, and select Properties. 4. In the Properties dialog box, click the Delegation tab. 5. Select Trust this computer for delegation to specified services only. 6. Select Use any authentication protocol. 7. Click the Add button. The Add Services dialog box appears. 8. Click the Users or Computers button. The Select Users or Computers dialog box appears. 9.
Granting the “Act as Part of the Operating System” Privilege When the search appliance sends an authorization request with a user name, the SAML Bridge can generate a Windows token by impersonation, but it can use the token to access remote resources only if it has the privilege “Act as part of the operating system.” The Network Service that represents the identity of the SAML Bridge Application Pool must now be configured to act as part of the operating system, if it is not already configured that way.
After the SAML bridge is installed, proceed to the section corresponding to the version of IIS that you use. • “Configuring the SAML Bridge in IIS 6.0” on page 12 • “Configuring the SAML Bridge in IIS 7 with Windows 2008” on page 14 Configuring the SAML Bridge in IIS 6.0 The SAML Bridge for Enterprise is implemented as a virtual directory that runs in IIS. In SAML Bridge 2.0, the virtual directory is created automatically when you install the SAML Bridge.
2. Right click the name of the application pool that was configured for saml bridge and select Properties. 3. In the Properties dialog box, click the Identity tab. 4. In Application pool identity, verify that Predefined is selected and that Network Service is selected in the drop-down menu. 5. Click OK to close the Properties dialog box. Configuring Authentication Requirements for the Login.aspx File The Login.aspx file is the component of the SAML Bridge that authenticates the user.
9. In the Permissions for Everyone list, check the checkbox in the Full Control row and the Allow column. 10. Click OK. This completes the process of granting all users permission to write to the logs. Verifying the Configuration of the SAML Bridge This step verifies that the Application Pool of the SAML Bridge is using Network Service and that the SAML Bridge can obtain a user’s identity. In the address field of an Internet Explorer browser, enter http://your_saml_bridge_host/samlbridge/Login.aspx.
Verifying the Configuration of the SAML Bridge Application Pool This process verifies that the Application Pool identity for the SAML Bridge is Network Service. 1. In the IIS Manager tree view, click to expand the Application Pools. 2. Select the name of the application pool that was configured for the SAML Bridge and select Advanced Setting from the Actions pane. 3. Under Process Model, verify that the value of Identity is set to Network Service. 4. Click OK to close the dialog box.
7. In the Permissions for Everyone list check the checkbox in the Full Control row and Allow column. 8. Click OK. This completes the process of granting all users permission to write to the log files. Granting Permissions for the GSA Simulator Log File These instructions enable all users to write to the search appliance simulator’s log file. 1. Select the GSA Simulator Bridge web site in IIS. 2. In the Actions panel, click Explore. 3. Right-click the gsa.log file and select Properties. 4.
Configuring the Search Appliance to Use the SAML Bridge You must now configure the Google Search Appliance so that it uses the SAML Bridge for authentication. You do this by configuring it to use the authentication SPI. You need the following values to configure the search appliance: • IDP Entity ID, which uniquely identifies the SAML Bridge installation. To locate this value, navigate to the saml-bridge virtual directory and open the Web.config file. If the field is blank in the web.
Setting Up and Using the Google Search Appliance Simulator A Google Search Appliance simulator lets you test that the SAML Bridge can gain authorization for resources on the content server, without involving the complexity of the search appliance. Once you know that the SAML Bridge works, you can reconfigure it to work with the search appliance. Like the SAML Bridge, the simulator is implemented as a .NET web application.
Configuring the Simulator to Communicate with the SAML Bridge The search appliance simulator lets you examine the communication flow between the SAML Bridge and search appliance. These steps configure the simulator by providing it with the location of the SAML bridge: 1. In File Explorer, go to the subfolder gsa-simulator. 2. In that subfolder, open the file Web.config for edit. 3. Scroll to the bottom to find .
Granting Permissions for the GSA Simulator Log File These instructions enable all users to write to the search appliance simulator’s log file. 1. Select the GSA Simulator Bridge web site in IIS. 2. In the Actions panel, click Explore. 3. Right-click the gsa.log file and select Properties. 4. On the Security tab click the Add... button. You see the Select Users, Computers or Groups dialog box. 5. In the Enter the object names to select text box, type Everyone. 6. Click Check Names. 7.
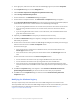
5. Enter a URL into the field. Specify one of the URL or file resources that you picked earlier, either one that you do have access to or one that you don’t have access to. Note that this page requires that if you want to test a file on a file share, you must specify the URL by including the SMB protocol name, using the following format: SMB://rest-of-url 6. Click Submit. The page returns an authorization response XML file. In the file, locate the Decision code.
Configuring the SAML Bridge to Communicate with the Google Search Appliance In a previous step (see “Configuring the SAML Bridge to Communicate with the Simulator” on page 19), you configured the SAML Bridge to communicate with the simulator. Now you must reconfigure the SAML Bridge so that it communicates with the search appliance instead of the simulator. 1. In File Explorer, go to the subfolder saml-bridge. 2. In that folder, open the file Web.config for edit. 3.
Ensuring Connectivity Between the Google Search Appliance and SAML Bridge It’s important to make sure that the two systems can communicate with each other, as follows: 1. In the Admin Console, go to Administrator > Network Settings. 2. In Network Diagnostics, enter the URL for the Login.aspx file into the URLs to Test box, as follows: http://your_ac_host/virtual_directory_name/Login.aspx, where your_ac_host is the name of the host on which the SAML Bridge is installed. 3.
• The security for the Login.aspx file security was incorrectly set up. • Your Internet Explorer browser is using enhanced security settings, and the host of SAML Bridge is not recognized as an Intranet site. If you enter credentials but are not granted access, the Kerberos configuration may be incorrect and might have duplicate SPNs configured. Contact Microsoft Support.
Suggestion This error indicates that the host on which the SAML Bridge resides might have an incompatible version of the .NET framework. Refer to the section “SAML Bridge Host Prerequisites” on page 8 for the correct version. If you’ve checked the .NET version and determined that it meets the requirements, you can reconfigure the .NET framework for IIS as follows: cd C:\WINDOWS\Microsoft.NET\Framework\your-version\ aspnet_regiis.