Configuration Guide for Postini Directory Sync
Postini, Inc. 959 Skyway Road, Suite 200 San Carlos, CA 94070 www.postini.com Part number: DSCON_6.10_08 5 June 2007 © Copyright 2007 Postini, Inc. All rights reserved. Postini, the Postini Logo, Perimeter Manager, Security Manager, Network Edition, AirPostini, and Postini Message Platform are either registered trademarks or trademarks of Postini Inc. Postini is a registered trademark of Postini, Inc. All other trademarks are the property of their respective holders.
Contents Chapter 1: Introduction to Directory Sync About Directory Synchronization 5 Installation Introduction 5 System Requirements 6 5 Chapter 2: Architecture 7 About Directory Sync Architecture 7 Technologies Used 7 Directory Servers 7 DSML 8 SSL with Basic Authentication 8 Data Flow 8 Mapping and Synchronization 9 Chapter 3: Microsoft Active Directory 11 Directory Sync with Microsoft Active Directory 11 Install Prerequisite Tools 11 Install IIS 12 Download and install MSXML 4.
Install WebSphere Express 44 Install WebSphere Application Server 44 Copy Libraries 44 Configure WebSphere Express 45 Install SOAP into WebSphere Application Server 46 Confirm WebSphere and SOAP installation 47 Install DSML 48 Unpack DSML.zip 49 Modify IBM DSML Deployment Descriptor 49 Configure CLASSPATH 50 Install IBM DSML into SOAP 50 Verify DSML installation 51 Collect information for Directory Sync setup 51 Create batchrequest.
Introduction to Directory Sync Chapter 1 About Directory Synchronization The email protection service is a managed service which filters messages, protecting your mail flow from spam, viruses, and attacks. The service stores a list of users, to allow each user to have custom quarantine and mail filter settings. With Directory Sync, the email protection service can contact your directory server to collect your user list information.
System Requirements Directory Sync requires the following: 6 • A directory server. Directory Sync can connect to Microsoft Active Directory 2000 or 2003, and Sun ONE Directory Server. • DSML v2.0. Directory Sync collects information from your directory server using the DSML v2.0 standard to translate between XML and LDAP. • SSL. Directory Sync connects to your DSML server as an SSL client. We will accept any valid certificate, including self-signed certificates. • An open port.
Architecture Chapter 2 About Directory Sync Architecture Directory Sync is an optional feature included with the enterprise edition of the email protection service. Directory Sync connects to your directory server, using a Secure Sockets Layer (SSL) connection and basic authentication. Directory Sync runs on the email protection servers. You’ll need to set up a DSML server to allow Directory Sync to connect and upload information.
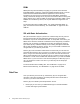
DSML DSML (Directory Services Markup Language) is a protocol which uses XML (Extensible Markup Language), a machine-readable standard format, to encode LDAP information. DSML allows different applications to share directory information over the Internet in a standard format. With DSML, applications usually communicate through HTTP, the protocol used most often for serving web pages. Directory Sync relies on DSML for all directory information.
2. Directory Sync opens a secure SSL connection to the address you have provided, and logs on to your DSML server using basic authentication. 3. Directory Sync requests a user list for a Base DN that you provide from your directory server. 4. Your DSML server opens the LDAP directory and queries the user list for the appropriate organization.
Directory Sync acts as a one-way synchronization tool. Your users and aliases in the email protection service are added, moved or deleted, but your directory server is not changed in any way. Directory Sync is launched manually from the Administration Console in the email protection service. Directory Sync is set up on a specific user organization, and synchronizes that organization with an organization unit (OU) on your directory server.
Microsoft Active Directory Chapter 3 Directory Sync with Microsoft Active Directory Microsoft Active Directory is an LDAP based directory which holds organizational information, and is often used with Microsoft Exchange. If you are using Active Directory 2000 or 2003, Directory Sync can collect this information. Allowing this connection requires setting up SSL and DSML in your environment. DSML (Directory Services Markup Language) allows an HTTP session to use SOAP to access Active Directory.
Install IIS DSML services require that IIS be installed on your server: 1. Double click the “Add / Remove Programs” option in the Control Panel. Windows will display the “Add / Remove Programs” dialog box. 2. Click the “Add / Remove Windows Components button”, and Windows will launch the Windows Components Wizard. 3. Select the “Application Server” option. 4. Click Details. 5. Check the Internet Information Services (IIS) box 6. Click OK followed by Next to install IIS. IIS is now installed on your server.
1. Double-click on the DSFW.msi file that you have downloaded earlier. 2. Windows will launch the DSML Installation Wizard. 3. Click Next on the Welcome screen to see the software’s end-user license agreement. 4. Read and accept the license agreement 5. The setup wizard will prompt you for an installation path and ask you whether everyone should be able to use it or just you. Select either option. 6. Make your selection. 7. Click Next twice. Installation will begin.
2. Enter the IIS web site name that you want to associate with DSML. If you are not sure which site to use, use the default. 3. In the IIS Virtual Directory Name field, enter “dsml” or another directory name. 4. Uncheck the Require SSL to connect to DSML Server. You will enable SSL in a later step. Disable SSL for now so that we can run the test programs that come with DSFW. 5. Click Create IIS Virtual Directory Now to move to Step 2.
. 6. In Step 2 of the configuration and enabling process, make sure the name of your Active Directory domain is correct and click Add to DSML Configuration File Now. 7. Click Close on the DSML Services Configuration dialog box to finish. The configuration and enabling process is completed. You are now ready to test for DSML setup.
Verify DSML Use the sample Visual Basic test (included with DSML Services for Windows) to test your configuration. The sample programs do not support SSL, so be sure SSL is not enabled in the DSML module for this step. Disable SSL in the DSML Module 1. Launch IIS Manager, from Start->Administrative Tools->IIS Manager. 2. Locate DSML module inside (local machine) under Web Sites->Default Web Sites. 3. Right-click on the DSML module and select Properties. 4. Click on the Directory Security tab. 5.
In the sample directory, use cscript to run “dsmltestcred.vbs”. You may want to view the sample code by typing “type dsmltestcred.vbs” to see the command line options. Remember to supply the command with a user name and password. Troubleshooting DSML Verification If running the test program is not successful, check your DSML setup by going back to Configuring DSML Services. Make sure the name of your AD is correct.
Enable SSL in the DSML Module Once you have completed the test, enable SSL in the DSML to set a secure connection. 1. Launch IIS Manager, from Start->Administrative Tools->IIS Manager. 2. Locate DSML module inside (local machine) under Web Sites->Default Web Sites. 3. Right-click on the DSML module and select Properties. 4. Click on the Directory Security tab. 5. In the Secure communications box, click Edit… 6. Check Require secure channel (SSL). 7. Click OK twice to close both dialog boxes.
5. Click Server Certificate... to start the IIS Certificate Wizard.
6. Click Next. 7. Choose Create a new certificate and click Next.
8. Choose to Prepare the request now, but send it later. Click Next. 9. Enter a name for the new certificate and leave the bit length as 1024. Click Next.
10. Enter the names for organization and organization unit that will be stored in the new certificate. and click Next. 11. Enter the full DNS name for the IIS machine which you're installing the certificate. Click Next to continue.
12. Enter the State/province and City/locality fields. Click Next. 13. Enter the location to store the certificate request file. Note this location for later. Click Next.
14. View the summary and confirm that the information is correct. Go back and make any changes if needed. When your settings are complete, click Next. 15. Click Finish to generate the new certificate request. You now have a pending certificate request, which can be processed and accepted in Microsoft Certificate Services. Add Certificate Services to IIS Enable Certificate Services, if your server does not already have Certificate Services enabled. 1.
2. Check the Certificate Services check box. A popup confirmation will appear. 3. Click Yes to confirm that you wish to enable this service. The Windows Component Wizard will open.
4. Choose Stand-alone root CA. Click Next.
5. Enter the name of the IIS machine for the Common Name for this CA. Click Next to continue. 6. Use the default locations for the certificate database settings and click Next. A confirmation dialog box will open. 7. You will need to stop and start your IIS server to enable Certificate Services. Click Yes to restart the server. 8. On the Completing Windows Component Wizard page, click Finish.
2. Click Request a certificate. 3. Click Advanced certificate request.
4. Click Submit a certificate request by using a base-64-encoded CMC or PKCS #10 file, or submit a renewal request by using a base-64-encoded PKCS #7 file. 5. On this screen, insert the content of the certificate request, which you saved to disk from the IIS Certificate Wizard. Cut and paste the content from the saved file into the dialog box. 6. Click Submit to process the request.
Issue Pending Certificate Request After a certificate request is submitted, it remains in the queue waiting to be accepted and issued. Log on as an administrator to issue the certificate you have just requested. 1. Log into the IIS machine as a user with admin privileges. 2. Go to Start -> Administrative Tools -> Certification Authority. 3. Open the tree and click Pending Requests. 4. Right-click the pending request on the right pane and click All tasks -> Issue. 5. Close Certification Authority.
2. Click Check on a pending cert. 3. Click on the saved certificate on the screen. 4. Click Download Certificate and save the certificate. Note the location where you save the certificate. Select Base-64 encoded.
Install the New Certificate Install the new certificate to IIS. 1. Launch IIS Manager from Start -> All Programs -> Administrative Tools -> IIS Manager. 2. In (local machine), navigate to Web Sites -> Default Web Sites. 3. Right-click on Default Web Sites and select Properties. 4. Go to the Directory Security tab. 5. In the Secure communications box, click Server Certificate… Windows will launch the Web Server Certificate Wizard. 6.
Enable SSL Configure Basic Authentication for Default Web Site and /dsml There are several web site authentication methods available in Windows IIS. Directory Sync tool uses Basic Authentication over SSL, which is the most common and secure method for HTTP communication. To use Basic Authentication, you must have a user account with rights to log on locally and to have access to necessary files. To select and enable Basic Authentication for the DSML module in IIS: 1.
Enable SSL Now that you have configured basic authentication, you can enable SSL for connections to the machine hosting your DSML Server. 1. In the Default Web Sites Properties dialog box, go to the Directory Security tab 2. In the Secure communications box, click Edit. 3. Check the Require secure channel (SSL) box. 4. Check the Require 128-bit encryption box. 5. Click OK to close Secure communications. 6. Click OK again to close Default Web Sites Properties. 7.
5. Add the following registry value: Name: UserTokenTTL Type: REG_DWORD Data: 0 6. Quit Registry Editor. 7. Restart IIS. Disable search entries limit By default, Active Directory will only allow 1000 search entries. If your server has more than this number of returned entries, you will need to override the default 1000 LDAP search size limit in Active Directory. The size limit is kept as a LDAP policy. You can modify the LDAP policies using Ntdsutil.exe tool in the Active Directory server. 1.
5. At the server connection command prompt, type connect to server ServerName ServerName is the DNS name of the Active Directory Server. 6. At the server connection command prompt, type q You will be returned to the previous menu. 7. At the LDAP policy command prompt, type Show Values 8. Verify that MaxPageSize is set to 1000. 9. At the LDAP policy command prompt, type Set MaxPageSize to 15000 10. At the LDAP policy command prompt, type Set MaxResultSetSize to 6000000 11.
• Server Type (MS Active Directory 2000 or 2003) • Base DN (distinguished name) Troubleshooting If you experience problems with using Directory Sync with Active Directory, check the following steps. Configuration Checklist 1. Is the Common Name for the SSL certificate identical to the hostname entered in the Directory Sync configuration page in the Administration Console? The hostname must be an Fully Qualified Domain Name (FQDN) with a DNS entry. For example, dsml.domain.com is fine, as is dirsync.
Configuration Guide for Directory Sync
IBM Lotus Domino Directory Server Chapter 4 Directory Sync with IBM Lotus Domino This document gives instructions on how to install and configure the DSML module for IBM Lotus Directory Server and optionally IBM Tivoli Directory Server, as well as requirements and details on how it works. IBM Lotus Domino Server is a server that provides e-mail, collaboration and custom application services.
If you are using an IBM Tivoli Directory Server, the DSML server connects to the IBM Tivoli Directory Server on the same machine. The IBM Tivoli directory server collects user information from your IBM Lotus Domino server, and exports it to your DSML server. Note: It is possible to use another application server, such as Apache Tomcat. However, this has not been validated. Instructions and support are available only for WebSphere Application Server (WAS).
• Application Server: Using DSML requires an application server. These instructions describe the use of the Express version of WebSphere Application Server version 5.1. It is possible to use another server, such as Apache Tomcat. However, this has not been validated and instructions are not included. • Authorization: Directory Sync requires a username and password of a user with read and execute permissions on your directory server. • Base DN: For importing users, you will need to find your Base DN.
6. Install DSML 7. Collect information for Directory Sync setup Each of these steps is documented in a separate section below. Enable LDAP support on your DSML Server LDAP service is not enabled by default in a Lotus Domino server. To enable LDAP services on an existing Domino server, load LDAP support and create a server configuration document. Load LDAP support in a Domino Server 1. In the Domino server command prompt, enter the following: load LDAP 2. Open the notes.ini file.
Install Java libraries Running the DSML server requires downloading and installing several Java libraries. Download libraries and install them on your Domino server. Note: This list includes two different versions of the Apache Xerces library. Be sure to install both. 1. Apache SOAP v2.3.1 http://www.apache.org/dyn/closer.cgi/ws/soap/ Note: There is an older version of SOAP.jar in WebSphere Express. In a later step, you will copy the soap.jar file from the Apache SOAP package into your WebSphere library.
Install WebSphere Express These steps describe installing WebSphere Application Server, which is bundled with IBM Tivoli Directory Server. If you do not already have WebSphere Application Server installed on a publicly accessible machine, follow these steps to install it. If you already have WebSphere Application Server installed, skip to the next step. Install WebSphere Application Server If you do not have WebSphere Application Server installed, run the install process now. 1.
2. Copy the soap.war file from the directory where you’ve unpacked the Apache SOAP v2.3.1 package to the C:\IBM\LDAP\V6.0\appsrv\installableApps directory. Configure WebSphere Express Open a command line session and go to the appsrv\bin directory under WebSphere. 1. Start WebSphere Application Server (WAS) by using the following command from a command prompt. startserver server1 If you are using a server than other than server1, enter that server name instead.
4. Copy the file server.xml to server.xml.original as a backup. The server.xml file is in the directory: C:\IBM\LDAP\V6.0\appsrv\config\cells\DefaultNode\nodes\DefaultN ode\servers\server1 As in Step 1, if you are using a server than other than server1, enter that server name instead. You can find the server name in the WAS log files in the logs directory under WebSphere Application Server. 5. Open “server.xml” in a text editor and add the following: xmlns:dsml="http://www.ibm.
2. Copy the file soap.war from the Apache SOAP v2.3.1 package into C:\IBM\LDAP\V6.0\appsrv\installableApps\soap.war. 3. To install SOAP into WebSphere, enter the following in a command line in the appsrv\bin directory: C:\IBM\LDAP\V6.0\appsrv\bin\wsadmin.bat -conntype NONE -c "$AdminApp install {C:\IBM\LDAP\V6.0\appsrv\installableApps\soap.war} {-configroot \"C:\IBM\LDAP\V6.0\appsrv\config\" -node DefaultNode usedefaultbindings -nodeployejb -appname soap.
Use the browser verification page You can also use a web browser to test the WebSphere application. 1. Find the port number of the SOAP connector in the SystemOut.log file. 2. In a web browser, navigate to: http://localhost:[port number]/soap/servlet/rpcrouter Where [port number] is the port number from the SystemOut.log file. 3. You should see a page showing the SOAP RPC router. You should see a page titled “SOAP RPC Router.” If this page is not available, check your SOAP and WebSphere settings.
Unpack DSML.zip 1. Find the DSML.zip file in C:\IBM\LDAP\V6.0\idstools. 2. Unzip the DSML.zip into C:\DSML. Modify IBM DSML Deployment Descriptor 1. Modify the file C:\DSML\deployDSMLSoap.xml. The original deployDSMLSoap.xml file in C:\DSML looks like this: PAGE 50xml2JavaClassName="org.apache.soap.encoding.soapenc.BeanSerializer "/>
3. Save your changes. Configure CLASSPATH WARNING: These Java name spaces need to be before other Java instances in the CLASSPATH, or the wrong version will be used. CLASSPATH is used in many Java programs, and problems with an incorrect CLASSPATH can be very difficult to debug. The exact settings for your CLASSPATH will depend on what other Java programs you are using.
Note: If you are using a different URL for the SOAP server, specify the correct URL for the SOAP server. The URL can be found in the file C:\IBM\LDAP\V6.0\appsrv\lib\app\SystemOut.log. For information about reading this file, see “Confirm WebSphere and SOAP installation” on page 47. Verify DSML installation Run the following command from C:\DSML directory to verify DSML installation: java com.ibm.ldap.dsmlClient.DsmlSoapClient "cn=Bob Level" "rulost2" -i "batchrequest.dsml" -o "result.xml" -l "log.
Use the LDAP browser to collect the following information: • User name and password to connect to your LDAP server • The proper spelling of the base DN from which to start the query You will also need to collect the following information for Directory Sync configuration: • Authorized user (name only) • Password (case-sensitive) • Host Name (no http://) • Path (including leading forward slash) • Port (no colon, just the number) • Server Type (IBM Lotus Notes) • Base DN (distinguished name)
2. With a text editor, create a file with the following content and name it “batchrequest.dsml” and save it in your C:\DSML directory. Substitute with the base DN you found in the LDAP browser.
3. Run the following command from C:\DSML directory, substitute “cn=Domino Admin” and “secret” with the proper user name and password that you were able to connect with the LDAP browser. Use double-quotes around the user name and password. Make sure you specify the correct URL for the SOAP server (see the steps to verify the SOAP installation). C:\DSML>java com.ibm.ldap.dsmlClient.DsmlSoapClient "cn=Domino Admin" "secret" -i "batchrequest.dsml" -o "result.xml" -l "log.
• Create a server configuration document • Download Apache Xerces v1.4.4, Apache SOAP v2.3.1, Java J2SE SDK v1.4.2 Update 10 • Install these libraries on your DSML Server • Download Apache Xerces v2.7.1 and rename xml-apis.jar to XMLParserAPIs.jar • Install this library on your DSML Server • Install WebSphere Application Server on your DSML Server • Copy soap.jar and soap.war files into your installation • Create DSMLv2.xsd and place the file in your schemas directory • Create soap-env.
[SOAPException: faultCode=SOAP-ENV:Server; msg=Exception while handling service request: org/apache/soap/Envelope] Cause: WebSphere Class Loader can not find the SOAP libraries. Refer to section 2.6 for information about WebSphere Class Loader. [SOAPException: faultCode=SOAP-ENV:Server; msg=service 'urn:oasis:names:tc:DSML:2:0:core' unknown Cause: IBM DSML was not installed properly. Refer to section 2.10 for information about installing IBM DSML.
Sun ONE Directory Server Chapter 5 Directory Sync with Sun ONE DS The Sun ONE Directory Server 5.2 product includes a Directory Server, an Administration Server to manage multiple directories, and Sun ONE Server Console to manage both servers through a graphical interface. Because Directory Sync extracts company information over the Internet, it is vital that all connections are secure. Directory Sync always connects to your directory server using SSL.
Enable SSL Secure Sockets Layer (SSL) provides encrypted communications between a client and server. Directory Sync uses SSL encryption and basic authentication to guarantee confidentiality and data integrity. Basic authentication requires a user name and password to connect to a directory server. SSL makes sure that transmitted data is encrypted and protected.
The first time you configure SSL on your server, you must set the password for your security device. Be sure to keep this password, as you will need it later. If you are not using an external hardware security device, the internal security device is a certificate and key database stored in the following files: ServerRoot/alias/slapd-serverID-cert7.db ServerRoot/alias/slapd-serverID-key3.db ServerRoot is the root directory of your directory server. ServerID is the ID number of your server.
Text Field Value Server Name Enter the fully qualified hostname of the Directory Server as it is used in DNS lookups, for example, east.example.com. Organization Enter the legal name of your company or institution. Most CAs require you to verify this information with legal documents such as a copy of a business license. Organizational Unity (Optional) Enter a descriptive name for your division or business unit within your company. Locality (Optional) Enter your company's city name.
When the CA sends a response, save the information in a text file. Back up the certificate data in a safe location, so you can reinstall the certificate using your backup file if needed. Install your new certificate When you receive your server certificate from the CA, you are ready to install it in your server's certificate database. 1. Log into the directory server console. Start the console from the directory where your Sun ONE Directory Server is installed. You will need root privileges. # .
2. On the top-level Tasks tab of the Directory Server console, click the Manage Certificates button. The Manage Certificates window is displayed. 3. Select the CA Certs tab, and click Install. The Certificate Install Wizard is displayed. 4. If you saved the CA's certificate to a file, enter the path in the field provided. If you received the CA's certificate via email, copy and paste the certificate including the headers into the text field provided. Click Next. 5.
Install DSML Enable DSML through the Directory Server console. 1. Log into the directory server console. Start the console from the directory where your Sun ONE Directory Server is installed. You will need root privileges. # ./startconsole 2. On the top-level Configuration tab of the Directory Server console, select the root node in the configuration tree, and select the Network tab in the righthand panel. 3. Check Enable DSML. 4. Select Only secure port.
Configuring Basic Authentication 1. Log into the directory server console. Start the console from the directory where your Sun ONE Directory Server is installed. You will need root privileges. # ./startconsole 2. On the top-level Configuration tab of the Directory Server console, select the root node in the configuration tree, and select the Encryption tab in the righthand panel. 3.
Note: You can not use cn=Directory Server as the user name in the HTTP Authentication header. To set up DSML Identity Mapping: 1. Stop the directory server 2. Using a text editor, open the dse.ldif configuration file. This configuration file is found in the same directory as the directory server. 3. Change the following settings in the file: Variable Value dsSearchBaseDN The base DN where the bind DN can be found. Normally, this base DN would be the suffix you defined when installing the directory.
Collect Information for Directory Sync setup Once you’ve enabled all components, you’ll collect information from your directory server. Directory Sync uses this information to contact your server and import settings.