Compatibility Test Suite (CTS) User Manual Open Handset Alliance revision 9 1
Contents 1. Why build compatible Android devices? 2. How can I become compatible? 2.1. Comply with Android Compatibility Definition Document (CDD) 2.2. Pass the Compatibility Test Suite (CTS) 3. Running the automated CTS 3.1. Setting up your host machine 3.2. Storage requirements 3.3. Setting up your device 3.4. Copying media files to the device 3.5. Using the CTS 3.6. Selecting CTS plans 4. Interpreting the test results 5. CTS Verifier instructions 5.1. Test Preparation 5.1.1. Hardware requirements 5.1.2.
1. Why build compatible Android devices? Users want a customizable device. A mobile phone is a highly personal, always-on, always-present gateway to the Internet. We haven't met a user yet who didn't want to customize it by extending its functionality. That's why Android was designed as a robust platform for running after-market applications. Developers outnumber us all. No device manufacturer can hope to write all the software that a person could conceivably need.
2. How can I become compatible? 2.1. Comply with Android Compatibility Definition Document (CDD) To start, read the Android Compatibility overview, which describes the goals and components of the program: http://source.android.com/compatibility/overview.html Then review the Android Compatibility Definition Document (CDD) for the requirements of and policies associated with compatible devices: http://source.android.com/compatibility/android-cdd.
3.1. Setting up your host machine Note: the steps to configure and run CTS have changed in the 4.0 release. Before running CTS, make sure you have a recent version of Android Debug Bridge (adb) installed and the 'adb' location added to the system path of your machine. To install adb, download Android SDK tools , and set up an existing IDE: http://developer.android.com/sdk/index.html#ExistingIDE http://developer.android.com/sdk/installing/index.
3.3. Setting up your device CTS should be executed on consumer (user build) devices only. This section is important as not following these instructions will lead to test timeouts and other failures: 1. Your device should be running a user build (Android 4.0 and later) from source.android.com. 2. Set up your device per the Using Hardware Devices instructions on the Android developer site. 3. Make sure your device has been flashed with a user build before you run CTS. 4.
14. For CTS versions 2.1 R2 through 4.2 R4, set up your device (or emulator) to run the accessibility tests: adb install r androidcts/repository/testcases/CtsDelegatingAccessibilit yService.apk On the device, enable Settings > Accessibility > Accessibility > Delegating Accessibility Service 15. For CTS 2.3 R4 and beyond on devices that require device administration, set up your device to run the device administration tests: adb install r androidcts/repository/testcases/CtsDeviceAdmin.
5. Run copy_media.sh: ○ To copy clips for just the default resolutions, run: ./copy_media.sh To copy clips up to a resolution of 720x480, run: ./copy_media.sh 720x480 ○ If you are not sure about the maximum resolution, try 1920x1080 so that all files are copied. ○ If there are multiple devices under adb, add the -s (serial) option to the end. For example, to copy up to 720x480 to the device with serial 1234567, run: ./copy_media.sh 720x480 s 1234567 ○ 3.5. Using the CTS To run a test plan: 1.
3. 4. 5. 6. Android—tests for the Android APIs Java—tests for the Java core library VM—tests for the Dalvik virtual machine Performance—performance tests for your implementation These can be executed with the run cts command as mentioned earlier. 4. Interpreting the test results The test results are placed in the file: $CTS_ROOT/androidcts/repository/results/.zip Inside the zip, the testResult.
The 'device information' section provides details about the device and the firmware (make, model, firmware build, platform) and the hardware on the device (screen resolution, keypad, screen type). The details of the executed test plan are present in the 'test summary' section which provides the CTS plan name and execution start and end times. It also presents an aggregate summary of the number of tests that passed, failed, timed out, or could not be executed.
details of the test failure (search for the tag corresponding to the failed test and look within it for the tag). 5. CTS Verifier instructions The Android Compatibility Test Suite Verifier (CTS Verifier) is a supplement to the Compatibility Test Suite (CTS).
5.2. CTS test procedure ● After the CTS Verifier.
● Each test contains a set of common elements (in some tests, Pass/Fail is determined automatically): ○ Info—a set of instructions to run the test. This will appear as a popup the first time each test is opened or whenever the Info button is pressed. ○ Pass—If the DUT meets the test requirements per the instructions from Info, then press the Pass button. ○ Fail—If the DUT does not meet the test requirements per the instructions from Info, then press the Fail button.
5.3. Specific test requirements 5.3.1. USB Accessory In order to run the USB Accessory test, you need a Linux computer to run the USB host program. 1. Connect the DUT to a computer 2. Execute the cts-usb-accessory program on the computer found in the CTS Verifier package. 3. A popup message will appear on the DUT. Select ‘OK’ and go into the USB Accessory Test in the CTS Verifier application.
4. Console output similar to below will appear on the computer’s console. out/host/linuxx86/ctsverifier/androidctsverifier$ ./ctsusbaccessory CTS USB Accessory Tester Found possible Android device (413c:2106) attempting to switch to accessory mode... Failed to read protocol version Found Android device in accessory mode (18d1:2d01)...
[SENT] Message from Android accessory #10 5.3.2. Camera field of view calibration This field of view calibration procedure is designed to be a quick way to determine the device field of view with moderate accuracy. Setup Print the calibration-pattern.pdf target file and mount it on a rigid backing (Print on 11” x 17” or A3): http://source.android.com/compatibility/calibration-pattern.
Setting the target width Measure the distance between the solid lines on the target pattern in centimeters to account for printing inaccuracies (~38 cm). 1. 2. 3. 4. Start the calibration application. Press the setup button and select “Marker distance” to enter the distance. Measure and enter the distance to the target pattern (~100 cm). Press the back button to return to the calibration preview.
screen, and select “Export”. ● A path to the saved report will be displayed in pop-up (e.g. /mnt/sdcard/ctsVerifierReports/ctsVerifierReportdatetim e.zip). Record the path. Future releases of CTS Verifier will support reporting directly from the device. ● Connect the device via USB to a computer with the SDK installed. ● From the computer’s SDK installation, run adb pull to download the report from the device.
clear the Pass/Fail results. 6. Release notes Note the CTS test harness has changed significantly in the Android 4.0 release. Some new features have been added included support for sharding a CTS test run onto multiple concurrent devices, as well as general faster performance. ● This CTS release contains approximately 18,000 tests that you can execute on the device. ● Please make sure all steps in section 3.3 "Setting up your device" have been followed before you kick off CTS.
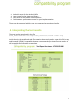
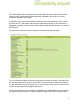
The CTS console can accept other commands while tests are in progress. If no devices are connected, the CTS host will wait for a device to be connected before starting tests. --plan -- package/-p [--package/-p ...] --class/-c [--method/-m --continue-session-id --shards --serial/-s If more than one device is connected, CTS host will choose a device automatically.
executed on devices. list commands List all 'run' commands currently in the queue waiting to be assigned to devices list results List CTS results currently stored in repository list devices List currently connected devices and their state. 'Available' devices are functioning, idle devices, available for running tests. 'Unavailable' devices are devices visible via adb, but are not responding to adb commands and won't be allocated for tests. 'Allocated' devices are devices currently running tests.