Android 3.0 User’s Guide February 23, 2011 AUG-3.0-100 Android™ mobile technology platform 3.0 AUG-3.
Legal Copyright © 2011 Google Inc. All rights reserved. Google, the stylized Google logo, Android, the stylized Android logo, Nexus, the stylized Nexus logo, Nexus S, the stylized Nexus S logo, Android Market, the stylized Android Market logo, Gmail, Google Apps, Google Calendar, Google Checkout, Google Earth, Google Latitude, Google Maps, Google Talk, Picasa, SafeSearch, and YouTube are trademarks of Google Inc.
Contents About this guide 5 Working with widgets 34 Optimizing battery life 35 Starting Android the first time 7 Welcome to Android! 8 Activating your mobile data service 9 Setting your location preferences 10 Signing into your Google Account 11 Resetting your Google Account password 12 Additional accounts 12 Backing up and restoring your data 13 Finishing setup 15 Working with apps 37 Opening and switching apps 38 Managing how apps use memory 40 Managing downloads 44 Entering and editing text 45 Usi
Using Google Search tips and tricks 82 Changing Google Search settings 84 Searchable items settings 84 Google Search settings 84 Voice Search and Voice Actions 85 Searching the web by speaking 86 Using Voice Actions 88 Changing Voice Search settings 91 Accounts 93 Adding and removing accounts 94 Configuring account sync and display options 97 Android apps 101 Books 102 Browser 103 Camera 104 Calendar 105 Calculator 106 Clock 107 Contacts 108 Email 109 Gallery 110 Gmail 111 Google Talk 112 Maps, Naviga
About this guide This guide describes how to use release 3.0 of the Android™ mobile technology platform. This guide does not describe the physical features of your tablet (its parts and accessories, how to turn it on, and so on) or its specifications; for that information, refer to your tablet’s owner’s guide. Chapter Describes “Starting Android the first time” on page 7 Starting Android and signing into your Google™ Account, so you can take full advantage of Google Apps™.
About this guide 6 Chapter Describes “Voice Search and Voice Actions” on page 85 Searching the web and controlling your tablet by speaking Voice Actions. “Accounts” on page 93 Adding and synchronizing email and other accounts, including Google Accounts and Microsoft™ Exchange ActiveSync™ accounts. “Android apps” on page 101 An overview of the diverse Google apps included with many Android tablets, including.
Starting Android the first time When you first turn on your tablet, you have the opportunity to activate your mobile data service, to sign into your Google Account, and to decide how you want to use some Google services. In this section “Welcome to Android!” on page 8 “Activating your mobile data service” on page 9 “Setting your location preferences” on page 10 “Signing into your Google Account” on page 11 “Backing up and restoring your data” on page 13 “Finishing setup” on page 15 AUG-3.
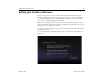
Starting Android the first time 8 Welcome to Android! The first time you power on your tablet (after setting it up, as described in your tablet’s owner’s guide), you’re welcomed to Android and invited to pick a language to work in and to start setting up and using your tablet. S Touch English if you want to work in a different language. S Touch Start to start setting up your tablet. Touch to use a different language. Touch Start. AUG-3.
Starting Android the first time 9 Activating your mobile data service On some mobile data networks, you must activate mobile data service on your tablet before you can use it to connect to the Internet. As soon as you touch Start on the Welcome! screen, your tablet starts the activation process.
Starting Android the first time 10 Setting your location preferences Google’s location service uses the Wi-Fi and mobile data networks near you to make your approximate location available to your apps. This location information can make finding your precise location by GPS much faster; it can also provide your location to apps when GPS isn’t available.
Starting Android the first time 11 Signing into your Google Account You must sign into a Google Account to use Gmail, Google Talk, and other Google Apps; to download apps from Android Market; to back up your settings and other data to Google servers; and to take advantage of other Google services on your tablet.
Starting Android the first time 12 If you have an enterprise Gmail account through your company or other organization, your IT department may have special instructions on how to sign into that account. When you sign in, your contacts, Gmail messages, Calendar events, and other information from these apps and services on the web are synchronized with your tablet.
Starting Android the first time 13 Backing up and restoring your data You can back up your settings and other data with your Google Account, so if you ever replace your tablet, you can restore your data on the new one. If you choose to use this service, your data is backed up automatically. If you previously used the backup service with the Google Account you just used to sign in, you can also choose to restore your settings from your Google Account to your tablet now.
Starting Android the first time 14 Some third-party apps also make use of the backup service, so if you reinstall one, its settings and data are restored. You can change your backup settings after you finishing setting up your tablet, see “Privacy settings” on page 132. AUG-3.
Starting Android the first time 15 Finishing setup If you aren’t connected to a mobile network, you’re prompted to set the date and time on your tablet. See “Date & time settings” on page 139. Otherwise, when setup is complete, Home opens, displaying your main Home screen. To learn more about Home and the basics of using Android, see “Home and Android basics” on page 17. AUG-3.
Starting Android the first time AUG-3.
Home and Android basics Once you’ve finished setting up your tablet, Home opens. It’s a good idea to become familiar with the basics of your tablet and how to use it—Home and its Home screens, the touchscreen, securing your tablet, monitoring and responding to status and notification messages, and so on.
Home and Android basics 18 Getting to know Home After you finish setting up your tablet, Home opens. Home is your starting point for all the features of your tablet. You can use the Customize button to add shortcuts to apps, widgets, and other features to your Home screens, and to change the wallpaper (see “Customizing Home screens” on page 31.
Home and Android basics 19 Using the touchscreen The main way to control Android features is by using your finger to manipulate icons, buttons, menu items, the onscreen keyboard, and other items on the touchscreen. You can also change the screen’s orientation. Touch To act on items on the screen, such as app and settings icons, to type letters and symbols using the onscreen keyboard, or to pres onscreen buttons, you simply touch them with your finger.
Home and Android basics 20 Using the Navigation buttons The System bar’s Navigation buttons make it easy to quickly switch among Android apps. In some media apps, the System bar controls are replaced by dim dots when you’re watching a movie, slide show, and so on, so you can better enjoy them without the distraction of the System bar. You can touch a dot as it if were the control it stands for, or touch a blank area of the System bar to restore it to full view. AUG-3.
Home and Android basics 21 Waking the tablet If you don’t use the tablet for a while, the screen dims and then darkens, to conserve the battery. 1 Press the Power button. The lock screen opens (unless you’ve turned it off; see “Securing your tablet” on page 29). 2 Touch & hold the lock icon and when it turns into a circle, drag it to the edge of the larger circle that surrounds it. Or if you’ve secured the lock screen, enter a pattern, PIN, or password. See “Securing your tablet” on page 29.
Home and Android basics 22 Finding your apps The Apps screen displays all the apps on your tablet. It’s your starting point for opening and managing the apps that came with the system and that your downloaded from Android Market or other locations. See “Working with apps” on page 37 for details about opening apps, switching among them, and more. Open and work with the Apps screen S Touch the Apps button the Apps screen.
Home and Android basics 23 Monitoring your tablet’s status The right side of the System bar displays icons indicating that you’ve received notifications, the current time, and icons indicating the tablet’s status. Notification icons Status icons See “Managing notifications” on page 24. Status icons Status icons indicate the status of your tablet at the right edge of the System bar and in the Status Details panel (which opens if you touch the time).
Home and Android basics 24 Managing notifications Notifications report the arrival of new messages, calendar events, and alarms, as well as ongoing events, such as when you have configured your tablet as a Wi-Fi hotspot. When you receive a notification, its icon appears in the System bar, to the left of the time, along with a summary that appears briefly (see “Notification icons” on page 23).
Home and Android basics Respond to a Notification 25 1 Touch a Notification icon in the System bar. The notification’s summary panel opens. Notification panels can contain a great variety of information and controls, including: G A summary of a message, along with the date and even a picture of the sender. G Controls, such as buttons to pause a playing song or to skip to the next or previous track. G Progress bars, such as those that indicate how much of an app you’ve downloaded from Market.
Home and Android basics 26 Status Details and Quick Settings You can get more details about the current date and time, networking, and battery status in with the Status Details. You can also open the Quick Settings to view and control the most common settings for your tablet, as well as accessing the complete Settings application. Open Status Details S Touch the time in the System bar.
Home and Android basics 27 3 View or change the settings you want. You can close the Quick Settings again by touching anywhere else on the screen. The Quick Settings are: Airplane mode Drag the switch to On to turn off all the tablet’s radios that transmit data, including mobile data and Wi-Fi. See “Wireless & Network settings screen” on page 121. Wi-Fi Touch to open the Wi-Fi settings. See “Connecting to Wi-Fi networks” on page 58.
Home and Android basics 28 Settings Touch to open the Settings application. See “Settings” on page 119. AUG-3.
Home and Android basics 29 Securing your tablet Initially, when you turn on or wake the tablet, the lock screen requires you to drag a lock icon to unlock the screen. But you can secure the lock screen by requiring that you draw a pattern or enter a numeric PIN or password, so only you can access your data, buy apps from Market, and so on. You may also be required to secure you lock screen by a policy set by an email account or other account you add to your tablet.
Home and Android basics 30 Warning! 1 Encryption is irreversible. The only way to revert to an unencrypted tablet is to perform a a factory data reset, which erases all your data (see “Privacy settings” on page 132). Prepare for encryption.
Home and Android basics 31 Customizing Home screens You can add app icons, shortcuts, widgets, and other items to any part of any Home screen where there’s free space. You can also change the wallpaper. For an introduction to Home, see “Getting to know Home” on page 18. Add an item to a Home screen 1 Open the Home screen where you want to add the item. For an introduction to working with Home, including how to switch Home screens, see “Getting to know Home” on page 18.
Home and Android basics 32 They take the place of the default background to your Home screens. See “Change Home screen wallpaper” on page 33. G More includes shortcuts to Browser bookmarks, to directions in Maps, and an assortment of other useful items. If there are more items in the category than can fit on one screen, outlines of additional items appear to the left or right. You can slide the screen left or right to see the additional items.
Home and Android basics Change Home screen wallpaper 33 1 Touch the Customize button at the top-right of a Home screen. 2 Touch Wallpapers. 3 Touch Gallery, Live wallpapers, or Wallpapers. Touch Gallery to use a picture that you have captured using the camera or copied to your tablet. You can crop the picture before setting it as a wallpaper. Working with pictures is described in “Gallery” on page 225. Touch Live wallpapers to open a scrolling list of animated wallpapers installed on your tablet.
Home and Android basics 34 Working with widgets Widgets are miniature apps that you can place on your Home screens. Some widgets are standalone applications, some open a related application when you touch them, and others provide a subset of useful information or controls for their related applications. Stock widgets include a clock, a Gmail widget that displays recent messages, a music player, a picture frame, a calendar that shows upcoming appointments, and so on.
Home and Android basics 35 Optimizing battery life You can extend your battery’s life between charges by turning off features that you don’t need. You can also monitor how apps and system resources consume battery power. Extend the life of your battery S Turn off radios that you aren’t using. If you aren’t using Wi-Fi, Bluetooth, or GPS, use the Settings app to turn them off. See “Wireless & networks settings” on page 121 and “Location & security settings” on page 127.
Home and Android basics 36 S Open the Settings app and touch Applications > Battery use. The Battery Use screen lists the apps that have been using the battery, from greatest to least battery use. The discharge graph at the top of the screen shows battery level over time, since you last charged the tablet, and how long you’ve been running on battery power. Thin green lines below the chart indicate short periods of time when you were connected to a charger.
Working with apps You can open and switch among numerous apps: Android manages your tablet’s resources for you so you don’t need to quit one to get the most out of another one. You can learn about how your apps memory. You can also view and work with the files and other items you’ve downloaded in such apps as Browser and Gmail. In this section “Opening and switching apps” on page 38 “Managing how apps use memory” on page 40 “Managing downloads” on page 44 AUG-3.
Working with apps 38 Opening and switching apps Home’s Apps screen has icons for all of the apps on your tablet, including any apps that you downloaded and installed from Android Market or other sources. When you open an app, the other apps you’ve been using don’t stop; they keep on running: playing music, opening webpages, and so on. You can quickly switch among your apps, to work with several at once.
Working with apps Switch to a recently used app 39 1 Touch the Recent Apps button in the System bar. A list of the names and thumbnails of apps you’ve used recently opens. 2 Touch a name or thumbnail to open that app. You can also touch the Back button list to return to your current app. or touch away from the Recent Apps Touch an icon to open an app you’ve used recently. Switch to the previous app you were using AUG-3.0-100 S Touch the Back button in the System bar.
Working with apps 40 Managing how apps use memory As described in “Opening and switching apps” on page 38, you typically don’t need to worry about managing apps beyond installing, opening, and using them. The operating system manages how they use memory and other resources automatically. But there are times when you may want to know more about how apps are using the memory and other resources in your tablet. Apps use two kinds of memory in your tablet: storage memory and RAM.
Working with apps 41 You manage how apps use storage memory directly and indirectly in many ways as you use your tablet, for example, by: G Installing or uninstalling apps (see “Market” on page 259 and “Uninstall an app” on page 43) G Downloading files in Browser, Gmail, and other apps G Creating files (for example, by taking pictures) G Deleting downloaded files or files you created (see “Managing downloads” on page 44 and the documentation for the apps you use) G Copying files to or from your t
Working with apps 42 S When viewing the Downloaded or All tab, touch the By Size icon or the Alphabetical icon to switch the order of the list. Get details about an app 1 Open the Manage Applications screen. 2 Touch an app, process, or service. You can also open the Application Info screen from Home’s Apps screen, by touching & holding an app and then dragging it to the Info icon. The Application Info screen for each app lists its name and version, along with details about the app.
Working with apps 43 1 Open the Manage Applications screen. 2 Touch the Running tab. 3 At the top-right of the screen, touch Show cached processes or Show running services to switch back and forth. The Running tab shows the apps, processes, and services that are currently running or that have cached processes and how much RAM they are using. The graph at the bottom of the screen shows the total RAM in use and the amount free.
Working with apps 44 Managing downloads Files, apps, and other items you download in Browser, Gmail, Email, or in other ways, are stored on your tablet’s internal storage. You can use the Downloads app to view, reopen, or delete what you’ve downloaded. Some mobile networks place restrictions on the size of the files you can download, to manage the demands on their networks or to help you avoid unexpected charges.
Entering and editing text You can use the onscreen keyboard to enter text in web pages, when composing mail, and anyplace else with a text field, or you can enter text by speaking instead of typing. You can also edit text: insert, delete, copy, and even paste between applicators. In this section “Using the onscreen keyboard” on page 46 “Entering text by speaking” on page 50 “Editing text” on page 52 AUG-3.
Entering and editing text 46 Using the onscreen keyboard You can enter text using the onscreen keyboard. Some apps open the keyboard automatically. In others, you touch a text field where you want to enter text to open the keyboard. The onscreen keyboard has a number of settings, as described in “Language & input settings” on page 134. You can also open the Android keyboard settings by touching the Settings key . You can enter text by speaking instead of by typing.
Entering and editing text 47 drag the insertion point by its tab to move the insertion point, to pick exactly where you want to add more text. You can also select a word or more at a time and copy, cut, and paste text. See “Editing text” on page 52. Touch a suggestion to enter it in place of the underlined word in the text field. S Touch the keys on the keyboard to enter text. As you type, words that the keyboard has suggestions for are underlined.
Entering and editing text 48 S Touch space or a punctuation mark to enter a suggested word in place of the underlined word. If you mistype a word that the keyboard recognizes, it corrects it automatically (unless you turn that feature off). If you touch the space key, the suggestion strip offers a series of punctuation marks you can touch, to replace the space with.
Entering and editing text Change the input language 49 If you’ve used the Input Method settings to make more than one language or input method available, the Input Method button appears in the System bar when the onscreen keyboard, voice input panel, or other input method is open. You can open the Input Method settings by touching the Keyboard Settings key on the onscreen keyboard, by touching Configure input methods in the panel that opens when you touch the Input Method button , or in Settings.
Entering and editing text 50 Entering text by speaking You can use voice input to enter text by speaking. Voice input is an experimental feature that uses Google’s speech-recognition service, so you must have a data connection on a mobile or Wi-Fi network to use it. Enter text by speaking You can enter text by speaking, in most places that you can enter text with the onscreen keyboard. 1 Touch a text field, or a location in text you’ve already entered in a text field.
Entering and editing text 51 key to erase the underlined text. If you start typing or entering more text by speaking, the underline disappears. You can edit the text that you enter by typing or speaking. See “Editing text” on page 52. You can change the language you want to use for voice input by touching the Input Method button just as you do for the onscreen keyboard. See “Change the input language” on page 49. AUG-3.
Entering and editing text 52 Editing text You can edit the text you enter in text fields and cut, copy, or paste text, within or across apps. Some apps don’t support editing some or all of the text they display; others may offer their own way to select text you want to work with. Edit text 1 Touch the text you want to edit. The cursor is inserted where you touched. The cursor is a blinking vertical bar that indicates where text you type or paste will be inserted.
Entering and editing text 53 Drag a selection tab to expand or reduce the range of selected text. 2 Drag either selection tab to expand or reduce the range of selected text. Or touch Select all in the Application bar. If you change your mind, you can unselect the text by touching elsewhere on screen. 3 Use the tools in the Application bar to cut, copy, or paste to replace the selected text.
Entering and editing text Paste text 54 1 Cut or copy the text to paste. See “Cut or copy text” on page 53. 2 Place the cursor in the text field where you want to paste the text, or select text you want to replace by pasting. You can paste text that you copied from one app into a text field in any app. 3 Touch Paste in the Application bar. You can also touch the Paste panel that opens above the cursor. The text is inserted at the cursor.
Connecting to networks and devices Your tablet can connect to a variety of networks and devices, including mobile networks for data transmission, Wi-Fi data networks, and Bluetooth devices, such as headsets. You can connect your tablet to a computer, to transfer files from your tablet, using a USB connection or Bluetooth. You can also share your tablet’s mobile data connection via USB, Bluetooth, or as a portable Wi-Fi hotspot.
Connecting to networks and devices 56 Connecting to mobile networks Your tablet is configured to use mobile networks to transmit data (unless your tablet is configured for Wi-Fi only). Depending on your model of tablet and how you purchased it, it may simply connect to your carrier’s network when you turn it on. Or you may need to insert a SIM card or configure details about how to connect to a specific carrier. Be sure to consult your tablet’s vendor and its owner’s guide for details.
Connecting to networks and devices Disable data when roaming 57 You can prevent your tablet from transmitting data over other carriers’ mobile networks when you leave an area that is covered by your carrier’s networks. This is useful for controlling expenses if your mobile data contract doesn’t include data roaming. 1 Open the Settings application. 2 Touch Wireless & networks > Mobile networks and uncheck Data roaming. With Data roaming unchecked, you can still transmit data with a Wi-Fi connection.
Connecting to networks and devices 58 Connecting to Wi-Fi networks Wi-Fi is a wireless networking technology that can provide Internet access at distances of up to 100 meters, depending on the Wi-Fi router and your surroundings. To use Wi-Fi on your tablet, you connect to a wireless access point, or “hotspot.” Some hotspots are open and you can simply connect to them. Others implement security features, so you must configure your tablet so it can connect to them.
Connecting to networks and devices 59 1 Open the Settings app. See “Opening Settings” on page 120. 2 Touch Wireless & networks > Wi-Fi settings. 3 Check Wi-Fi to turn it on. The tablet scans for available Wi-Fi networks and displays the names of those it finds. Secured networks are indicated with a Lock icon. If the tablet finds a network that you connected to previously, it connects to it. 4 Touch a network to connect to it.
Connecting to networks and devices 60 1 Touch & hold a network in the list 2 Touch Modify network in the dialog that opens. 3 Change the settings you want. See “Turn Wi-Fi on and connect to a Wi-Fi network” on page 58. 4 Touch Save. Receive notifications when open networks are in range By default, when Wi-Fi is on, you receive notifications in the Status bar when your tablet detects an open Wi-Fi network. 1 Turn on Wi-Fi, if it’s not already on.
Connecting to networks and devices 61 1 Turn on Wi-Fi, if it’s not already on. If you’re adding a Wi-Fi network when first setting up your tablet, Wi-Fi is turned on automatically. 2 In the Wi-Fi settings screen, touch Add Wi-Fi network (at the bottom of the list of discovered networks). 3 Enter the SSID (name) of the network. If necessary, enter security or other network configuration details. See “Turn Wi-Fi on and connect to a Wi-Fi network” on page 58. 4 Touch Save.
Connecting to networks and devices 62 Connecting to Bluetooth devices Bluetooth is a short-range wireless communications technology that devices can use to exchange information over a distance of about 8 meters. The most common Bluetooth devices are headsets for making calls or listening to music, hands-free kits for cars, and other portable devices, including laptops. There are several Bluetooth profiles that define the features and communications standards for Bluetooth devices.
Connecting to networks and devices Pair your tablet with a Bluetooth device 63 You must pair your tablet with a device before you can connect to it. Once you pair your tablet with a device, they stay paired unless you unpair them. 1 Open the Settings application. See “Opening Settings” on page 120. 2 Touch Wireless & networks > Bluetooth settings. 3 Check Bluetooth to turn it on. Your tablet scans for and displays the IDs of all available Bluetooth devices in range.
Connecting to networks and devices 64 1 Open the Settings application. See “Opening Settings” on page 120. 2 Touch Wireless & networks > Bluetooth settings. 3 Check Bluetooth to turn it on. 4 In the list of devices, touch a paired but unconnected device in the list. If the device you expected isn’t displayed, touch Scan for devices. When the tablet and the device are connected, the device is displayed as connected in the list.
Connecting to networks and devices 65 Connecting to a Windows computer via USB You can use the USB cable that came with your tablet to connect it to a Windows computer, to transfer music, pictures, and other files between your tablet and the computer. This connection uses the MTP protocol, which is supported by most recent versions of Windows. For information on connecting your tablet to a Macintosh computer, see “Connecting to a Macintosh computer via USB” on page 66.
Connecting to networks and devices 66 Connecting to a Macintosh computer via USB You can connect your tablet to a computer running Mac OS X with a USB cable, to transfer music, pictures, and other files between your tablet and the computer. This connection uses the MTP protocol, which is not supported by Mac OS X natively, so you first need to install the free Android File Transfer application on your Macintosh. It’s available from http://www.android.
Connecting to networks and devices 67 Touch to add a new folder in the current folder. Drag items to or from this window and Finder windows. S Click or Shift-click on files or folders to select them, just as you do in the Finder. S Double-click folders or touch their arrow icons to view their contents. S Use the commands in the Go menu open and close folders and to navigate back and forth among the folders you’ve opened.
Connecting to networks and devices 68 Sharing your mobile data connection You can share your tablet’s mobile data connection with a single computer via a USB cable or via Bluetooth: USB tethering or Bluetooth tethering. You can also share your tablet’s data connection with up to eight devices at once, by turning your tablet into a portable Wi-Fi hotspot. (Not all carriers and tablets support these features.
Connecting to networks and devices 69 1 Use the USB cable that came with your tablet to connect your tablet to your computer. 2 Open the Settings application. See “Opening Settings” on page 120. 3 Touch Wireless & networks > Tethering & portable hotspot. 4 Check USB tethering. The tablet starts sharing its mobile network data connection with your computer, via USB connection. An ongoing notification icon is added to the System bar, to the left of the time.
Connecting to networks and devices Share your tablet’s data connection as a portable Wi-Fi hotspot 70 1 Open the Settings application. See “Opening Settings” on page 120. 2 Touch Wireless & networks > Tethering & portable hotspot. 3 Check Portable Wi-Fi hotspot. After a moment, the tablet starts broadcasting its Wi-Fi network name (SSID), so you can connect to it with up to 8 computers or other devices. An ongoing notification is added to the System bar, to the left of the time.
Connecting to networks and devices 71 other device. Or touch Open in the Security menu to remove security from your Wi-Fi network. 6 Touch Save. AUG-3.
Connecting to networks and devices 72 Connecting to virtual private networks (VPNs) Virtual private networks (VPNs) allow you to connect to the resources inside a secured local network, from outside that network. VPNs are commonly deployed by corporations, schools, and other institutions so that their users can access local network resources when not on campus, or when connected to a wireless network.
Connecting to networks and devices Connect to a VPN 73 1 Open the Settings application. 2 Touch Wireless & networks > VPN settings. The VPNs you’ve added are listed on the VPN settings screen. 3 Touch the VPN to which you want to connect. 4 In the dialog that opens, enter any requested credentials and touch Connect. When you’re connected to a VPN, you receive an ongoing notification in the System bar, to the left of the time.
Connecting to networks and devices 74 Working with secure certificates If your organization’s VPN or Wi-Fi networks rely on secure certificates, you must obtain the certificates (in files that conform to the PKCS #12 standard) and store them in your tablet’s secure credential storage, before you can configure access to those VPN or Wi-Fi networks on your tablet.
Connecting to networks and devices 75 information about credential storage, see “Location & security settings” on page 127. You can now use the certificate that you installed when connecting to a secure network. For security, the certificate is deleted from the USB storage or SD card. AUG-3.
Connecting to networks and devices AUG-3.
Google Search You can search for information on your tablet and on the web using Google Search. You can also search the web by speaking, instead of typing: see “Voice Search and Voice Actions” on page 85. In this section “Searching your tablet and the web” on page 78 “Using Google Search tips and tricks” on page 82 “Changing Google Search settings” on page 84 AUG-3.
Google Search 78 Searching your tablet and the web You can use Google Search to find information on your tablet and the web. AUG-3.
Google Search Search your tablet and the web by typing 79 1 Return Home . 2 Touch the Google Search button at the top-left of the screen. 3 Start typing what you want to search for. As you type, suggestions from Google web search appear below the Search box, and results from your tablet and local searches appear to the right. You can touch a suggestion’s arrow icon to enter it in the Search box.
Google Search 80 by the application’s own icon in the search box. See the documentation for those applications for information about searching in them. You can use the Search settings to configure some aspects of Google web search (for example, whether it personalizes search results for you), and what tablet features you want to include in searches. See “Changing Google Search settings” on page 84.
Google Search 81 1 Open Google Search. 2 Touch the Menu button at the top right and touch Search settings. 3 Touch Google Search. 4 Check or uncheck Use My Location depending on whether you want to inform Google of your location when using Google Search, to see local results. 5 Check or uncheck Personalized search depending on whether you want Google servers to make search suggestions based on your interests and previous searches.
Google Search 82 Using Google Search tips and tricks The following techniques are examples of shortcuts to getting the most out of Google Search and Voice Search. For the latest list of tips and tricks, visit the Google Help Center. AUG-3.
Google Search AUG-3.
Google Search 84 Changing Google Search settings You use the Google Search settings to configure which data on your tablet you want to be able to search, manage your privacy, and to configure a number of other settings. S To change Google Search settings, touch in the Google Search box on the Home screen to open Google Search, touch the Menu button at the top right, and touch Search settings.
Voice Search and Voice Actions You can search for information on the web and control your tablet by speaking, with Voice Search. You can also use Voice Actions to control your tablet in a number of ways, such as sending messages or setting Clock alarms. In this section “Searching the web by speaking” on page 86 “Using Voice Actions” on page 88 “Changing Voice Search settings” on page 91 AUG-3.
Voice Search and Voice Actions 86 Searching the web by speaking You can use Voice Search to search the web by speaking, instead of by typing. To learn about searching the web and your tablet by typing, see “Google Search” on page 77. Search the web by speaking 1 Return Home. 2 Touch the Microphone button at the top-left of the screen. The first few times you open Voice Search, it offers hints about how to use it and offers to play an introductory video.
Voice Search and Voice Actions 87 3 Speak the words you want to search for on the web. You can simply say words you want to search for, or you can use the techniques described in “Using Google Search tips and tricks” on page 82. You can also speak Voice Actions, which are detailed in “Using Voice Actions” on page 88. When you’re finished speaking, Voice Search analyzes your speech and Browser opens, displaying results of a Google Search on the web. See “Browser” on page 219.
Voice Search and Voice Actions 88 Using Voice Actions You can use Voice Actions in Voice Search to text your contacts, get directions, send email, and to perform a number of other common tasks, in addition to searching the web. For example, you can say: G “Set alarm for 8:30am” G “Send email to Marcus Foster. Subject: Coming tonight? Message: Hope to see you later.
Voice Search and Voice Actions 89 Followed by one or more optional words Results Examples “Navigate to,” followed by an address, name, business name, type of business, or other destination Maps opens with spoken, turn-by-turn directions to your destination, or a list of possible matching destinations. “Navigate to Union Square, San Francisco.” The name of one of your contacts. If there is a single match, Contacts opens with details about your contact.
Voice Search and Voice Actions Say 90 Followed by one or more optional words “Note to self” followed by the message you want to send to yourself “Set alarm” “Listen to” followed by words for music you want to search for, such as the name of a song, artist, or album AUG-3.0-100 “Time” or “for” followed by a time, such as “10:45am” or “20 minutes from now” “Label” followed by a label for the alarm Results Examples Gmail opens where you can complete a message to yourself before sending it.
Voice Search and Voice Actions 91 Changing Voice Search settings You use the Voice Search settings to configure which data on your tablet you want to be able to search, manage your privacy, and to configure a number of other settings. S To change Voice Search settings, touch the Voice Search icon on the Home screen to open Voice Search, touch the Menu button at the top right, and touch Settings. Language Displays the language you want Voice Search to recognize. Touch to change languages.
Voice Search and Voice Actions AUG-3.
Accounts You can sync contacts, email, calendar events, and other information with your tablet from multiple Google Accounts, Microsoft Exchange ActiveSync accounts, or other kinds of accounts, depending on the applications installed on your tablet. For example, you could start by adding your personal Google Account, so your personal email, contacts, and calendar are always available.
Accounts 94 Adding and removing accounts You can add multiple Google Accounts and Microsoft Exchange ActiveSync accounts. You may also be able to add other kinds of accounts, depending on your applications. Some you can add in the Accounts & Sync settings, as described in this section. Others you add using an application that works with those kinds of accounts; for example, you can add IMAP and POP3 email accounts with the Email application (see “Adding and changing email accounts” on page 209).
Accounts 95 Touch Add account. 2 Touch Add account. 3 Touch the kind of account to add. 4 Follow the onscreen steps to enter the required and optional information about the account. Most accounts require a username and password, but the details depend on the kind of account and the configuration of the service you’re connecting to.
Accounts 96 how to add an email account based on IMAP, POP3, or SMTP, using the Email application. 5 Configure the account. Depending on the kind of account, you may be asked to configure what kinds of data you want to sync to the tablet, name the account, and other details. When you’re finished, the account is added to the list in the Accounts & Sync settings. Depending on how you configured the account, email, contacts, and other information start syncing to your tablet.
Accounts 97 Configuring account sync and display options You can configure background data use and synchronization options for all of the applications on your tablet. You can also configure what kinds of data you synchronize for each account. Some applications, such as Gmail and Calendar, have their own synchronization settings. Some applications, such as Contacts, Gmail, and Calendar, can sync data from multiple applications.
Accounts 98 you can touch the Menu button then touch Accounts. in the top-right of the Application bar and The screen displays your current sync settings and a list of your current accounts. indicates that some or all of an account’s information is configured to sync automatically with your tablet. indicates that none of an account’s information is configured to sync automatically with your tablet.
Accounts Change an account’s sync settings 99 1 Open the Accounts & Sync settings. 2 Touch the account whose sync settings you want to change. The Sync Settings screen opens, displaying a list of the kinds of information the account can sync. Checked items are configured to sync to your tablet. 3 Check or uncheck the kinds of information you want to sync to the tablet.
Accounts AUG-3.
Android apps In addition to Home, Google Search, Settings, and the core features of the Android platform, your tablet comes with an assortment of apps for reading email, browsing the web, shooting pictures and movies, listening to music, and more. This section introduces you to some of the Android apps from Google that may be included on your tablet. See your tablet’s documentation for details about its specific apps. Visit Android Market on the web (http://market.android.
Android apps 102 Books Use Books to read eBooks you purchase or download for free from the web-based Google Books service. You can read your books online or mark them for availability offline, so you can read them when you don’t have an Internet connection (such as on an Airplane). You can also use Books as your starting point for browsing or searching for books in the Google Books store. To learn more, visit the Android Apps page on the Google Mobile Help Center (http://www.google.
Android apps 103 Browser Use Browser to view webpages and to search for information on the web. As with PC-based browsers, you can bookmark pages you want to return to, view your history, and even synchronize your bookmarks with Google Chrome. Use Browser’s tabs to switch quickly from one site to another. To learn more, visit the Android Apps page on the Google Mobile Help Center (http://www.google.com/support/mobile/bin/answer.py?answer=1196682). AUG-3.
Android apps 104 Camera Camera is a combination camera and camcorder that you use to shoot and share pictures and videos using your front or back camera lens. Camera offers a variety of preset and manual settings for controlling your exposures in many lighting conditions. To learn more, visit the Android Apps page on the Google Mobile Help Center (http://www.google.com/support/mobile/bin/answer.py?answer=1196682). AUG-3.
Android apps 105 Calendar Calendar on the tablet works with the web-based Google Calendar calendaring service. It can also with the Microsoft Exchange ActiveSync calendaring service. You can view your Calendar events by the day, week, or month, and in other views. You can also create and change events and configure Calendar to notify you about upcoming events. To learn more, visit the Android Apps page on the Google Mobile Help Center (http://www.google.com/support/mobile/bin/answer.py?answer=1196682).
Android apps 106 Calculator You can use Calculator to solve simple arithmetic problems or use its advanced operators to solve more complex equations. Then paste the results into Gmail or another app. To learn more, visit the Android Apps page on the Google Mobile Help Center (http://www.google.com/support/mobile/bin/answer.py?answer=1196682). AUG-3.
Android apps 107 Clock Use Clock to display the date and time in large characters on your screen. You can also use it to set alarms to sound once or on a repeating schedule (such as at 8 every weekday morning). To learn more, visit the Android Apps page on the Google Mobile Help Center (http://www.google.com/support/mobile/bin/answer.py?answer=1196682). AUG-3.
Android apps 108 Contacts Contacts gives you quick and easy access to the people you want to reach. You can set Contacts to sync details about your contacts with each Google Account or Microsoft Exchange ActiveSync account you add to your tablet: any changes you make to your contacts on the tablet, on the web, or on another device are made everywhere the next time you sync.
Android apps 109 Email Use Email to read and send email from services other than Gmail. Email includes a wizard that makes it easy to configure it for several popular email service providers, including those based on IMAP, POP3, and Microsoft Exchange ActiveSync. To learn more, visit the Android Apps page on the Google Mobile Help Center (http://www.google.com/support/mobile/bin/answer.py?answer=1196682). AUG-3.
Android apps 110 Gallery Use Gallery to view pictures and play videos that you’ve taken with Camera or copied onto your tablet form a computer or other source. You can also view pictures in Picasa web albums. You can perform basic editing tasks on pictures and set them as your wallpaper or contact picture. You can also share your pictures and videos with friends, via email or messaging, or by uploading them to the Picasa and YouTube web sites.
Android apps 111 Gmail Gmail is an Android application for working with Google’s web-based email service: you can read, send, label, and respond to messages, and Gmail keeps everything synced among the web, your tablet, and any other places you work with Gmail. To learn more, visit the Android Apps page on the Google Mobile Help Center (http://www.google.com/support/mobile/bin/answer.py?answer=1196682). AUG-3.
Android apps 112 Google Talk Talk is Google’s instant messaging and audio and video chat service. You can use it to communicate in real time with other people who also use Google Talk, on another Android tablet or phone or on a computer. To learn more, visit the Android Apps page on the Google Mobile Help Center (http://www.google.com/support/mobile/bin/answer.py?answer=1196682). AUG-3.
Android apps 113 Maps, Navigation, Places, and Latitude Use Maps to find your current location; to view real-time traffic conditions, to get detailed directions by foot, public transportation, bicycle, or car; and to navigate by using spoken, turn-by-turn driving instructions through free Google Maps Navigation (Beta). You can find street addresses, landmarks, and places of business, and locate these points-of-interest directly on a street map or satellite image.
Android apps 114 Market Android Market provides direct access to more than 100,000 apps. Browse and search for your favorite games ranging from casual to arcade & action to brain & puzzle and more. Don’t forget to check out the entertainment section or search for wallpapers and widgets to customize your new tablet. To learn more, visit the Android Apps page on the Google Mobile Help Center (http://www.google.com/support/mobile/bin/answer.py?answer=1196682). AUG-3.
Android apps 115 Movie Studio Use Movie Studio to edit the videos you take with Camera or copy onto your tablet into movies. You can cut and order scenes, add a sound track, and so on. To learn more, visit the Android Apps page on the Google Mobile Help Center (http://www.google.com/support/mobile/bin/answer.py?answer=1196682). AUG-3.
Android apps 116 Music Use Music to listen to music and other audio files that you copy from your computer (see “Connecting to networks and devices” on page 55). To learn more, visit the Android Apps page on the Google Mobile Help Center (http://www.google.com/support/mobile/bin/answer.py?answer=1196682). AUG-3.
Android apps 117 YouTube YouTube is Google’s online video streaming service for viewing, discovering, and sharing videos. To learn more, visit the Android Apps page on the Google Mobile Help Center (http://www.google.com/support/mobile/bin/answer.py?answer=1196682). AUG-3.
Android apps 118 AUG-3.
Settings You use the Settings application to configure how your tablet looks, sounds, communicates, protects your privacy, and operates in many other ways. Many applications also have their own settings; for details, see the documentation for those applications.
Settings 120 Opening Settings The Settings application contains most of the tools for customizing and configuring your tablet. The Quick Settings also offers convenient access to several of the most commonly used settings. See “Status Details and Quick Settings” on page 26. Open Settings S Touch the time in the lower-right of the System bar to open the Status Details, touch in the Status Details to open Quick Settings, and then touch Settings. See “Status Details and Quick Settings” on page 26.
Settings 121 Wireless & networks settings Use Wireless & Network settings to configure and manage connections to networks and devices via Wi-Fi, Bluetooth, mobile networks, and via a USB connection. You also use Wireless & Network settings to configure connections between your tablet and virtual private networks (VPNs), to connect other devices to the Internet using your tablet’s mobile data connection, and to turn off all radios with Airplane mode.
Settings 122 Wi-Fi disconnect policy Opens a dialog where you can set when you want to disconnect from Wi-Fi networks and connect to mobile data networks: when the screen turns off (uses more mobile data), never when plugged in, or never (uses more battery power). Wi-Fi networks Displays a list of Wi-Fi networks you’ve previously configured and those detected when the tablet last scanned for Wi-Fi networks. See “Connecting to Wi-Fi networks” on page 58.
Settings Tethering & portable hotspot settings screen 123 For details about these settings, see “Sharing your mobile data connection” on page 68. USB tethering Check to share your tablet’s mobile network data connection with your computer, via a USB connection. Portable Wi-Fi hotspot Check to share your tablet’s mobile network data connection as a portable Wi-Fi hotspot.
Settings 124 Data usage Only available if your carrier enforces a mobile network data use policy. Displays the amount of data you’ve transmitted over the mobile network in the current period, the data threshold (the amount of data you can transmit before the policy is enforced), and the time when the next period starts.
Settings 125 Sound settings Use the Sound settings to configure how, and at what volume, the tablet plays music or other media with audio, notification ringtones, and alarms. You also use these settings to pick the notification ringtone you prefer and whether you hear audible feedback when touching or locking and unlocking the screen. Volume Opens a dialog with three sliders for adjusting the volume of music and other media audio, notification ringtones, and alarms.
Settings 126 Screen settings Use the Screen settings to configure brightness and other screen settings. Brightness Opens a dialog for adjusting the brightness of the screen. You can check Automatic brightness to set the tablet to adjust the brightness automatically, using the tablet’s built-in light sensor. Or uncheck that option to use the slider to set a brightness level you want at all times when using the tablet. For the longest battery life between charges, use the dimmest comfortable brightness.
Settings 127 Location & security settings Use the Location & Security settings to configure how you want the tablet to determine your location (this affects accuracy) and how you want to share your location with Google and others. You can also configure settings that help secure your tablet and its data.
Settings 128 Visible passwords Check to briefly show each character of passwords as you enter them, so that you can see what you enter. Device administrators Opens a screen with a list of the applications you have authorized to be administrators for your tablet.
Settings 129 Applications settings You use the Applications settings to view details about the applications installed on your tablet, to manage their data, to force them to stop if they misbehave, and to set whether you want to permit installation of applications that you obtain from web sites and email. Applications settings screen Manage applications Opens a list of all the applications and other software installed on your tablet, along with their sizes and tools for managing them.
Settings 130 Stay awake Check to prevent the screen from dimming and locking when the tablet is connected to a charger. Don’t use this setting with a static image on the tablet for long periods of time, or the screen may become marked with that image. Allow mock locations Check to permit a development tool on a computer to control where the tablet believes it is located, rather than using the tablet’s own internal tools for this purpose. AUG-3.
Settings 131 Accounts & sync settings Use the Accounts & Sync settings to add, remove, and manage your Google Accounts and other accounts. You also use these settings to control how and whether applications send, receive, and sync data on their own schedules, and whether applications can synchronize user data automatically. Gmail, Calendar, and other applications may also have their own settings to control how they synchronize data; see the documentation for those applications for details.
Settings 132 Privacy settings You use the Privacy settings to manage whether your settings and other data are backed up to Google servers, using your Google account. You also use these settings to erase all the data on your tablet by performing a factory data reset. Back up my data Check to back up some of your personal data to Google servers, with your Google Account. If you replace your tablet, you can restore the data you’ve backed up, the first time you sign in with your Google Account.
Settings 133 Storage settings Use the Storage settings to monitor the used and available space on your tablet’s internal storage. You can also view and manage the storage used by applications; see “Managing how apps use memory” on page 40. You can view, reopen, and delete files you’ve downloaded with Browser, Gmail, or Email with the Downloads application; see “Managing downloads” on page 44. AUG-3.
Settings 134 Language & input settings Use the Language & Input settings to select the language you want to work with on your tablet. You can also configure the Android voice input feature, described in “Entering text by speaking” on page 50, and the text-to-speech synthesizer, for applications that can take advantage of it, such as TalkBack (see “Accessibility settings” on page 138). You can configure the onscreen keyboard or other input methods.
Settings Google Voice Recognition settings screen 135 Language Opens a screen where you can set the language you use when entering text by speaking. SafeSearch Opens a dialog where you can set whether you want Google SafeSearch filtering to block some results when you use Google Voice Search: Block no search results (off), only explicit or offensive images (moderate), or both explicit or offensive text and images (strict).
Settings 136 Speech rate Opens a dialog where you can select how quickly you want the synthesizer to speak. Language Opens a dialog where you can select the language of the text you want the synthesizer to read. This is particularly useful in combination with the Always Use My Settings setting, to ensure that text is spoken correctly in a variety of applications. Engines Lists the text-to-speech engines installed on your tablet. Touch one to view or change its settings.
Settings 137 Auto-correction Check to automatically enter a suggested word, highlighted in the strip above the keyboard, when you enter a space or punctuation. See “Using the onscreen keyboard” on page 46. Show correction suggestions Check to show suggested words in a strip above the onscreen keyboard as you type. See “Using the onscreen keyboard” on page 46. AUG-3.
Settings 138 Accessibility settings You use the Accessibility settings to configure any accessibility plug-ins you have installed on your tablet. Accessibility Check to enable all installed accessibility plug-ins. KickBack Check to have the tablet vibrate briefly as feedback as you navigate the user interface, touch buttons, and so on. This setting is only included if your tablet has a vibration feature.
Settings 139 Date & time settings Use Date & Time settings to set your preferences for how dates are displayed. You can also use these settings to set your own time and time zone, rather than obtaining the current time from the mobile network. Automatic date & time Uncheck to set the date and time on the tablet manually, rather than obtaining the current time from the mobile network.
Settings 140 About tablet About tablet includes information about your tablet. About tablet screen System updates Opens a screen that reports on the availability of Android system software updates. Status Opens the Status screen with information about your battery, mobile network connection, and other details. Battery use Opens a list of the applications and operating system components you have used since you last charged the tablet, sorted by the amount of power they have used.