
Solar Controller User Manual (GP-PWM-30-UL)
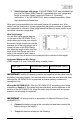

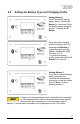
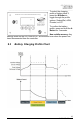
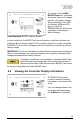
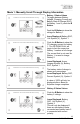
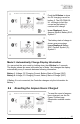
Table Of Contents
- 1.0 Installation Overview
- 2.0 IMPORTANT SAFETY INSTRUCTIONS
- 3.0 Tools and Materials Needed
- 4.0 Choosing a Location
- 5.0 Choosing a Battery
- 6.0 Installation Instructions
- 7.0 Wiring Diagram
- 8.0 Operating Instructions
- 9.0 Display Symbols
- 10.0 Inverter Control (on/off)
- 11.0 USB Charging
- 12.0 Bluetooth® Wireless Technology
- 13.0 Frequently Asked Questions (FAQs)
- 14.0 Troubleshooting Problems
- 15.0 Limited Warranty
- 16.0 Installation Template

GP-PWM-30-UL
_______________________________________________________________________
20
© 2019 Go Power!
Push the B Button to show
the PV charging current for
battery 2. The GP-PWM-30-
UL will begin to limit the
current as the battery 2
reaches a full charge.
Icons Displayed: Arrow,
Ampere Symbol, Battery SOC,
Symbol 2
The battery state of charge is
shown as a percentage.
Icons Displayed: Battery
SOC, Percent Symbol (%),
Symbol 2
Mode 2: Automatically Change Display Information
You can select the auto mode by holding down the A Button for 3 seconds.
The display shows the same information as in Mode 1 but changes the display
automatically every 8 seconds between following information:
Battery 1: Voltage; PV Charging Current; Battery State of Charge (SOC)
Battery 2: Voltage; PV Charging Current; Battery State of Charge (SOC)
If Battery 2 is not connected, the Controller changes only the information for
Battery 1.
8.6 Resetting the Ampere Hours Charged
To reset the count of ampere
hours charged, use the Go
Power! Connect app
(Bluetooth
®
enabled version
only).
GP-PWM-30-UL Solar Controller
GP-PWM-30-UL Solar Controller
GP-PWM-30-UL Solar Controller
GP-PWM-30-UL Solar Controller with Bluetooth® Wireless Technology
GP-PWM-30-UL Solar Controller with Bluetooth® Wireless Technology
GP-PWM-30-UL Solar Controller with Bluetooth® Wireless Technology