
User's Manual


GO MBW Getting Started Guide
GO MBW Getting Started GuideGO MBW Getting Started Guide
GO MBW Getting Started Guide
Draft Version - Confidential - Page 21
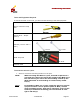
Tools and Equipment Required
To mount the WLS on the wall, you will need the following tools and equipment.
Power connector crimp
tool
Screw driver – Philips
(size 2)
Ratchet (10 mm. and 17
mm.)
10 mm. 17 mm.
RJ45 crimp tool
HT-210A
Console cable
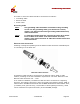
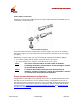
To mount the unit on a pole:
1. Select a convenient mounting location on the pole.
NOTE: When mounting the WLS on a pole, it should be placed on a
pole that can support four times the weight of the WLS (as in
the wall mount), as well as the wind loading created by the
WLS (maximum of about 470 kg for wind velocity of 200
km/h).
Noter: En installant le WLS sur un pole, il doit être place sur un pole
qui peut soutenir 4 fois le poids le poids du WLS ( comme
dans le pendage mural). Ainsi que la charge du vent crée par
le WLS (un maximum de 470 kg pour une vélocité de vent
égal a 200 km/h).
Power