
Instruction Manual


www.glp.de
10 GLP German Light Products GmbH
2.4 Connections
2.4.1 Power Supply
~100-240 Volt AC, 50-60 Hz, earth contact type plug - Powercon
Connected load 350 VA (W) <=> T5A (micro-fuse 5x20mm)
Please see printing on the case for the right electronic supply!
Disconnect from the mains supply for changing the fuse and use
only the above described micro-fuse type.
2.4.2 DMX
USITT DMX-512 Standard input/output in 5 pin connectors.
Pin 1 = [Ground] / Pin 2 = [-] / Pin 3 = [+] / Pin 4&5 N.C.
The DMX- Addressing starts at the DMX- Address [001].
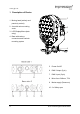
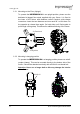
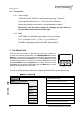
3 The Menu Field
You’ll find the control board on the side part of the arm. It allows you
to make all necessary adjustments of the
I
I
M
M
P
P
R
R
E
E
S
S
S
S
I
I
O
O
N
N
X
X
4
4
.
. With the
Mode-key you get into the main menu. Afterwards you can navigate
through the menu with the Up/Down-keys. Push the Enter-key to get
in the next menu level or to confirm your settings. Make them and set
functions ON/OFF with the Up/Down-keys. Confirm and save it with
the Enter-key (the display shows OK). Push the Mode-key to cancel
the entry and go back to the main menu.
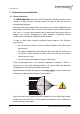
Mod e Down
En t e r Up
To lock or unlock the keys of the menu field press Mode+Enter+Up simultaneously.
DOWN - UP
MODE - ENTER
Level1 Level 2 Level 3 Level 4 Remark
DMX Start
Address 001
Set the DMX start address
Special Manual DMX Manual control of all fixture functions
Pan Manual control for Pan (X-movement)
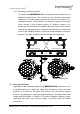
Pattern
Byte 3
Manual control for Pattern Byte 3 LED 17 -19
Pattern
Byte 2
Manual control for Pattern Byte 2 LED 9 - 16
Pattern
Byte 1
Manual control for Pattern Byte 1 LED 1 - 8
Pattern Manual control for Pattern channel / bank
Zoom Manual control for Zoom
Speed
Movements
Manual control for Pan/Tilt movements