
Gas Griddle (Thermostat Controlled) Conversion Kit Instructions


Rev. C O:\Service\Public\service bulletins\999239 Gas Conversion Thermostat Griddle
Gas Griddle (Thermostat Controlled)
Conversion Kit Instructions
Do not attempt gas conversion by yourself. Gas conversion of your unit is to be
made by a certifi ed/licensed technician. Locate an authorized Globe servicer at
www.globefoodequip.com
CONVERSION
Instructions are for conversion from Natural Gas to Propane (L.P.) on all models. The conversion should be done
before connecting the unit to the gas supply. Units are shipped from the factory equipped for use on natural gas.
Parts necessary for L.P. (liquid propane) are provided with the unit. Turn off the main gas supply before doing
any maintenance. (Use only factory supplied regulator!)
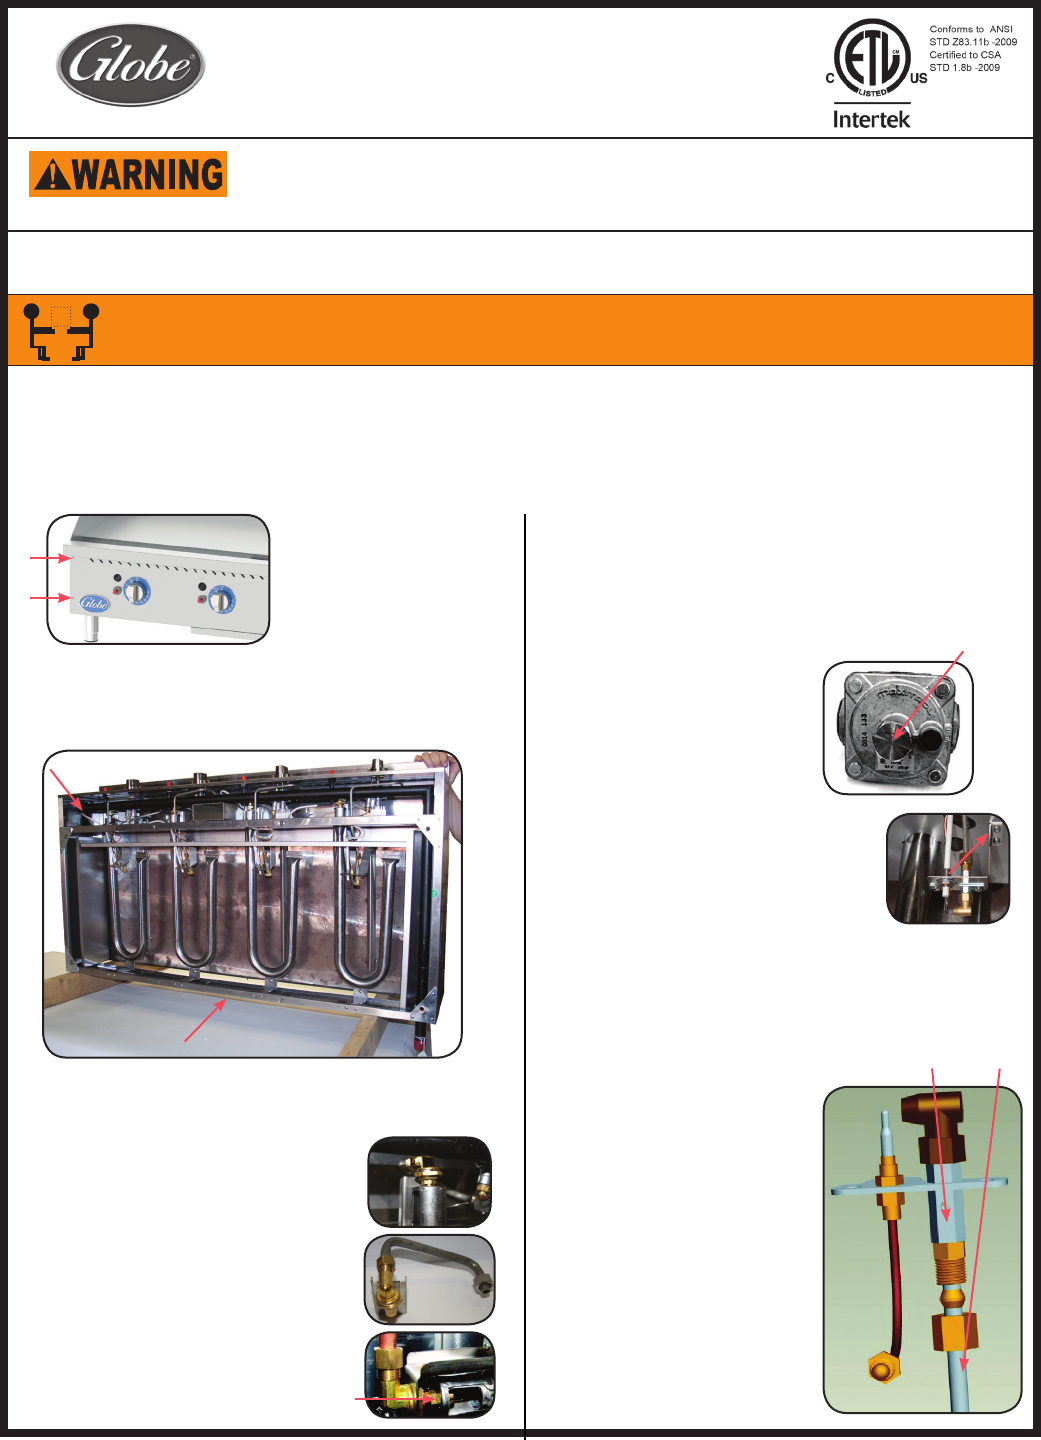
1. Remove the knobs and
front panel to help with
access. Loosen and remove
the 4 screws on the front of
the control panel, Remove
the panel from the front of
the griddle. Also, remove the
crumb tray from underneath
the griddle and set it off to the
side.
3. Remove the main burner tube,
loosen the gas supply tube at the gas
control unit end of the supply tube
to allow the tube to be moved easily
without bending.
Main
Injector
Pilot Burners
8. Remove the pilot gas supply pipe. First
remove the two screws on the mounting
bracket. Then loosen both ends of the
pilot supply pipe and withdraw the pilot
injector from inside the pilot burner.
9. Determine the correct injector size for
the corresponding gas from the rating
label. Replace with the correct size
injectors.
10. Reconnect the supply tube
to the base of the pilot burner
and tighten the gas supply
tube at the gas supply end.
(Repeat instructions for each
burner.)
11. Refi t the front control panel
and tighten the 4 screws on
the front to secure the panel
in place. Refi t the pack and
underneath panels as well.
12. Refi t the control knobs to the
front control panel. The
control knobs are a push fi t
onto the shafts of the gas
control valves.
Pilot
Injector
Gas
Supply
Pipe
Convertible
regulator with
octagon cap.
Unscrew from
regulator.
(Gas Specifi cations Table on page 3)
Pg 2 of 4
IMPORTANT NOTE for SERVICERS: At least two people are required for this conversion. (2) 2'' x 4''
pieces of wood at least 3 feet long are also needed for proper positioning of equipment.
TEAM LIFT! DO NOT ATTEMPT TO LIFT OR POSITION THE GRIDDLE FOR SERVICE ALONE.
At least one other person is required to aid in lifting and spotting the equipment at all times.
2. Remove the back and underneath panels
of the griddle revealing the innards of the
griddle. Make sure the griddle is SECURE while
standing in place for the adjustments.
Safety First.
4. Unscrew and remove the injector
(½'' A/F) from the main burner end
clamp.
5. Determine the correct injector size for the corresponding
gas from the rating label.
6. Replace with the correct size injectors.
Refer to ‘Gas Specifi cations Table’ for
injector sizes.
7. Before installing the included
convertible regulator, unscrew
the octagon cap. You can read
(NAT) on the plastic insert
attached to the head of the
cap; fl ip it over and snap back
in place.