
Operation Manual
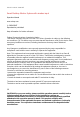
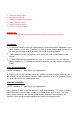


1. Bluetooth pairing button
2. Bluetooth pairing LED
3. Headphone output (3.5 mm jack)
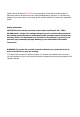
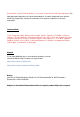
1. Rotary control for bass
2. Rotary control for treble
3. Rotary control for volume
Accessories
-Speaker cable (for left/right channel connection) -Power cord -Instruction Manual
Installation
1. For optimum audibility of the high frequencies we recommend installing the tweeter of the
studio monitors at face level; if necessary use an appropriate speaker stand. Be sure to use
an even, stable underground; if necessary, use sound cushioning material.
2. These speakers are near-field monitors which can be set up at a short distance to the
listener.
3. To avoid reflection from walls that are too close (e.g. room corners), turn the speakers
slightly towards you. To optimise your ambience acoustics, you may use sound absorbing
plates.
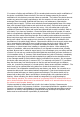
Close-Field Installation
[SKIZZE Installation 1 – siehe Skizze Zenit Lautsprecher]
In control rooms, monitor speakers are usually placed on the studio console (face level). For
this purpose, the monitors and the listener's position should be set up in an isosceles triangle,
i.e. at an angle of 60° to the listening position.
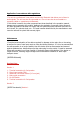
Mid-Field Installation
[SKIZZE Installation 2 – siehe Skizze Zenit Lautsprecher]
This installation is more or less the same as the close-field installation. This variant is usually
used if the monitors are too large or heavy to be placed on the studio console. This setup
offers a larger sweet spot and a better spacial acoustic imaging. In this installation the
monitors' woofer should be positioned above the height of the studio console.